File download location
In most browsers, you can select where the files that you open in courses are downloaded. For example, in Chrome, navigate to Settings > Advanced > Downloads. You can select the location for file downloads and choose if you want the browser to ask each time. In Safari, you have the same capabilities. Navigate to Preferences > General > File download location. You can perform an internet search to learn about file download choices in other browsers.
Your instructor and institution control which tools are available.
About files and multimedia
You can add files, images, video, and audio when you create content in your course. For example, in discussions, you can browse for a media clip from your computer or the Content Collection if you have access to it.
Based on the content type, you can use the functions in the editor to embed content in your text. You have creative control over how your content appears and the flexibility to change the order and appearance.
In some instances, you can browse for files in a separate attachment section.
You can add social media from YouTube or Flickr to your content. These social media elements that appear in a course are called "mashups." A mashup combines elements from two or more sources. For example, when you view a YouTube™ video as part of the course content, that's a mashup.
Add files to your content
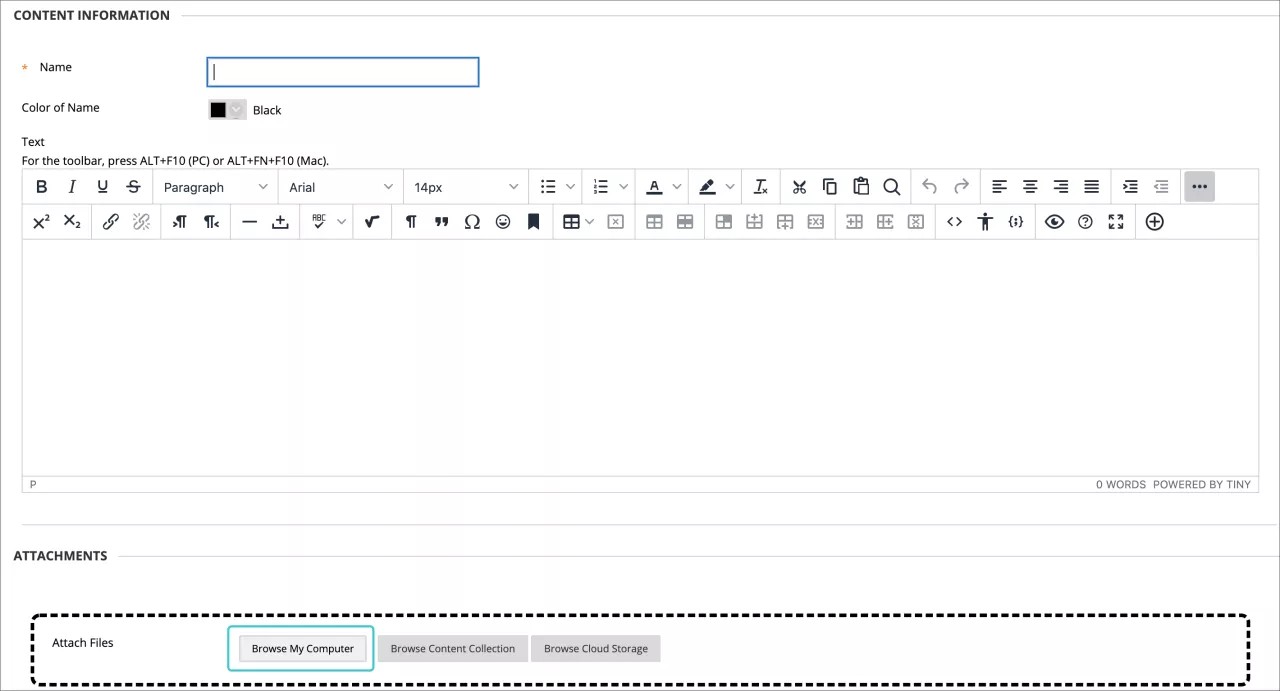
Wherever you can attach files in your course, you can use the Browse My Computer function to select a file. If you have access to the Content Collection, you can use the Browse Content Collection function for some content types.
When you use the Add Content function in the editor, you can determine exactly where the file's link appears within your content.
The Browse Content Collection window includes tabs and functions so that you can browse and search for files easily.
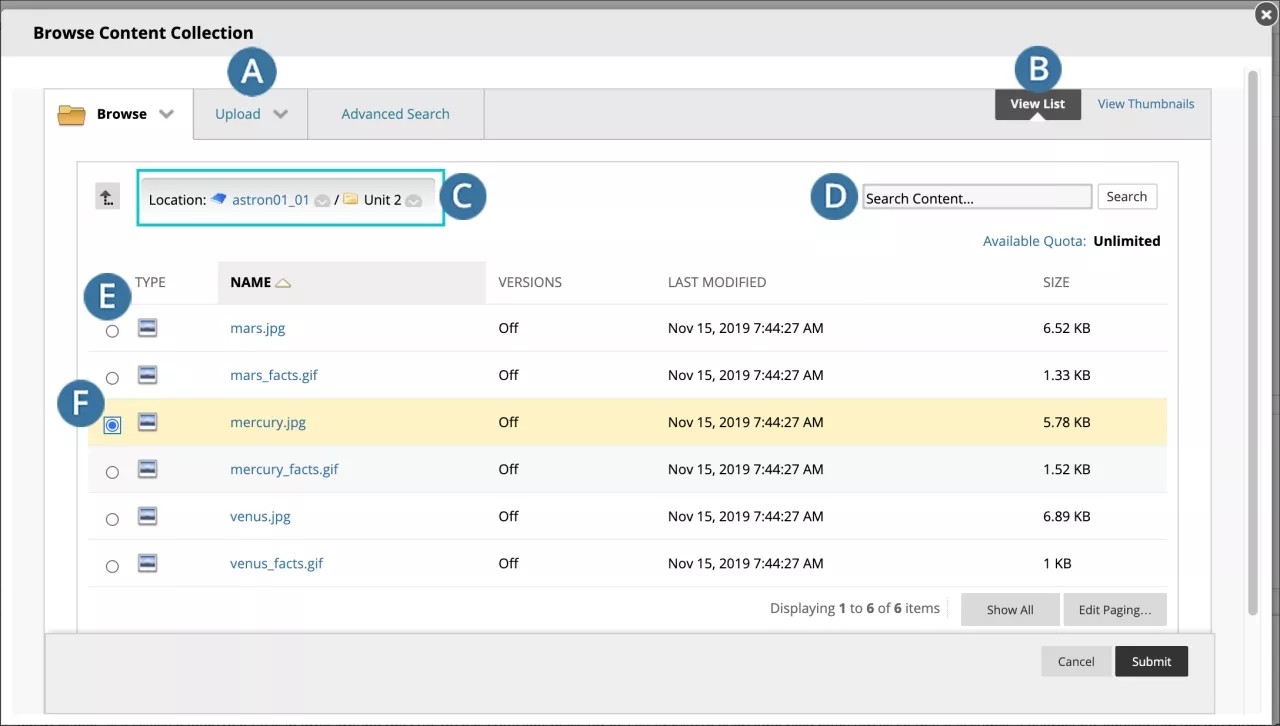
- Browse, Upload, and Advanced Search tabs:
- Browse for Content Collection folders you have access to.
- Upload one file, multiple files, or a zipped package.
- Perform an advanced search. You can search file and folder names, metadata, file contents, date created, and more.
- View List and View Thumbnails: View files and folders as a list of file names or as thumbnail icons.
- Breadcrumbs: Navigate to other folders.
- Search Content: Perform a basic search for file and folder names.
- Use the check boxes to select files and folders to include in your content item. You can select the header check box to select all visible items.
- Select Items: The files and folders you select appear in this area. Select the Show List icon to view your selections. To remove an item, select the X.
More on the Content Collection
Upload content from Dropbox
If your institution has enabled the Dropbox Education integration, you can link directly to your Dropbox content in most content areas with the content editor Add Content feature . You can also upload files directly from your Dropbox when you submit assignments.
When you access Dropbox Education the first time from Blackboard Learn, you're prompted to either create an account or authenticate to your current account directly. After you log in, browse Dropbox and select content.
Add images in the editor
You can determine where images appear in relation to your text. Select the Add Content icon to select and insert a local image file in the text area, or upload it from other available source. Alternatively, embed or edit an image using the right-click menu. You can also resize an image you already added in the text area. Press and drag an image's corners or sides.
You can add the following common image types: PNG, GIF, JPG, SVG, BMP and ICO.
If you don't want the image to appear embedded in your text, select the Insert File icon. Browse for the image file and create a link that users select to view the image in another window or tab. In some areas of your course, you can also drag and drop files from your computer or use the Browse My Computer option.

Image settings
The following image settings are not available within the content editor anymore. For you to display these settings, add the image file from your computer, for example, using the Attachments section. When the file you selected is uploaded and visible, select the Display Media File within the page option from the File Action menu.
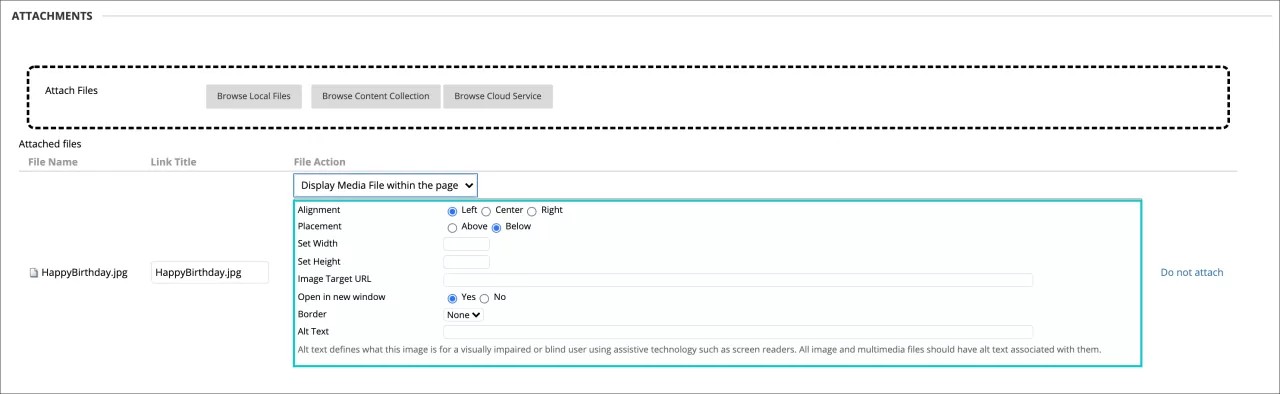
Each inserted file, link image or other media will be inserted in a "new line" to prevent consecutive inserted items from colliding. Line Breaks will be created when an image is inserted into a pre-existing text line. To make this text flow around the image, delete the linebreaks
You can add alternative text that describes the image for people who use screen readers or visit web pages with images turned off. You can also add a title that appears when a user points an image.
You can control image placement and appearance. Pixels are used for dimensions, space, and the border width. You can also add a target URL for the image to behave as a link and decide if the target page will be opened in a new window.
Add media files in the editor
You can determine where media files appear in relation to your text. Select the Insert/Edit Embedded Media icon to embed a media clip in the text area or edit an existing selected media item. You can also use the right-click menu to edit the properties of an existing selected media clip.
If you don't want the media file to appear embedded in your text, you can add it as an attachment uploading the source file from your computer, the Content Collection or the Cloud Storage, if the section you are adding content into allows you to add attachments, and use the option Create a link to this file.
Media settings
Unlike images, other media types (including documents) don't offer settings customization or to display the media file within the page when using the attachment option. You can only control some of them when using the Add Content option in the content editor and the right click menu or the mash up options, as explained earlier.
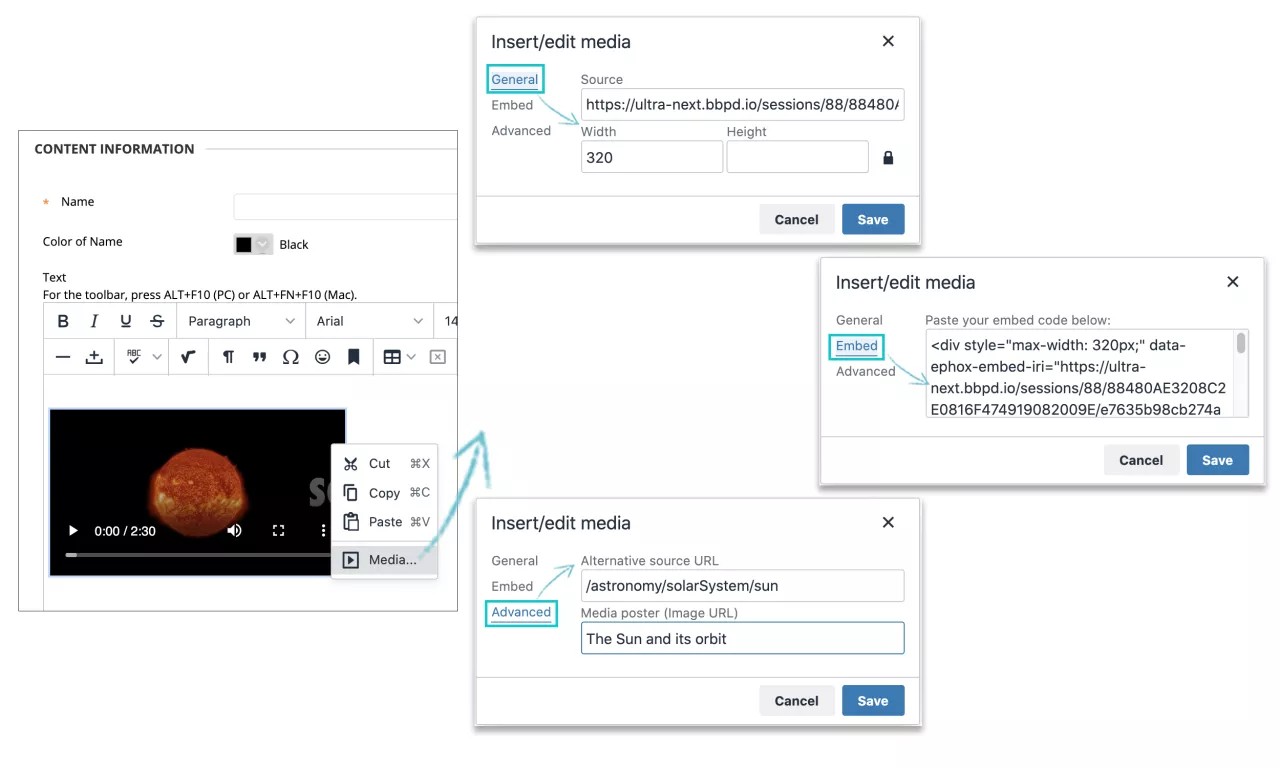
For the dimensions, you can add a size displayed in pixels. If not set, the actual size populates the boxes.
In the General tab, for width and height, if you select the padlock icon for constrain proportions and add a measurement, the file is resized without horizontal or vertical distortion.
On the Advanced tab, you can set advanced display parameters. For example, you can set alternative sources/image URL.
On the Embed tab, you can provide custom media HTML code. This feature is intended for advanced web developers.