Upload a syllabus file
On the Course Content page, you can browse for syllabus files in cloud storage or on your computer.
Supported file types include DOC, DOCX, HTM, HTML, MP3, MPG, PDF, PPT, PPTX, XLS, XLSX, RTF, TXT, ZIP, and most image types.
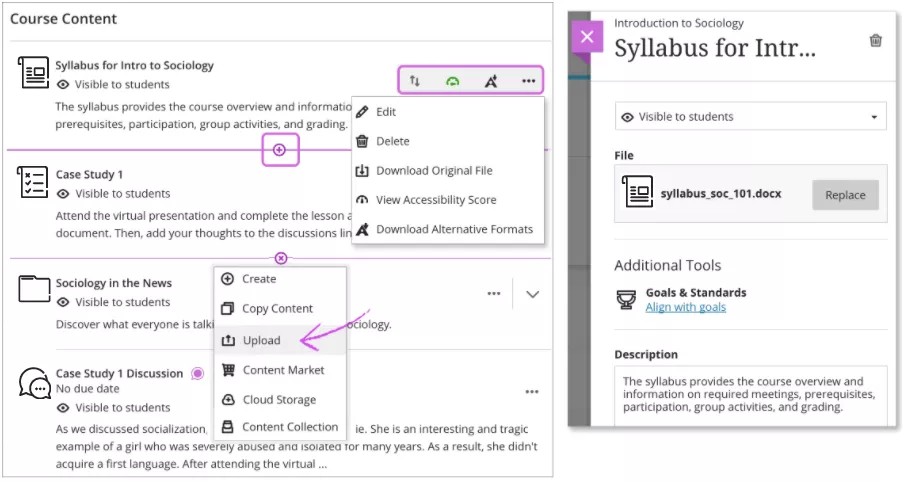
Upload a syllabus file. Select the plus sign wherever you want to upload files. In the menu, select Upload to browse for files on your computer. The files appear in the content list. Open a file's menu to edit the file name, align with goals, replace the file, or add a description. You can also expand or create a folder or learning module and then upload files.
Add syllabus files from cloud storage: If you already have files stored in the cloud, such as in OneDrive® and Google Drive™, you can add them to your course.
Add a syllabus file in the Content Collection. If you already have files stored in the Content Collection, you can add them to your course.
More on browsing and adding files from the Content Collection
Control what students see. All content is hidden from students until you decide to show it. Each item displays if it's visible or hidden from students. Select the visibility to change it.
With your keyboard, tab to the visibility list and press Enter to open the menu. Use Alt/Option + the up and down arrows to select an option.
Reorder, edit, and delete content easily. Point to an item to reveal its management options. Select the Move button and drag the item to a new location in the content list. Select the More options button to delete or edit the item. For example, you can change a file's name and type a description that appears with the file on the Course Content page.
With your keyboard, you can move an item to a new location, move an item into an expanded folder, and move a folder into another expanded folder.
- Tab to an item's Move button.
- Press Enter to activate move mode.
- Use the arrow keys to choose a location.
- Press Enter to drop the item in the new location.