You can use tests and surveys to measure student knowledge, gauge progress, and gather information from students.
Remind your students that they need to use a wired connection when they take tests. Wireless connections are more prone to network issues. The stability of the signal depends on how long and how much bandwidth students draw, similar to 4G phone data connections.
Watch a video about creating tests
The following narrated video provides a visual and auditory representation of some of the information included on this page. For a detailed description of what is portrayed in the video, open the video on YouTube, navigate to More actions, and select Open transcript.
Video: Create a Test explains how to create a test, add questions, and make the test available to students.
Test and survey basics

After you build a test or survey, you create questions or add existing questions from other tests, surveys, and pools. On the Question Settings page, you can adjust question settings for a test, survey, or pool. For example, you can set options for scoring, feedback, images, metadata, extra credit, and how questions are displayed to students.
Then, you choose the options and deploy the test or survey in a content area or folder. When you add a test or survey to a content area, it's "deployed."
More on test and survey options
You add questions to tests and surveys in the same way, but you add no points to survey questions. Survey questions aren't graded, and student responses are anonymous. You can see if a student has completed a survey and view aggregate results for each survey question.
More on test and survey results
Create a test or survey and add questions
Control Panel > Course Tools > Tests, Surveys, and Pools > Tests or Surveys
- On the Tests page, select Build Test.
- On the Test Information page, type a name. Optionally, provide a description and instructions.
- Select Submit.
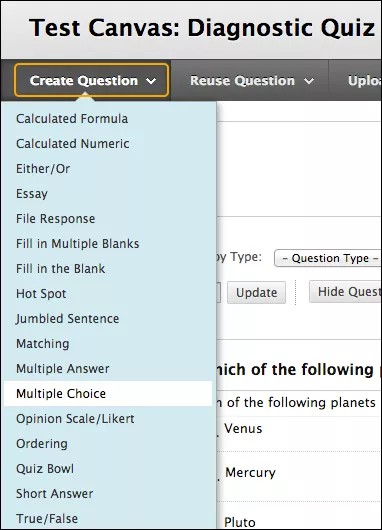
- On the Test Canvas, from the Create Question menu, select a question type.
- On the Create/Edit page, provide the necessary information to create a question.
- Select Submit.
- When you have added all the questions you need, select OK. The test is added to the list on the Tests page and is ready to make available to students.
The next section explains how to add new questions exactly where you want them.
More on creating tests with JAWS®
Add questions to an existing test or survey
You can add new questions exactly where you want them on the Test or Survey Canvas. Select the plus sign before or after another question and choose a question type.
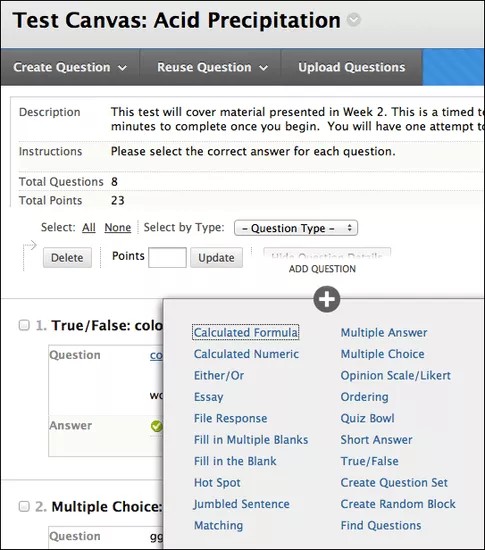
You can also change the value for individual questions as needed.
If you set the points possible to a non-whole number, letter grades may not be assigned correctly.
Reorder questions
Questions are numbered automatically in the order you add them. The question numbers update when you reorder or randomize them. To prevent confusion, don't use numbers to reference other questions within the test.
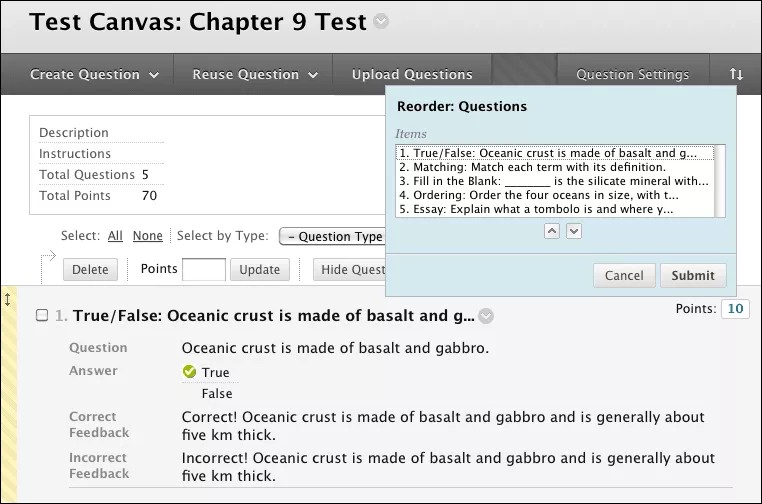
On the Test or Survey Canvas, you can use the drag-and-drop function to reorder questions. Press the arrows next to a question and drag it to a new location.
Or, select the Keyboard Accessible Reordering icon. Select a question and use the Move Up and Move Down icons following the Items box to adjust the order.
Only new test attempts are affected by the changed order if the test isn't set to display questions in random order. Students who have already made submissions see the original order.
Add a test or survey to a content area
After you create a test or survey, the next step is to deploy it. First, you add the test or survey to a content area, folder, learning module, or lesson plan. Then, you make the test or survey available to students.
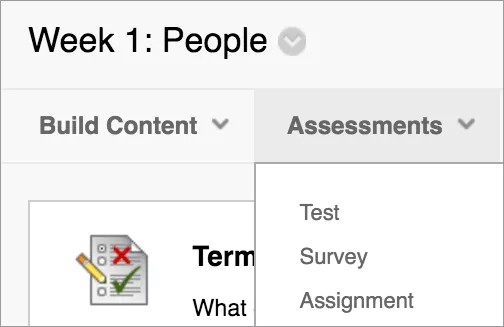
- Navigate to where you want to add a test or survey.
- Select Assessments to access the menu and select Test or Survey.
- Select a test or survey from the list.
- Select Submit. The Test or Survey Options page appears.
- Make the test or survey available to students.
- Optionally, select the options for feedback and display, and set the due date and display dates.
- Select Submit.