Use any theory or model for teaching your online course with Blackboard Learn because it's open, flexible, and centered on student achievement.
Whether you're new to online instruction or new to Blackboard Learn, you can start with the basics and add to it over time. Start with a week or two of materials and add more later. This process helps you get students involved while you develop and refine the next portion of materials.
We've compiled the basics of course building for the novice Blackboard Learn instructors. We want to help you build the basic course to get you started. As you get more comfortable working in Learn, you can add more to your courses.
Students may have anxiety about online courses too. You can help them feel comfortable in these ways:
- Include information on how to contact you and where to find your course information.
- Add an introduction video about you. You can help students realize that their instructor is a real person with enthusiasm for the subject matter.
- Upload a syllabus.
- Hold office hours in discussions, Blackboard Collaborate, or the Microsoft Teams for Blackboard LTI integration to help orient your students to your courses and answer questions on a regular basis.
- Ask your students to find quiet places to work, turn off cell phones, and remove distractions.
- Provide resources for working online and materials that they can print or download for future reference.
Teaching online can be overwhelming to start, but we're here for you! After you complete these basic steps, you'll have a course ready for students!
Determine your course view
The first step is to determine which course view you'll build your course in—the Original Course View or Ultra Course View. Our help documentation is separated by each view, so let's learn how to determine your view!
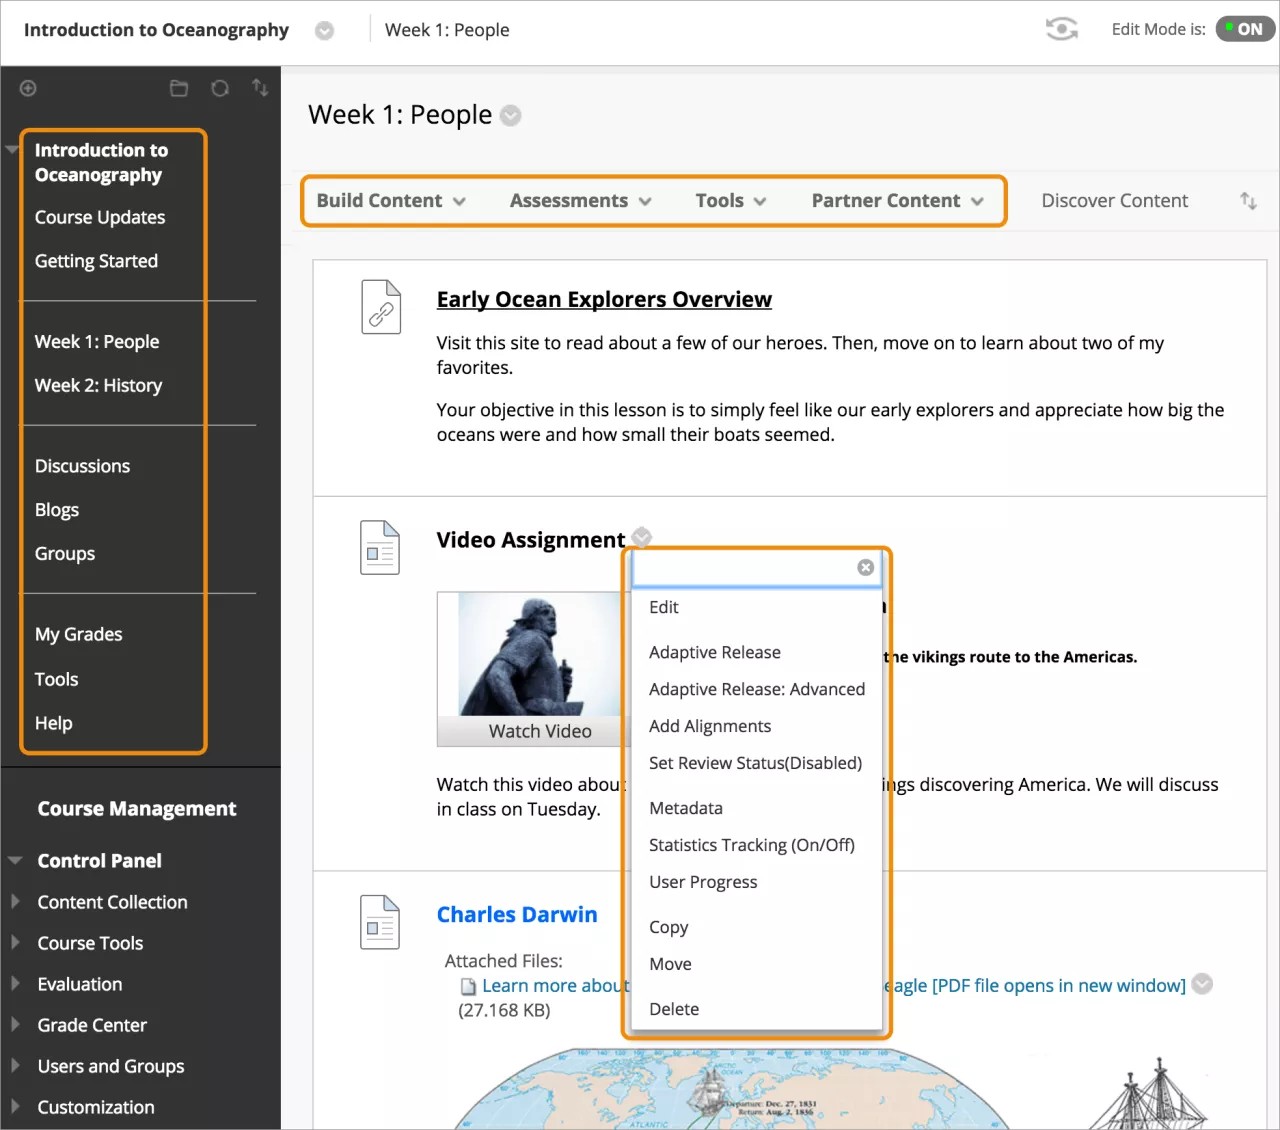
Original Course View
The course menu appears on the left side of your window. You create links on the course menu to present tools and materials to students. The area after the course menu is the Control Panel. You can access the Grade Center and your file repository, and choose which course tools to use. Content appears in the main window to the right of the course menu.
More on the Original Course View
Video playlist: Get up and running with the Original Course View
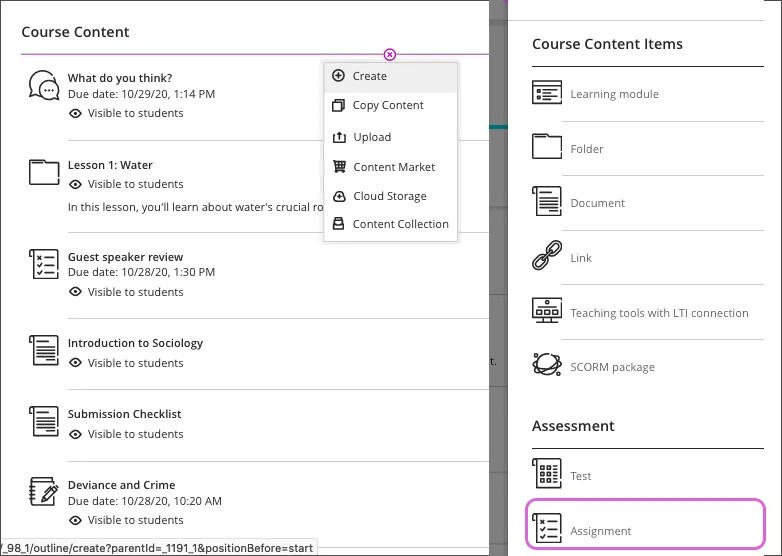
Ultra Course View
In the Ultra Course View, select the plus sign on the Course Content page wherever you want to create content. All of your course content appears in the main part of the page. When you open a piece of content, it slides out in a layer on top of the Course Content page. Close layers to go back to a previous spot in your course.
Video playlist: Get up and running with the Ultra Course View
Course calendar
The calendar displays a consolidated view of all your institution, course, organization, and personal calendar events. You can view events by day, week or month. Use the course calendar to provide students with dates for course-related events.
Course calendar events appear to all members of the course. You can include items such as upcoming tests, due dates for assignments, or special lectures. Course items with due dates appear automatically in the course calendar. You can manually enter non-graded items, such as tasks, to your course calendar. Only instructors can create course calendar events.
Add a syllabus
Your syllabus acts as your course planning tool. You can provide details about your course structure, participation standards, and even the social online behavior you expect in your virtual classroom. Your syllabus functions as a contract between you and your students. Be sure to include the due dates for assignments and tests and connect those dates to the course calendar.
View a list of students
Your course roster shows you a searchable list of users enrolled in your course. In the Ultra Course View, you can message anyone involved with your course. If allowed by your institution, you can enroll users in your course.
Communicate and interact with students
Announcements
Announcements are an ideal way to post time-sensitive information critical to course success. You can add announcements to alert your students to these types of course activities:
- Due dates for assignments and projects
- Changes to your syllabus
- Corrections or clarifications of materials
- Exam schedules
Messages
Course messages are private and secure text-based communication that occurs within your course among course members. You must be logged in to a course to read and send course messages. Messages provide an easy way to send reminders, quick questions, and social interactions in your course.
Your institution can choose not to allow students to reply to or create messages in their courses. When this setting is turned on, students can only read the messages other roles send, such as instructors and teaching assistants.
Discussions
Online discussions provide unique benefits. Because students can take time to ponder before they post ideas, you may see more thoughtful conversations. You can observe as students demonstrate their grasp of the material and correct misconceptions.
You can extend your office hours and reach students more often during the week so that learning is continuous. You might also include a "Questions and Answers" topic where students can go with issues. Students may also enjoy an "Introductions" topic so they can learn more about their classmates and you.
Create assignments
With assignments, you can create coursework and manage the grades and feedback for each student separately. Based on your course view, you can create assignments in content areas, learning modules, lesson plans, and folders. When you create an assignment, a grading column is created automatically.
Create tests
You can add tests alongside the other content students need as they prepare. Use online tests as you do in your face-to-face classroom to gauge student knowledge and progress. Based on your course view, you can choose your settings for scoring, feedback, images, extra credit, and how questions are displayed to students.
Remind your students that they should use a wired connection when they take tests. Wireless connections are more prone to network issues.
Want just to get feedback from your students? In the Original Course View, you can create a survey similar to how you create a test, but surveys aren't graded. Use them to gather insight and feedback from your students!
Add additional content
In your Blackboard courses, you can add a variety of content in addition to your tests and assignments. You can add online lectures, multimedia, and links to websites and social media.
More on the types of content you can add
More on adding files, images, video, and audio
You can choose to hide or show your content based on conditions—on an exact date, until a certain date, or during a defined period of time. When you hide content, you can create, edit, and change the content and then release it when you're ready. Then, students can interact with the course materials.
When might I use release conditions?
Example: You might show only the first week of content and hide the rest while you work on it. This process helps you get students involved while you refine the next week's materials.
Example: You want students to progress to the next item only after they score a B or above.
Grading basics
Grades are assigned automatically for online tests that don't have questions that require manual grading, such as Essay questions. You manually grade assignments from the grading interface.
Provide feedback
You may have already seen how to provide feedback in tests and assignments, but did you know you can record audio and video feedback for your students? Online courses can be convenient, but instructors often need to find new ways to engage their students without face-to-face conversations. If you're unable to meet with students offline, you can use audio and video recordings to provide more personal interactions with your students.
Additional resources
You may experience different challenges when you teach online vs. your face-to-face courses. We've compiled some additional resources for you that you may find helpful as you build your online content.
Basic steps for getting started
Best practices for online interaction

