This information applies only to the Original Course View. Your institution controls which tools are available.
You can use the tasks tool to organize projects and activities, define task priority, and track students' task status. As an instructor, you add tasks to your course. You can allow students to manage their tasks from the My Tasks module or a tool link in your course.
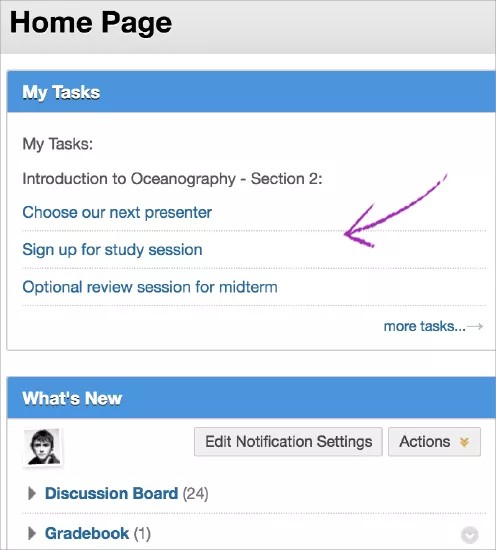
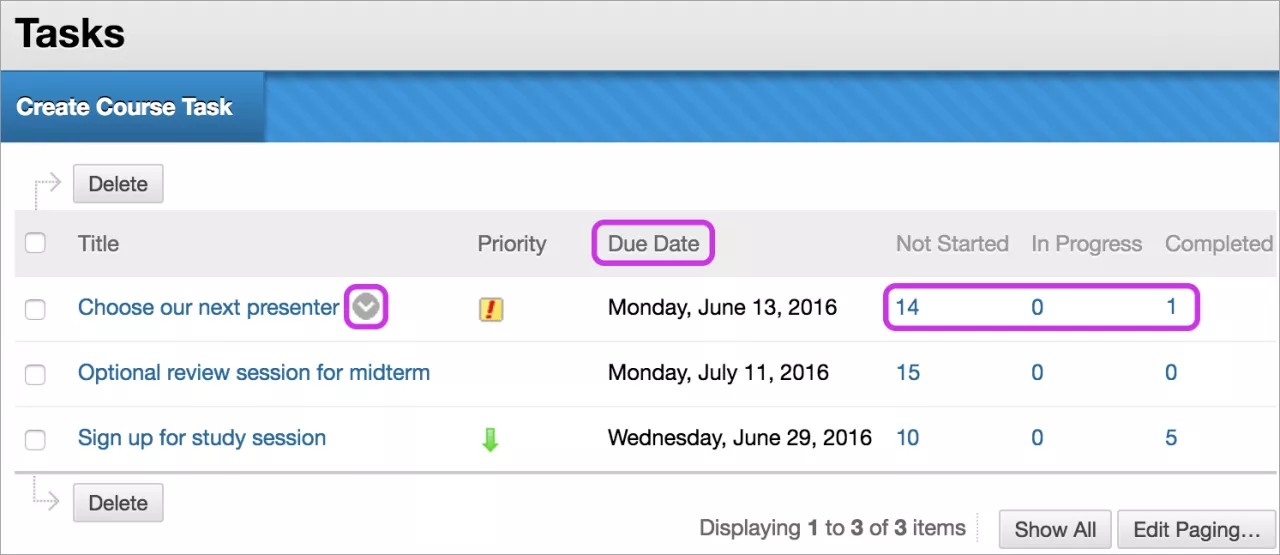
You can create tasks and post them to the course Tasks page. Each student can post personal tasks to their own task pages. Task information is arranged in columns that display the priority, task name, status, and due date.
Tasks are also available as a course group tool for tasks that are specific to a smaller group within your course.
Video: Create and Manage Tasks
Watch a video about tasks
The following narrated video provides a visual and auditory representation of some of the information included on this page. For a detailed description of what is portrayed in the video, open the video on YouTube, navigate to More actions, and select Open transcript.
Video: How to Create and Manage Tasks explains the difference between personal and course tasks, and how to access, create, and manage tasks.
Create, edit, or delete a course task
- On the course menu, select Tools. On the Tools page, select Tasks.
-OR-
On the Control Panel, expand the Course Tools section and select Tasks. - On the Tasks page, select Create Course Task.
- On the Create Course Task page, type a name, description, and due date. You can use the options in the editor to format the text and upload files, images, and multimedia.
- Assign a priority of Low, Normal, or High.
- Select Submit.
- The task appears on the Tasks page. Access the task's menu to edit or delete the task.
View tasks
By default, tasks are listed from highest priority to lowest—not by date. To view tasks listed by due date, select the Due Date heading. Use the status columns to view how many students have reported their progress or completed a task.
View task progress
Select a task title to access the View Task page. The View Task page displays all students' progress for that task.
Add a tasks link to the course menu
You can add a link to the course menu for instant access to the tasks tool. You can also customize the name of the link.
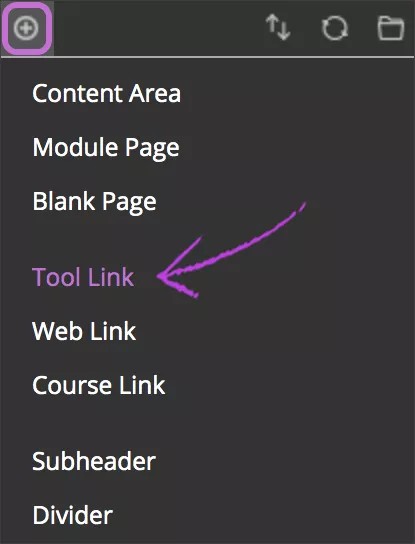
- Change Edit Mode to ON and select the Add Menu Item icon above the course menu to access the menu.
- Select Tool Link and type a name.
- From the Type menu, select Tasks.
- Select the Available to Users check box if you're ready for students to see it.
- Select Submit.
The new tool link appears last in the course menu list. Press and drag the arrows icon to move the link into a new position. Access the link's menu to rename, delete, or hide the link from students.