You can manage the discussion board and the content within forums and threads. For example, to keep students focused as the term progresses, edit forum settings or organize forums and threads to attract attention again. You can also add forums to other locations, edit content, and delete unneeded forums or threads. To help students locate important posts, you can enable tagging and attach tags.
You can assign forum roles to limit access to a forum or to help with forum administration. To help control the discussion board content that is presented to your students, you can assign a responsible user the role of moderator.
Edit a forum
As a discussion progresses, you can edit forum settings to solve any issues. For example, if students are posting to the wrong topic, you can fine-tune the forum name or description to clarify the forum's purpose. You can also choose to create all forums at the beginning of the term and make them unavailable. When you need a forum, edit the forum to make it available.
- On the Discussion Board page, open a forum's menu and select Edit.
- On the Edit Forum page, change the forum's name, description, availability, or settings.
- Select Submit.
Availability of discussions on mobile apps
To make Original course discussions unavailable to mobile app users, you can use these methods:
- Single Forum: On the Discussion Board page, open a forum's menu. Select Edit and change the availability.
- Entire Discussion Board: On the Control Panel, expand the Customization section and select Tool Availability. Clear the check box for Discussion Board. Users on the app will see the Discussions tool, but it will be empty.
Simply hiding the Discussion Board link on the course menu or tools page doesn't prohibit access to the tool for mobile app users or web view users.
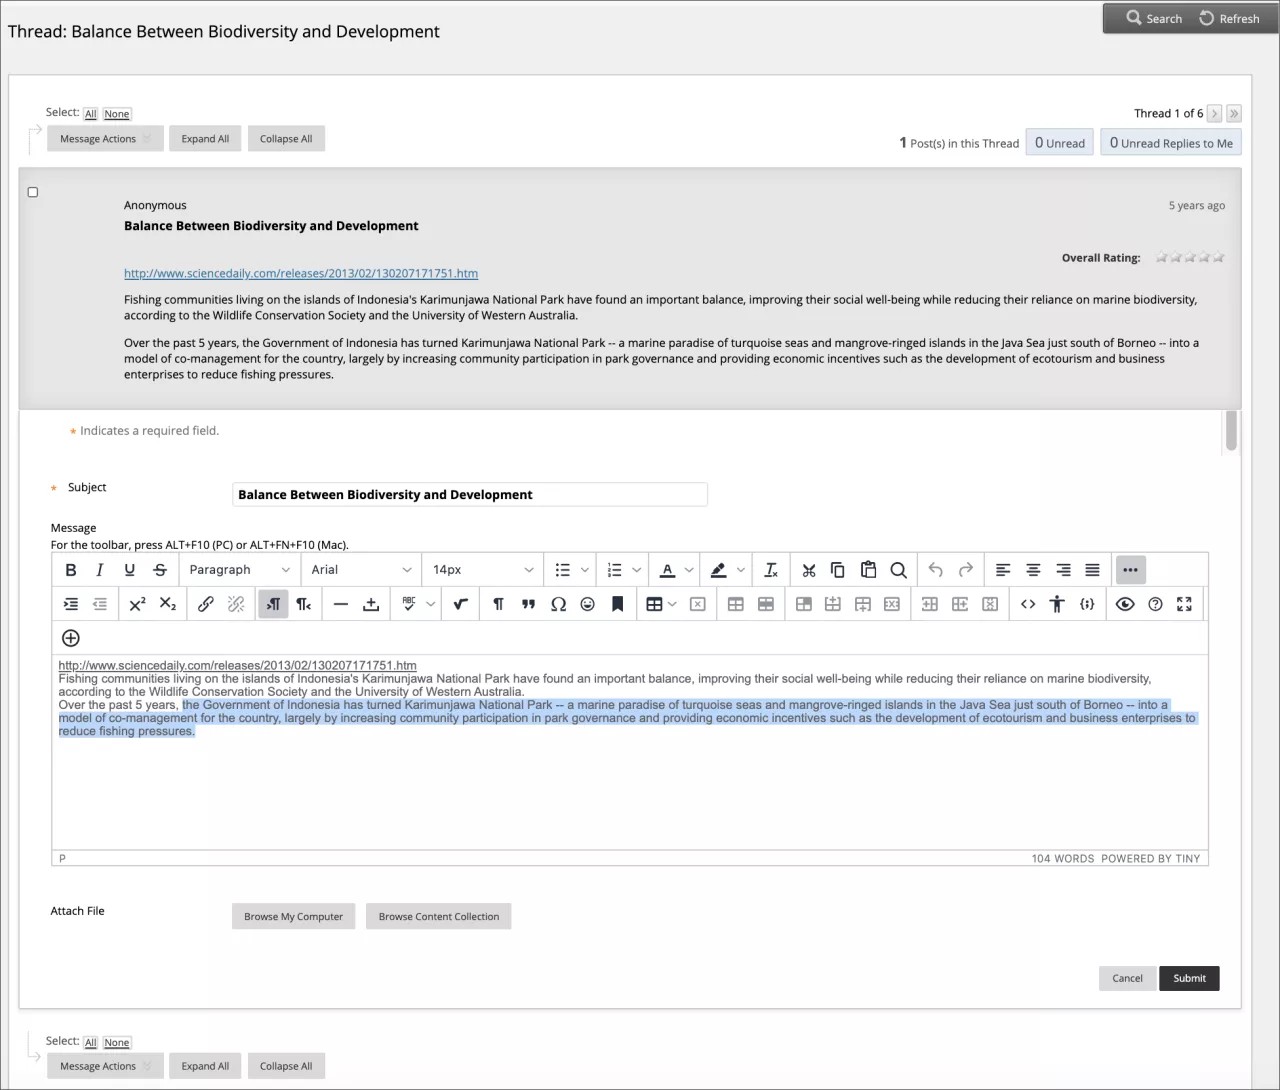
Edit a thread
You can edit posts in any thread. If a student added inappropriate or inaccurate content, you can edit the post. When you create or edit a forum, you control if students may edit their published posts.
- Open a forum and select a thread.
- On the thread's page, point to a post so that all of the functions appear and select Edit.
- The editor appears. Make edits while you view the original post.
- Select Submit. Your edits appear in the post.
Delete forums and threads
When you delete a forum or thread, all content is permanently deleted. You won't be able to refer to the posts if a student wants to dispute a grade. For a less permanent solution, you can make a forum unavailable. When you delete graded discussion content, you control if the Grade Center column and scores are also deleted.
- Open a forum or thread's menu and select Delete.
- Select OK in the pop-up window.
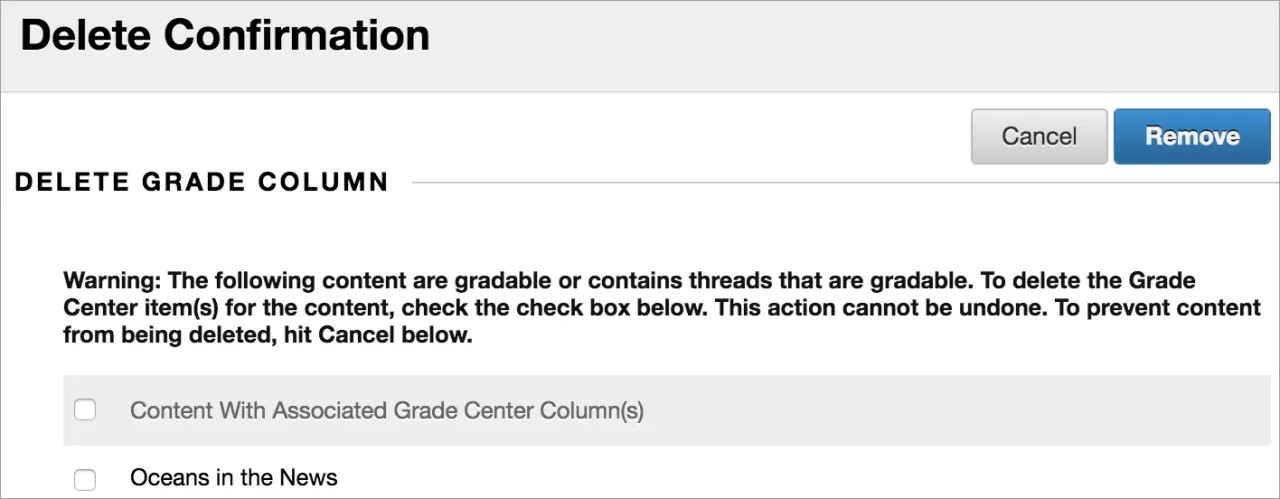
- On the Delete Confirmation page, you have two options:
- Retain Grade Center columns (don't select check boxes): If you select this option, the graded forum or thread is deleted, but the Grade Center column and scores you assigned remain. Choose this option if want to keep the Grade Center column for the final grade calculations. If you delete the forum or thread, but retain the Grade Center column, you can delete that column from the Grade Center at any time.
- Delete Grade Center columns (select check boxes): The grade column in the Grade Center and the forum or thread are deleted. If you don't want to include the grade column for the discussion posts in the final grade, you can safely delete both.
- Select Remove.
Delete a post
To delete individual posts, point to the post on the thread's page and select Delete. This action is permanent. Any replies to the post you delete are also permanently deleted.
Organize forums
You can reorganize discussions to help students focus on the most relevant content. When you create a forum, it appears at the bottom of the list. You can move the current forum to the top or delete forums that are no longer relevant.
Reorder forums with the drag-and-drop function. You can also use the keyboard accessible reordering tool.
Drag and drop
- Open the discussion board and point to the forum you want to move. Select and hold the arrows next to a forum you want to move. The item is highlighted.
- Drag the forum into a new location in the list.
- Release the forum to place it in its new location.
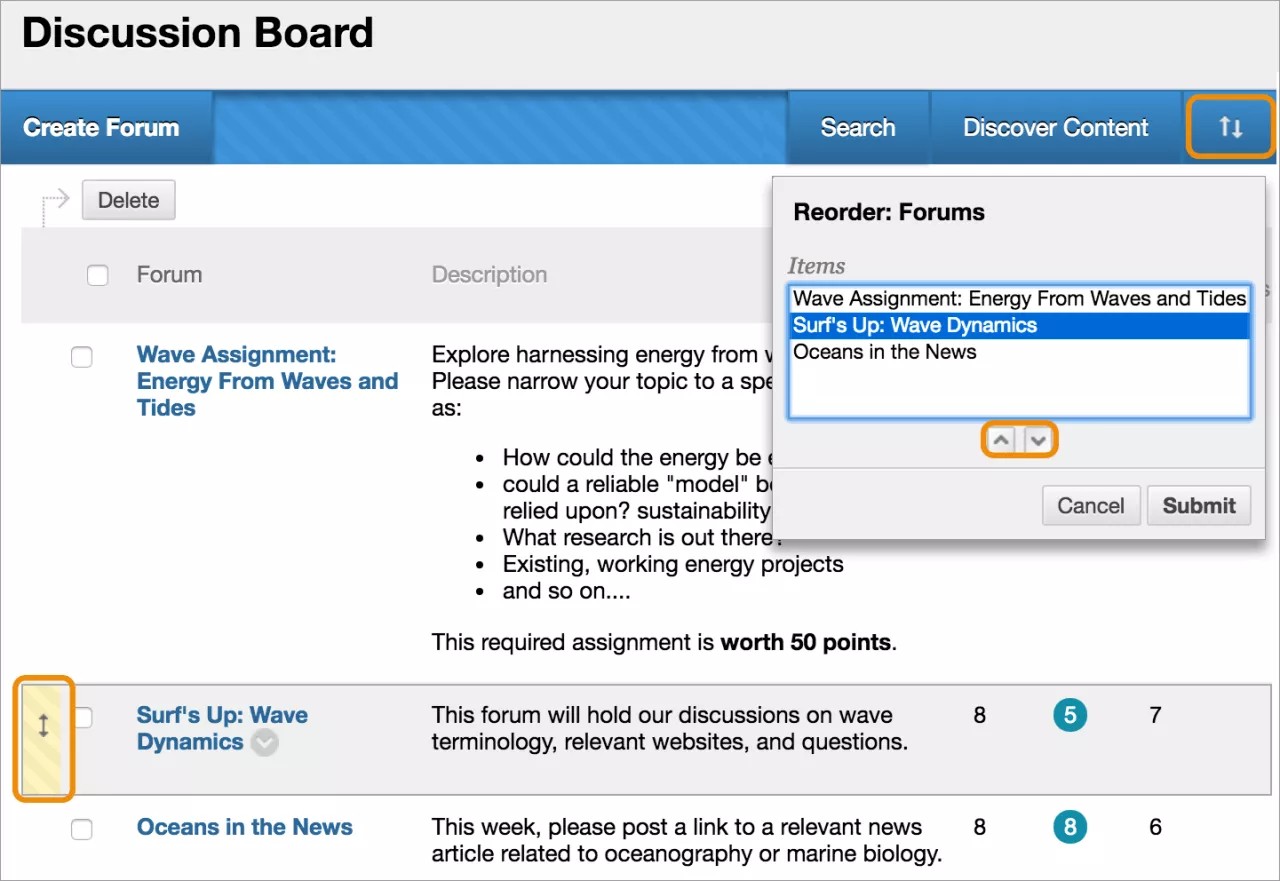
Keyboard accessible reordering tool
You can use an accessible tool to reorder items.
- In the upper-right corner of the discussions area, select the Keyboard Accessible Reordering icon.
- In the Reorder: Forums box, select a forum title.
- Use the Move Up and Move Down icons to adjust the order.
- After you submit, a pop-up box states: Items have been reordered.
- Select OK.
Copy a forum
You can copy discussion forums and add them to the current discussion board or to a group discussion board in the same course. You can copy a forum, the settings, and the posts, or copy just a forum's settings.
To copy discussion board forums to another course, use the copy course utility.
Example: Copy the entire forum
If two distinct topics emerge during a discussion, you can create separate forums for these topics. Copy the forum and delete the off-topic posts from each forum.
When you copy content, all threads and replies appear in the new location, along with any file attachments.
Example: Copy forum settings only
You can base a new forum on the settings from another forum. If you want students to submit a second research paper, copy the settings of the first research paper's forum. The forum is added with no threads.
- On the Discussion Board page, open a forum's menu and select Copy.
- On the Copy Forum page, type a name.
- Choose the option to copy Entire forum or Forum settings only.
- In the Location box, select a discussion board as the destination. To select the course's discussion board, select the course ID.
- Select Submit.
- On the Discussion Board page, the copied forum is added to the bottom of the list.
When you copy a discussion forum to a group discussion board, the copy only includes messages authored by the group's members.
Add a discussion link on the course menu
You can include a link on the course menu for instant access to the discussions tool. You can also customize the name of the link.
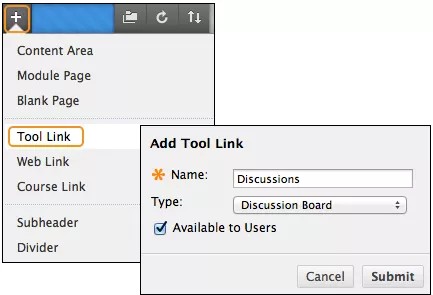
- Select the Add Menu Item icon above the course menu to access the menu.
- Select Tool Link.
- Type a Name for the link.
- From the Type menu, select Discussion Board.
- Select the Available to Users check box.
- Select Submit.
The new tool link appears last in the course menu list. Press and drag the arrows icon to move the link into a new position. In the link's menu, you can rename, delete, or hide the link from students.
Add a discussion link in a course area
You can incorporate the discussion board into course areas, allowing students to access the tool alongside content.
In a content area, add a forum link following lecture notes to gather questions on the material presented or after an assignment to gather students' perceptions of how they did. You can add adaptive release rules or date availability restrictions to limit students' access. Then, students access content in a specified order, such as reading a PDF before they add posts to the discussion board.
- Access the content area or folder where you want to link to the discussion board or forum.
- Access the Tools menu and select Discussion Board.
- From here, you have three options:
- On the Create Link: Discussion Board page, select the Link to Discussion Board Page option to link to the discussion board itself.
- Use Select a Discussion Board Forum and select a forum from the list.
- Select Create New Forum to add a link to a forum you create at this time. You select all forum settings at the time of creation. The newly created forum appears in the list of forums to choose from when adding the link in your course.
- Select Next.
- On the next Create Link: Discussion Board page, type a Link Name. The Link Name can't exceed 50 characters.
- Optionally, type instructions or a description in the Text box.
- For the Available option, select Yes.
- To enable tracking, select Yes. The system will record the number of times the link is viewed, when it's viewed, and by whom.
- Select the Display After and Display Until check boxes to enable the date and time selections. Display restrictions affect the visibility of the discussion board or forum.
- Select Submit. The discussion link appears in the course area.
Frequently asked questions
You can make some simple changes to help successfully manage your discussion content.
A discussion forum has been available for two weeks with few contributions. What changes can I make to the forum to encourage participation?
You can make two changes:
- If the topic is potentially controversial, allow anonymous posts.
- If you aren't grading threads, allow students to create new threads. This flexibility may encourage students to post their ideas and questions.
By the end of the semester, my discussion board contains dozens of forums. What can I do to provide better organization and flow?
To keep your discussion board organized, you can:
- Change the order of the forums and move the most current forums to the top of the list.
- Delete ungraded forums that weren't used or contain few postings.