Add Tables
Add tables in the editor
You can add and format tables in the editor. The editor appears wherever you can add text, such as in assignments, tests, discussions, and journals. You have creative control over how your content appears and the flexibility to change the order and appearance.
To be sure your content is accessible to all users, use tables only to present data rather than for layout or presentation purposes. For example, users who are blind use screen readers to have text on the web read aloud. Table information read by screen readers can be difficult for users to understand.
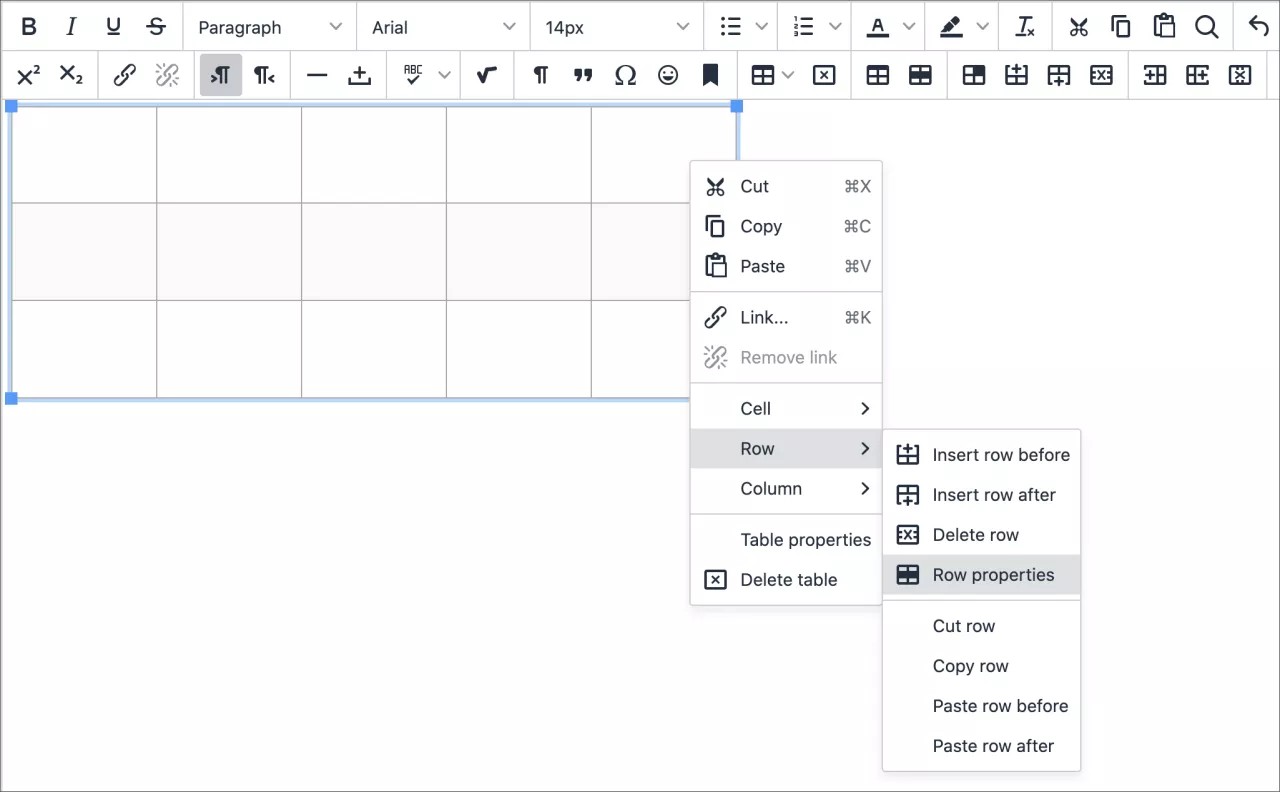
In the editor's text box, place your mouse pointer where you want to add a table and select the Insert/edit table icon. You can also use the right-click menu.
Most of the table options are grayed out and unavailable unless you access an existing table in the text area.
To resize a table, press and drag a table's corners or sides.
To use your keyboard to jump to the editor toolbar, press ALT + F10. On a Mac, press Fn + OPT + F10. Use the arrow keys to select an option.
Table properties
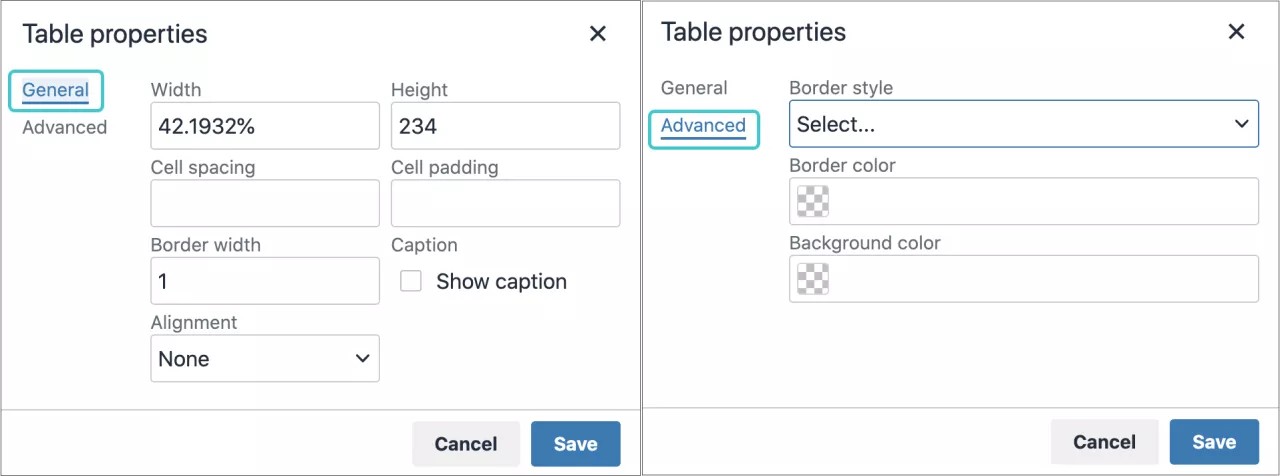
When you add a table, you can set the table's basic properties on the General tab.
The system uses pixels for padding, spacing, and borders. You can use pixels or a percentage of the available display for the width and height of the table. If you leave the height box blank, the table is sized automatically to fit the content.
If you don't select a table alignment, the current paragraph alignment is used.
Select the Show Caption check box so that you can add a title that appears centered over your table.
Advanced tab
On the Advanced tab, you can set additional properties for a table from menus and color boxes. You can also add information about these properties:
- Border style - Choose from:
- Solid
- Dotted
- Dashed
- Double
- Groove
- Ridge
- Inset
- Outset
- None
- Hidden
- Border color: Select a color from the color selector, the palette or write down the color code preceded by the # character to become the border color.
- Background color: Select a color from the color selector, the palette or write down the color code preceded by the # character to become the background color.
Set table row and cell properties
You can set formatting parameters to control how the content of table rows or cells will appear. Select a table and then select the Table Row Properties or Table Cell Properties icon. You can also select a row or a cell and use the right+click menu to display any of these options too. Both Row and Cell property windows have a General and Advanced options.
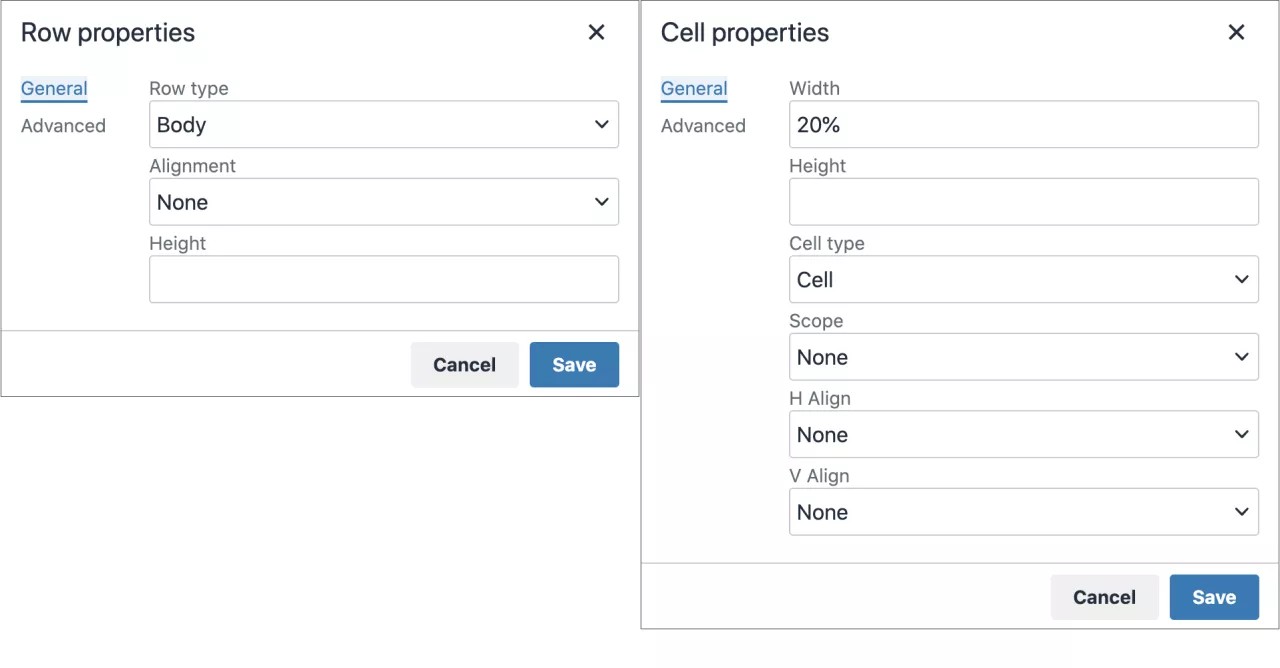
On the General tab, you can set basic properties for rows and cells, such as type, alignment and height. If you don't set a height for a row, the row is sized automatically to fit the content.
General properties for Rows:
- Type: Header, Body or Footer
- Alignment: Left, Center or Right
- Height: Desired height in pixels. If left blank it will take de default value depending of the text size.
The Advanced tab will offer the same properties as the ones for a table.
General properties for Cells:
- Width: it can be described in pixels or percentage
- Height: it can be described in pixels or percentage
- Cell type: Cell or Header
- Scope: None, Row, Column, Row group or Column group
- H Alignment (Horizontal): Left, Center or Right
- V Alignment (Vertical): Left, Center or Right
The Advanced tab will offer the same properties as the ones for a table plus the Border width value (in pixels).
Edit tables
In the editor's text box, select a table, or a group of cells, to make the table editing options active.
| Options | Description |
|---|---|
| Open the Insert/Edit Table window. If you select the icon while inside a table, a new table is created inside the first one. | |
| Delete the table currently selected. | |
| Open the Table Properties window. | |
| Open the Table Row Properties window. | |
| Open the Table Cell Properties window. | |
| Insert a blank row in the table above the current mouse pointer position. | |
| Insert a blank row in the table after the current mouse pointer position. | |
| Delete the current row from the table. If you select multiple rows, all are deleted. | |
| Insert a blank column in the table to the left of the current mouse pointer position. | |
| Insert a blank column in the table to the right of the current mouse pointer position. | |
| Delete the current column from the table. If you select multiple columns, all are deleted. |


