Wherever attaching files is available in your course, you can use the Browse Course function to select a file from Course Files. If your institution has access to content management, you will browse for files in the Content Collection and use the Browse Content Collection function.
The Browse Course and Browse Content Collection windows include tabs and functions to make browsing and searching for files easier.
Does my institution use Course Files or Content Collection
Browse Course window
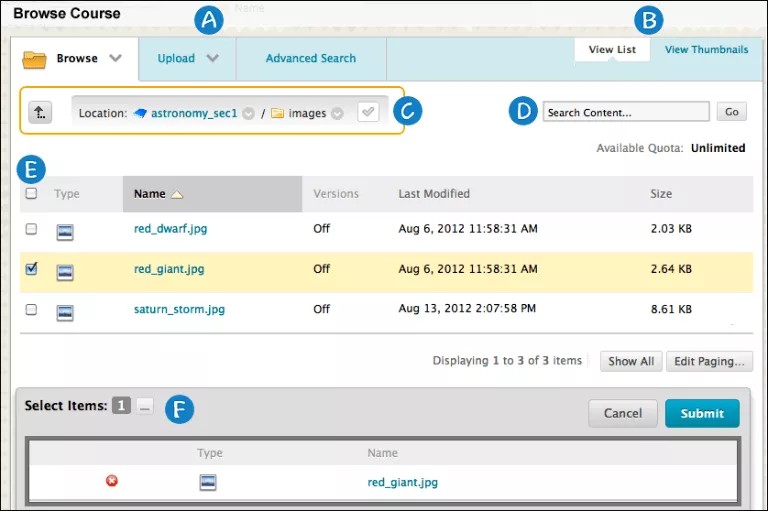
- Browse, Upload, and Advanced Search tabs:
- Browse for folders you have access to. If you have Course Files, you only have access to the course you are in. With the Content Collection, you may be able to access other folders such as My Content, Course Content, and Institution Content.
- Upload one file, multiple files, or a zipped package.
- Perform an advanced search. You can search file and folder names, metadata, file contents, file comments, location, size, recycle bins, date created, and creator.
- View List and View Thumbnails: View files and folders as a list of file names or as thumbnail icons. Select the links at the top of the page to switch views.
- Orientation bar: Navigate to other folders using the links on the orientation bar.
- Use the downward arrow next to a folder name to access and navigate to its sub-folders.
- Select the checkmark icon to select the current folder to link it in your course. After selection, the checkmark turns green.
- Use the up arrow icon to move up one folder to the parent folder, if one exists.
- Search Content: Perform a basic search for file and folder names. The search doesn't include options to search metadata. You can optionally search files contents. Type search criteria and select Go.
- Use the check boxes to select files and folders to include in your content item. You can select the header check box to select all visible items. When you link to a folder, use caution as students receive the read permission by default on all the folder's contents. Read permission allows students to view all the files and sub-folders in the folder. You can select a header's title to sort the column.
- Select Items: The files and folders you select appear in this area. Select the Show List function, represented by a full square, to open the Select Items area to view your selections. When you open the area, the square icon collapses. To remove a selected file or folder, select the X.