You can create files to contribute to the Content Collection or create folders to help keep things organized.
Remember that you can only create folders and files in areas of the Content Collection where you have permissions to do so.
Create a folder
Folders are useful for keeping content organized in the Content Collection.
- In the Content Collection, go to the folder where you want to create a new folder.
- Select Create Folder.
- Type a name for the Folder in the field that appears.
- Select Create and Customize to set options for the folder or select Submit to complete the action.
- If you selected Create and Customize, the Edit Folder page opens. Select any of the available options to customize your folder.
- Select Submit when you're finished.
More on folders in the Content Collection
Create a file
When you add a file to your course, it is stored in the Content Collection. You can also browse the Content Collection for the file and add it to the course. You can create files in the Content Collection where you have read and write permission.
- In the Content Collection, go to the folder where you want to create a new file.
- If you have appropriate permissions to add a file, you'll have the option Upload.
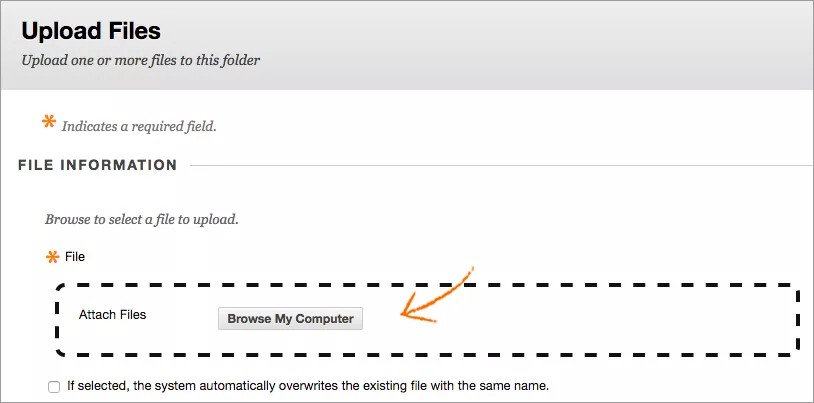
- Select Upload Files.
Select Browse My Computer to upload a file from your computer
-OR-
Drag files from your computer to the "hot spot" in the Attach Files area. If your browser allows, you can also drag a folder of files. The files will upload individually. If the browser doesn't allow you to submit your assignment after you upload a folder, select Do not attach in the folder's row to remove it. You can drag the files individually and submit again.
You won’t be able to drag files to upload if your institution uses an older version of Blackboard Learn.
You can use the file name or provide another name for the file.
Editing the file URL may remove access to the files. We recommend you don't edit the file URL.
- Select Submit to finish the upload. The file is added to the Content Collection.
To upload a ZIP package, see Upload and Download Packages.
You can also create a file as a reusable object if your institution has enabled this tool.
Create an external link
You can add external links to the Content Collection if your institution has made this option available. If you don't see the options, it may be that your institution hasn't made this available, or you don't have permission to add a link in that folder.
- In the Content Collection, go to the folder where you want to create a new link.
- Select Link. You can also create an external link by choosing External Link in the Build menu.
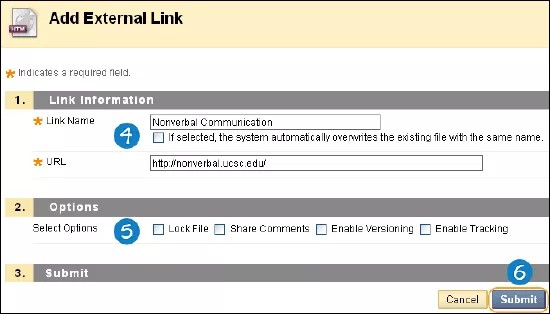
- Type a Name for the link. If you select the check box below this field, the system will automatically overwrite an existing link with the same name.
- Provide a Link Name and the URL. Don't use the '%' and the '?' characters in this field.
- Select the options you want for this link.
- Select Submit. The link is added to the Content Collection.
Editing the file URL may remove access to the files. We recommend you don't edit the file URL.
Edit content
If you have read and write permission for a folder and the files within it, you can edit these files.
To edit a file such as a written document, download it to your system by selecting Download Package in the file's menu. Make your edits and then re-upload it to the Content Collection. If the filename is the same as it was when you downloaded it, you can select the check box on the Upload File page to overwrite the previous version of this file.
Some items have the option Edit in Blackboard. Select this option to edit the item using the editor and other tools within Blackboard Learn.
Lock an item
A lock secures the file or folder itself (name and settings) from changes.
To lock a file, select Edit Settings in the item's menu. Under Options, check the Lock File box.
You lock a folder in the same way. On the Edit Settings page, you'll find a section for Lock Options. Choose how you want to protect the folder and its contents:
- Lock this folder: the items within the folder may be edited, but can't be deleted or moved.
- Lock this folder and everything it contains: This option protects both the folder itself and the materials it contains. All subfolders and files within the folder will be locked. These folders and items may not be edited, moved, or deleted. If a folder is locked, the user will also be unable to edit items within it through the Web Folder, for example, copying an item directly into the Web Folder.
On a Mac, a web folder is called a shared location.