
Use the power of merge tags with recorded messages!
Just as with emails and text messages, you can use merge tags when recording messages. The tag will record the information available in the database for the specific information.
For example, if you want parents to confirm that their specific child is absent, you can record the message, insert a merge tag for the name of the student, and the student's name will be inserted into the generalized recording. Then the message will be sent to all parents of absentee students with the information for their own child.
Merge tags help you to send personalized messages with only one recording.
Where can I use merge tags with recorded audio?
You can use merge tags for different messages:
- System Messages
- Message Library
- Send Message
How do I add merge tags for recordings?
- Create your script for your recorded message. You can use merge tags with recording System Messages, as a template to save in the Message Library, or when you are sending a message in the Send Message interface.
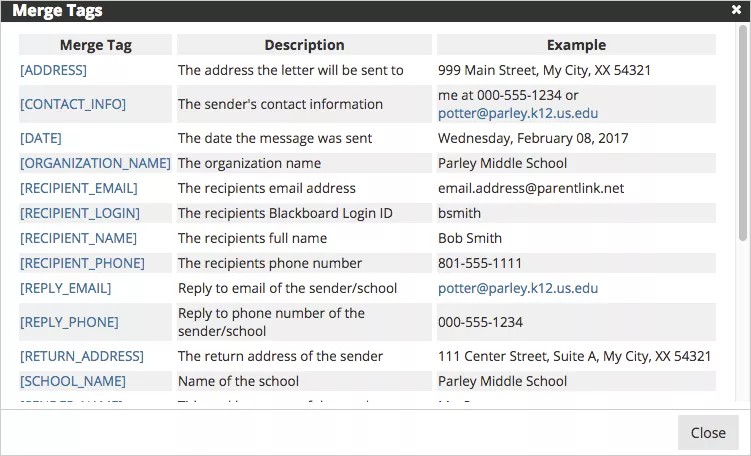
- When typing your script, select your merge tags through the Merge Tags feature. To avoid errors, do NOT copy and paste merge tags into the text.
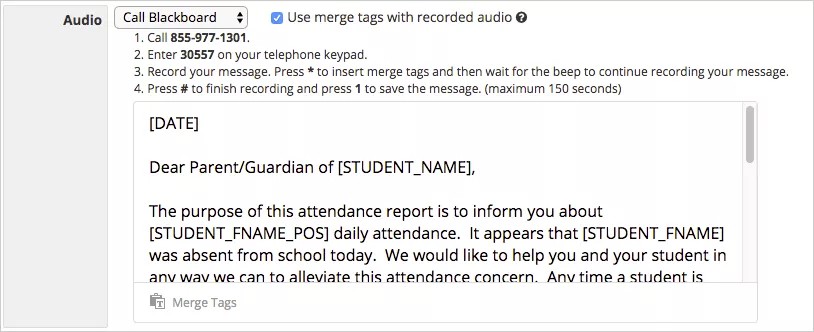
- When you are ready to record your message, select Use merge tags with recorded audio.
- Read the script and when you see a merge tag, press the Star (*) button on your phone. Wait for the beep to continue reading your script.
- Press Pound (#) when finished recording, and press 1 to save the message.
How do I add custom merge tags?
Using an uploaded file you can create a voice recorded message with your own merge tags. When you are creating the message in the Send Message interface, you will be able to import a comma delimited file with your information.
- From Messages > Send, create your email message.
- From the Select Recipients area, select Choose.
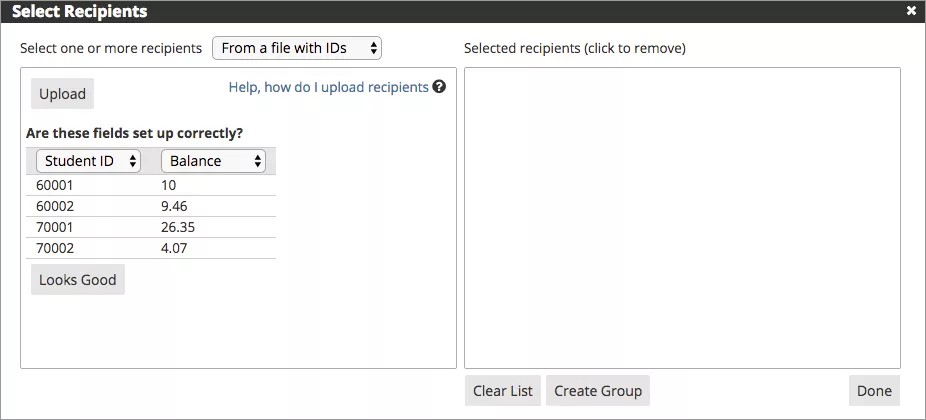
- Select From a file with IDs or From a file with addresses. The file that you upload must either start with Student ID or the Email Address depending on your selection.
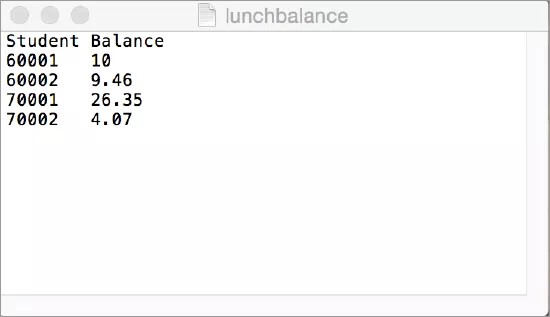
- Select Upload. The file must contain either Student or Email Address plus the name of your custom merge tag with the information. The file must be saved as a tab delimited text file (.TXT).
- Review that the fields are set correctly, and select Looks Good.
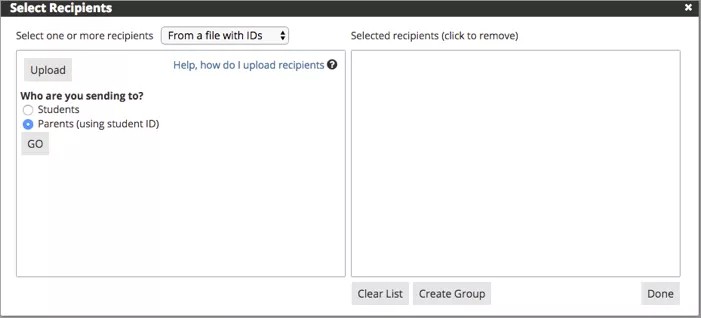
- Select who to send the email to and select Go.
- Select Done when finished.
- When typing the email, select Insert Merge Tag and your custom tag will be available.
