Add Social Media
Add social media feeds and posts
Incorporating social media on your website is a great way to share what's happening throughout your district.
Like the web itself, a lot is changing with how you access data in social media platforms. Many platforms require server-side authentication to retrieve data, so for social media integration in WCM, you must use the widgets provided by each platform.
Social media widgets, plugins, and embed codes
Before you can embed social media feeds to your site, you need the proper widget, plugin, and embed codes.
- Facebook page plugin
- Facebook embed a post steps
- Twitter embed a timeline steps
- Pinterest widget
- Instagram embed steps
- LinkedIn plugins
- Flickr embed steps
- Google+ plugins
- YouTube embed code instructions
- Vimeo embedding video overview
Add the widget, plugin, or embed code in the Embed Code app
- From Site Manager find the page you want and edit it.
- Add the Embed Code app to your page.
- Edit the Embed Code app.
- Paste the social media widget, plugin, or embed code in the Embed box.
- Select Save.
Community Media Settings
App Social Settings
App social settings
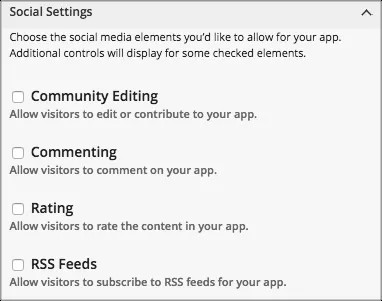
If you have Social Media Framework, you may be able to add one or all of these social media elements to your apps in the App Options. Whether you can add a particular element depends on which settings and elements your Site Administrator has enabled. Site Administrators may enable RSS feeds regardless of whether or not you have Social Media Framework.
- Visitor Commenting allows visitors to comment on your app.
- Visitor Rating allows visitors to rate your app.
- RSS Feeds allows visitors to subscribe to Really Simple Syndication (RSS) feeds for your app.
- Community Editing allows visitors to your website to contribute to your app.
Available social settings
The Social Media elements that are available in Web Community Manager are commenting, rating, RSS feeds, community editing and tagging. This table lists the elements available for each app.
| App | Community editing | Visitor commenting | Visitor rating | RSS feeds |
|---|---|---|---|---|
| About Teacher | ||||
| Alumni Directory | Yes | Yes | ||
| Announcements | Yes | Record | Record | Yes |
| Article Library | Yes | Record | Record | Yes |
| Assignments | Yes | |||
| Blog | Yes | Record | Record | Yes |
| Book List | Yes | Record | Record | Yes |
| Calendar | Entire app | Entire app | Yes | |
| Content | Entire app | Entire app | Yes | |
| Discussion | Yes | Record | Record | Yes |
| Divider | ||||
| Document Viewer | Entire app | Entire app | ||
| Embed Code | Entire app | Entire app | ||
| Facebook-like | ||||
| File Library | Yes | Record | Record | Yes |
| Flex Editor | Entire app | Entire app | Yes | |
| Google Folder | ||||
| Heading | ||||
| Headlines & Features | Yes | Record | Record | Yes |
| Image | ||||
| Link Library | Yes | Record | Record | Yes |
| Lunch Menu | Record | |||
| Maps & Directions | Record | Record | Yes | |
| Minibase | ||||
| Photo Gallery | Entire app | Entire app | ||
| Podcast | Yes | Record | Record | Yes |
| Premium Video | Record | Record | ||
| Q&A | Yes | Record | Record | Yes |
| School Directory | ||||
| Site Shortcuts | ||||
| Staff Directory | ||||
| Table | Record | Record | ||
| Twitter Share | ||||
| Upcoming Events | ||||
| Wiki | Entire app |
Community Editing
Community Editing
Community Editing allows selected registered users to add content to that app from the end user website. Any content registered users add, is in the format of the app. For example, content added to a Link Library App is a link. Content added to an Alumni Directory is an alumnus post.
All registered user content must be approved before it appears.
Turn community editing on
- Find the app you want to allow the community to edit.
- Select Options and select Social Settings.
- Select Community Editing.
- Select Assign User or Assign Group.
- Select the groups or users you want to assign.
- Type all or part of the group or user name.
- Select Search.
- Select the group or user you want.
- Repeat until you assign all groups or users.
- Select Add.
- Select Save.
Unselect Community Editing any time to turn it off.
Moderate community editing
- Find the workspace with community editing.
- Select Tools and Approve Community Editing.
- View a post.
- Select Approve or Decline.
- Select I'm Done.
Commenting
Commenting allows visitors to add their comments about your app. Visitors can also reply to comments left by other visitors and reply to comments.
If a visitor posts a comment and is not signed in, the name associated with the post is Anonymous. If a visitor posts a comment and is signed into your website, the name and email address of the visitor is pulled from the visitor’s user account. However, if you select the Allow visitors to change names and email addresses check box, visitors who are signed in to your website may modify their posting name and email address.
The email address associated with a post never displays on the end-user website.
Turn commenting on
- Find the app you want to allow visitors to comment on.
- Select Options and select Social Settings.
- Select Commenting.
- Optionally select these options.
- Require Approval (Recommended): You must approve all visitor comments before they display on your website.
- Allow visitors to change names and email addresses: Visitors who are signed in to your website change their display name and email address.
- Select Save.
Select Commenting Rights to limit who can comment on the app.
Manage Visitor Comments
- Navigate to Site Manager.
- Hover over the comments under Pending Comments.
- Select Approve to approve the comment and display it on your page. Select Review to review the comment and view the Author Name, Author Email, Date/Time, and the Comment. You can approve the comment in this window. Select Save when finished. Select Decline to remove the comment.
To remove approved comments, select Approved from Approve Visitor Comments. Find the comment you want to remove and select Unapprove. Select I'm Done.
Approve all comments
You can approve all comments for your page in one area.
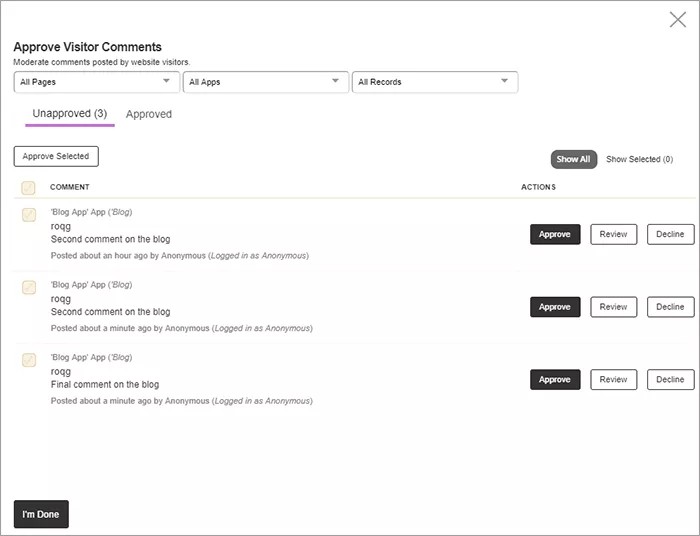
- Select All Comments.
- Select your All Pages, All Apps, and All Records options.
- Select each comment to approve and select Approve Selected.
- Optionally, Select Approve, Review, or Decline for each individual comment.
- Select I'm Done.
Rating
Rating allows visitors to rate the articles in your app. The rating system consists of a series of five stars that display for each article in your library.
Select a star to rate the app. You can specify half values by mousing over the first half of a star. Once rated, the stars display the average rating on the end-user website and you see the number of times the app was rated.
RSS feeds
Really Simple Syndication (RSS) Feeds enables visitors to subscribe to your app. With the RSS option activated, an RSS Feed icon displays on your website for your app. When visitors select this icon, a dialog window displays. It contains information about RSS feeds and instructions on how to subscribe. After a visitor subscribes, the RSS reader, also known as an aggregator, periodically checks for and downloads updates made to the app.
Video: Enable social media framework
The following narrated video provides a visual and auditory representation of some of the information included on this page. For a detailed description of what is portrayed in the video, open the video on YouTube, navigate to More actions, and select Open transcript.
Video: Enable social media framework explains how to enable the social media framework in Web Community Manager.