Configure Templates
If you are a site or subsite director, you can change the templates for your site in Template Configuration. If you are a user with a Passport having the extended privilege to manage sites, you can also change templates for a site in the Sites Workspace.
More on editorial privileges and administrative passports
You may choose a template from a set of standard templates. If you have the Subscription Template Library or have obtained templates using individual template licenses, you have additional templates you may choose from.
Open Template Configuration
You can get to template configuration two ways. From CONFIGURE or from SITE & CHANNELS.
- From Site Manager select CONFIGURE and select Sites. Select the name of the site you want to edit.
- From Site Manager select SITE & CHANNELS and select the site you want to edit. Select Settings.
Switch templates
Choose a new template from the Template Library.
More design ready and made to order templates from our Creative team
- From Template Configuration select Advanced and select Change.
- Select the current template thumbnail to Choose a new template.
- Browse and select a new template.
- Decide if you want to preview, publish, or cancel your changes.
Always exit Template Configuration by selecting Publish & Exit or I’m Done. If you select X to close it, you go into preview mode. If you see the Preview Mode bar, selec End Preview Mode to dismiss it.
- Save & Preview: Create a temporary, or working copy, of the template. The changes you made to the template are saved to a temporary file. You see those changes when you preview the site.
Saved changes are saved in the temporary file until you publish the template.
- Publish & Exit: Push the saved changes to the live template and the end-user website. This also purges the temporary copy of the template and closes Template Configuration.
- Reset: Revert the changes you made to the template. From the Reset menu, select Current Live Version to restore the template element settings to match those of the currently active template. Select Default Version to restore the template element settings to match those of the default template found in the template library.
- I'm Done: Close Template Configuration without publishing the template. Any changes you made since the last save are lost.
- Save & Preview: Create a temporary, or working copy, of the template. The changes you made to the template are saved to a temporary file. You see those changes when you preview the site.
- Select Save.
Change template elements
Open Template Configuration to change elements your current template.
- From Template Configuration select Advanced and select Change.
- Select each element set and change the values to what you want.
- Decide if you want to preview, publish, or cancel your changes.
- Select Save.
After the current template thumbnail, are sets of elements you can change in the template. You can change the values in each element set. For example, your school colors and tagline.
Not every template has the same elements. The elements you see change with the template.
Preview template breakpoints
You can view how your template design displays in different breakpoints. Using the breakpoints preview allows you to see how your site displays on a mobile, tablet, or smaller devices. Be absolutely certain that your template works across multiple breakpoints, ensuring a fantastic experience for all your users
Navigate to the template library to get started!
Select a template and select Settings.
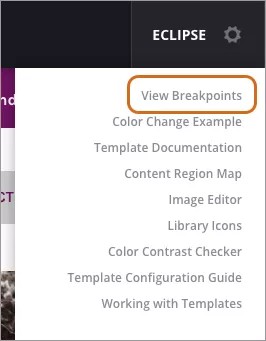
Select View Breakpoints.
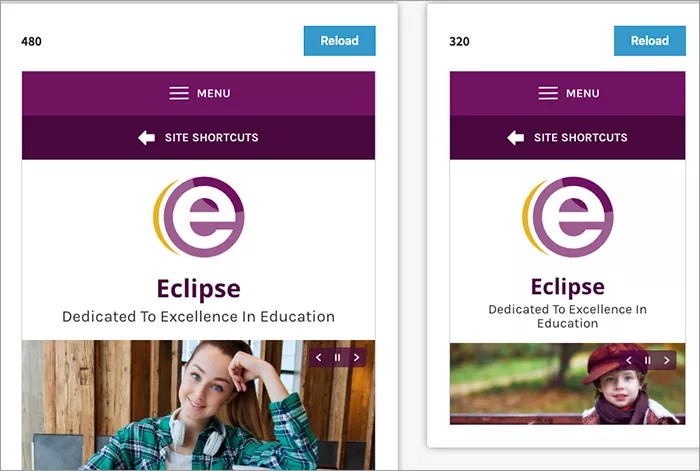
Preview your template configuration in the specified breakpoints. As you make changes to your template configuration, select Reload to view the updated preview on each breakpoint.
Colors
Make the colors of your website your own.
- Template Colors: Select the colors for your entire website.
- MyStart Bar Colors: Select the colors you want to use on the MyStart Bar.
- Channel Bar Colors: Pick the colors you want to use on the Channel Bar.
- Channel Bar Drop-Down Colors: Pick the colors you want to use when the Channel Bar menu opens.
- Content Region Colors: Select the font colors for the different regions of the template.
To see the template region locations, publish the template. From Site Manager find the Site Homepage and edit it. The region thumbnail, which maps the regions in the template, displays at the top right of the page.
Use color code
Use color code, if you know the exact code of the color you want to use.
- From Template Configuration select the color set you want to change.
- Type or paste the color code for the element you want to change.
Color codes always start with a hashtag (#).

Use the color picker
If you don't know the code of the color you want to use, you can browse colors to pick what you want.
- From Template Configuration select the color set you want to change.
- Select the color.
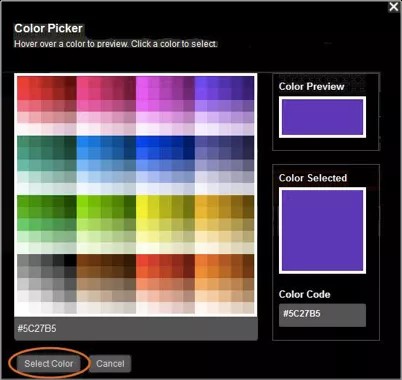
- From the Color Picker move your pointer over colors to preview them.
- Select the color you want to use.
- Select Select Color.
School name
Set your School Name and School Name Color.
Use the ActiveBlock [$SiteName$] for the school name. This uses the Site Name value set in Site Settings.
- From Template Configuration select School Name.
- Change the school name.
- Provide the color code, or use the color picker to select the color you want for the school name.
School tagline
Set your school tagline, or slogan, and tagline text color.
Preview the template to make sure your tagline fits in the space provided.
- From Template Configuration select School Tagline.
- Type your tagline.
- Provide the color code, or use the color picker to select the color you want for the tagline.
Show school logo
After you add your school logo image to the site Templates Files & Folders, decide if you want to show it on your website.
- From Template Configuration select School Logo.
- Select Show School Logo.
Logos that display in the dialog are found in the image subfolders of Files & Folders in the Template Library or Custom Templates.
Change global icons
If the template uses Global Icons, you can choose the ones you want.
If you want to use your own icons, upload your icons to Files & Folders in the Templates workspace.
More on uploading template images
- From Template Configuration select Global Icons.
- Make the changes you want.
- Number of icons: Select a number from the menu.
- Icon color: Type the color code or use the color picker to select a color.
- Icon image: Select the current icon image to choose a new one.
- Icon text: Type the text that appears below the icon on the website.
- Icon link: Type the link location for the icon. You can use web addresses, email hyperlinks, and site ActiveBlocks.
- Link to the site homepage calendar type [$SITECALENDARLINK$]
- Link to Friendly Web Address field set in Site Settings type [$SITEALIAS$]
- Icon target: Select where the link opens from the menu.
Video: Template configuration
The following narrated video provides a visual and auditory representation of some of the information included on this page. For a detailed description of what is portrayed in the video, open the video on YouTube, navigate to More actions, and select Open transcript.
Video: Template configuration explains template configuration in Web Community Manager.