Organize your app for students, parents, staff, and community members.
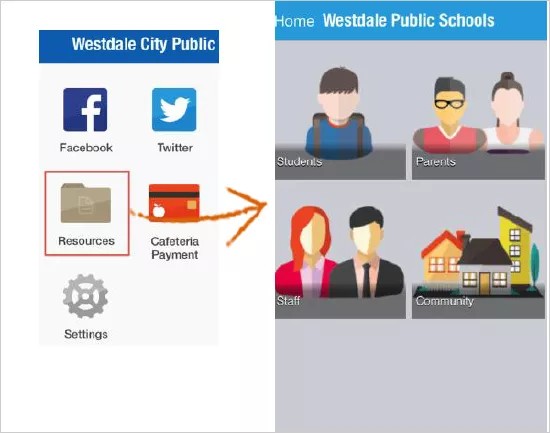
The Resources icon in a district or school app is a spot to save information for users to review on a regular basis, such as bell schedules or lunch forms.
When users select the Resources, they will see the organized data.
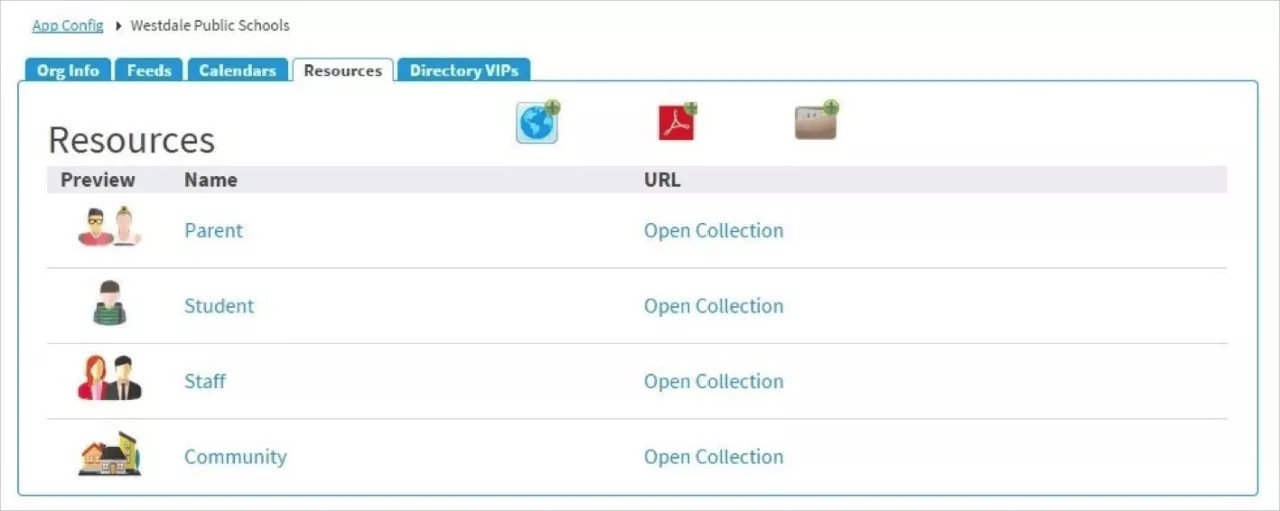
You can add resources for your school community members to access via your district or school app. You can links and PDF files as resources.
Add a website link resource
You can create a link to a website, such as a lunch menu you may have posted to your school's website.
- After logging into the Blackboard Communications HQ website, select Settings > App Config.
- Select the organization Name to add the resources.
- Select the Resources tab.
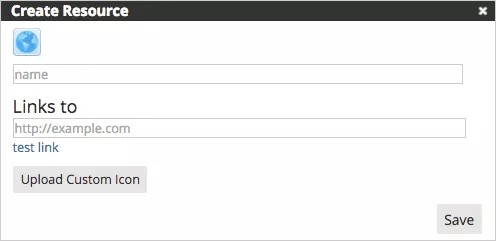
- Select the Add a Website Link icon.
- Type the Name of the link as it will appear in the app.
- Type the URL in the Links to box.
- To include an icon image for a link, select Upload Custom Icon and search for the image.
- Select Save when finished.
Upload a PDF resource
- After logging into the Blackboard Communications HQ website, select Settings > App Config.
- Select the organization Name to add the resources.
- Select the Resources tab.
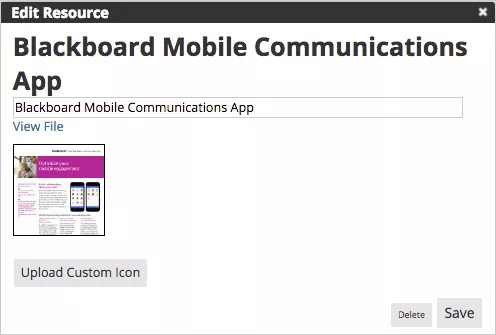
- Select the Upload a PDF icon.
- Select the file to upload.
- Update the Name if necessary.
- Select Upload Custom Icon to change the image.
- Select Save when finished.
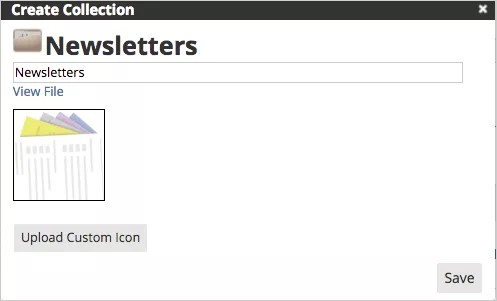
Create a folder of resources
You can group similar resources by subject by adding folder to sort the resources. For example, create a Newsletter folder to store all your district or school newsletters.
- After logging into the Blackboard Communications HQ website, select Settings > App Config.
- Select the organization Name to add the resources.
- Select the Resources tab.
- To add a new folder, select the Folder icon.
- Type the Name of the folder.
- To include an icon image for the folder, select Upload Custom Icon and search for the image.
- Select Save when finished.
Organize resources
- Organize folders by simply selecting and moving a folder to a different spot in the list.

- Place resources in a folder by selecting Open Collection for the resource, and adding web links or uploading the needed PDF files.
Delete resources
- After logging into the Blackboard Communications HQ website, select Settings > App Config.
- Select the organization Name to add the resources.
- Select the Resources tab.
- Select the resource Name to remove (web link or PDF).
- Select Delete.