In this page
- Snowflake Accounts Settings
- Settings to integrate with other systems
- Change Service Account Password
- License and User Management
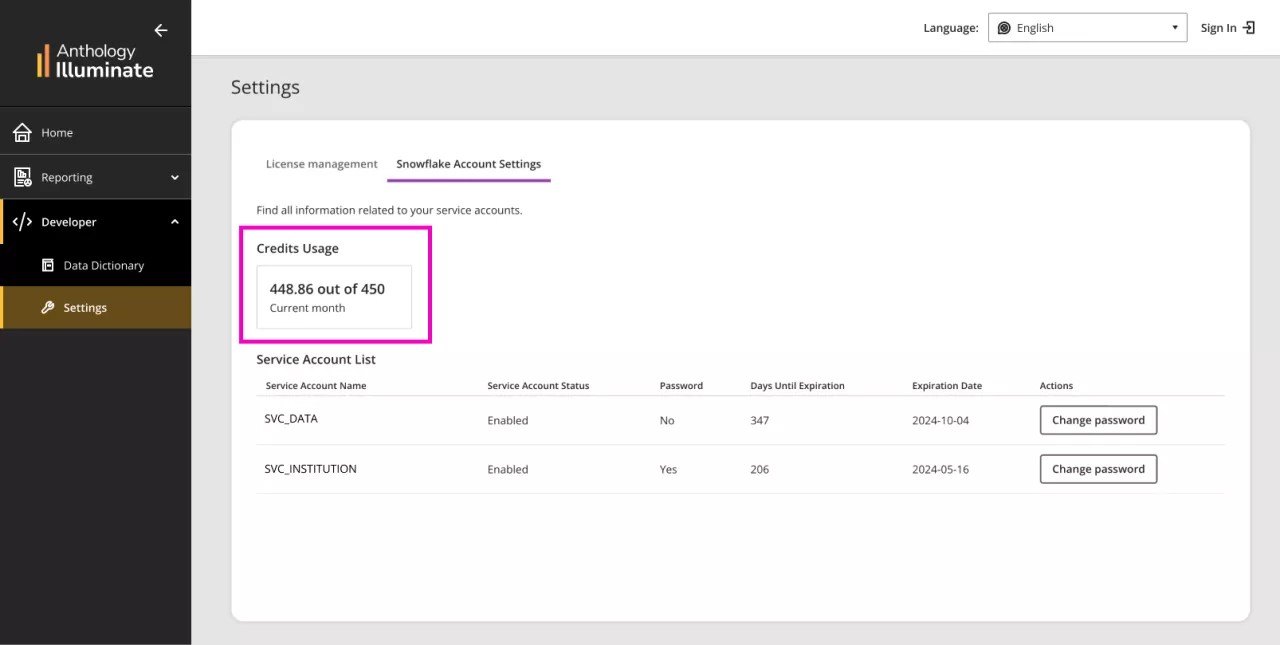
- Credits Usage
Settings
In settings you can:
- Review your service account status.
- Enable service accounts.
- Change your service account password.
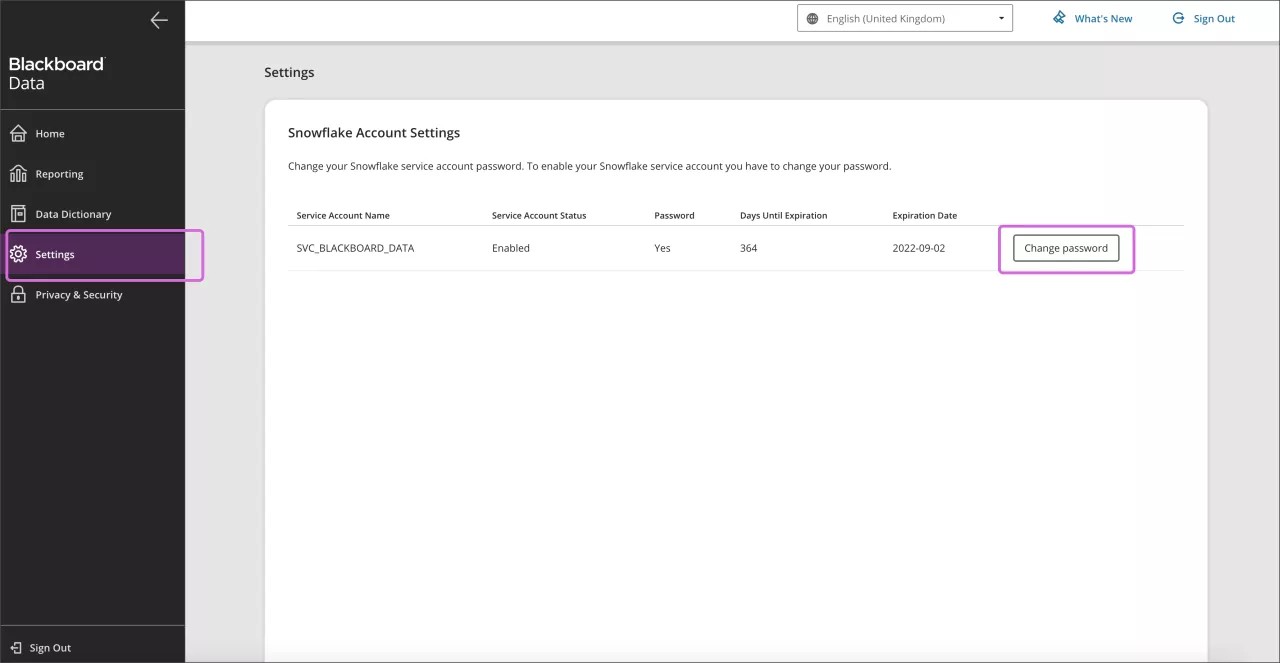
Snowflake Account Settings
Review your service account status:
- Log in to Anthology Illuminate.
- Select the menu option.
- Select Settings.
- Under Snowflake Account Settings, locate the Service Account Status column.
- Service Account Status shows if the account is enabled or disabled.
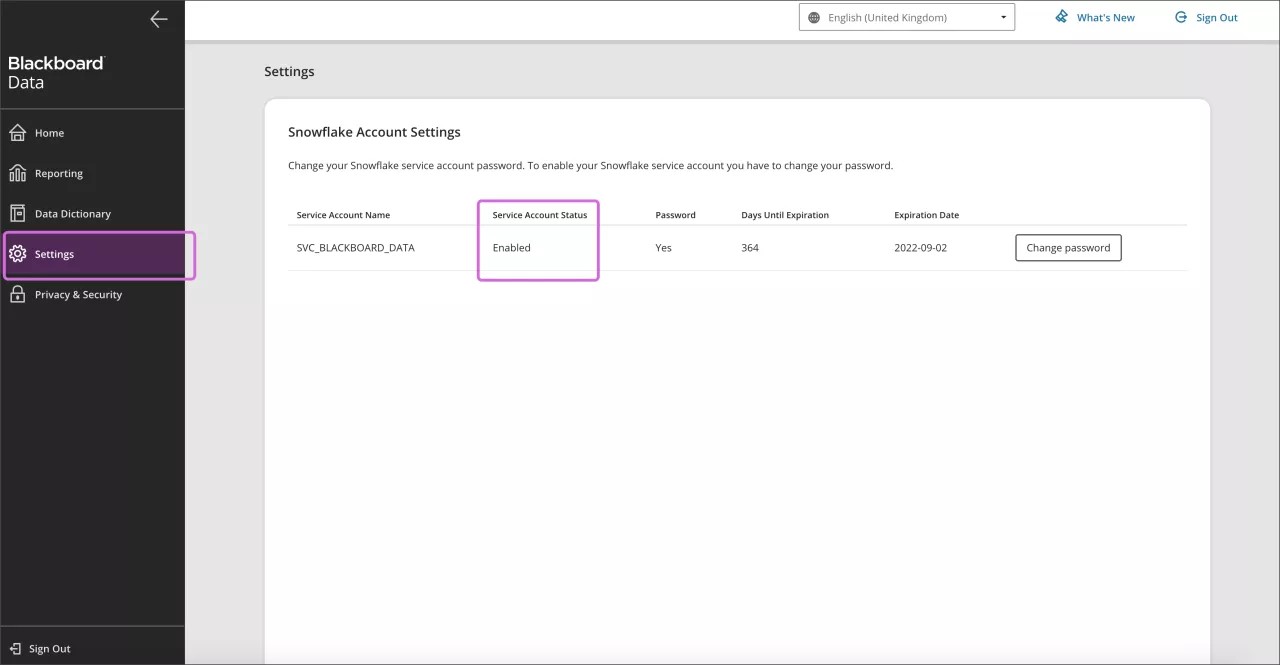
Enable a Service Account
If your account is disabled and you want to enable it, you must change the service account’s password.
Settings to integrate with other systems
Use the SERVICE ACCOUNT to integrate with other systems.
The individual accounts will only work with the browser-based Snowflake Console and data.blackboard.com
- Your Service Account can be obtained from Anthology Illuminate, as explained above.
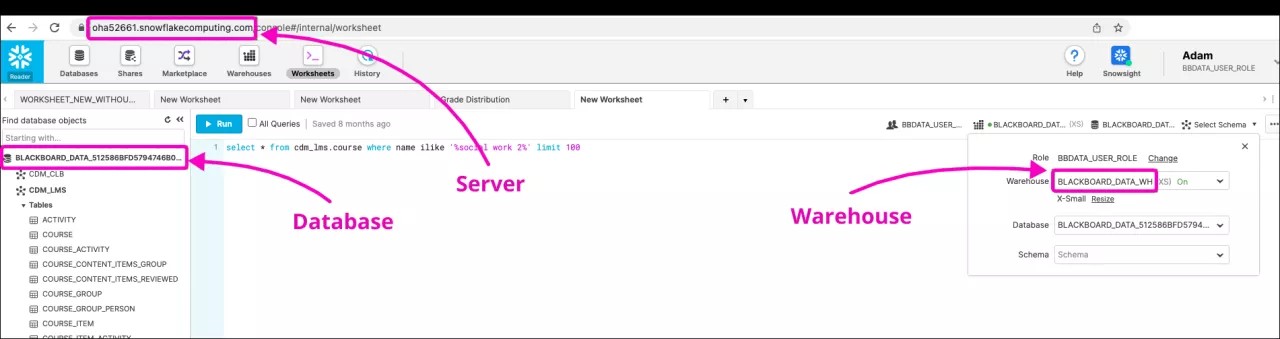
Snowflake settings
The settings can be found when you’re logged in to Snowflake:
- Server: your Snowflake URL, e.g. oha52661.snowflakecomputing.com
- Warehouse: in the Context section of the Snowflake UI, usually BLACKBOARD_DATA_WH
Database: in the left panel where the schemas are listed.
You can right-click and select Place Name in SQL to more easily copy it, e.g., BLACKBOARD_DATA_512586BFD5794746B0E5D14CB8322067
Change Service Account Password
Keep track of your service account’s password days until expiration and expiration date. Change your password in time.
- Log in to Anthology Illuminate.
- Select the menu option.
- Select Settings.
- Under Snowflake Account Settings, select Change Password.
- You’ll be redirected to Snowflake to complete your password change.
- Select Yes to continue.
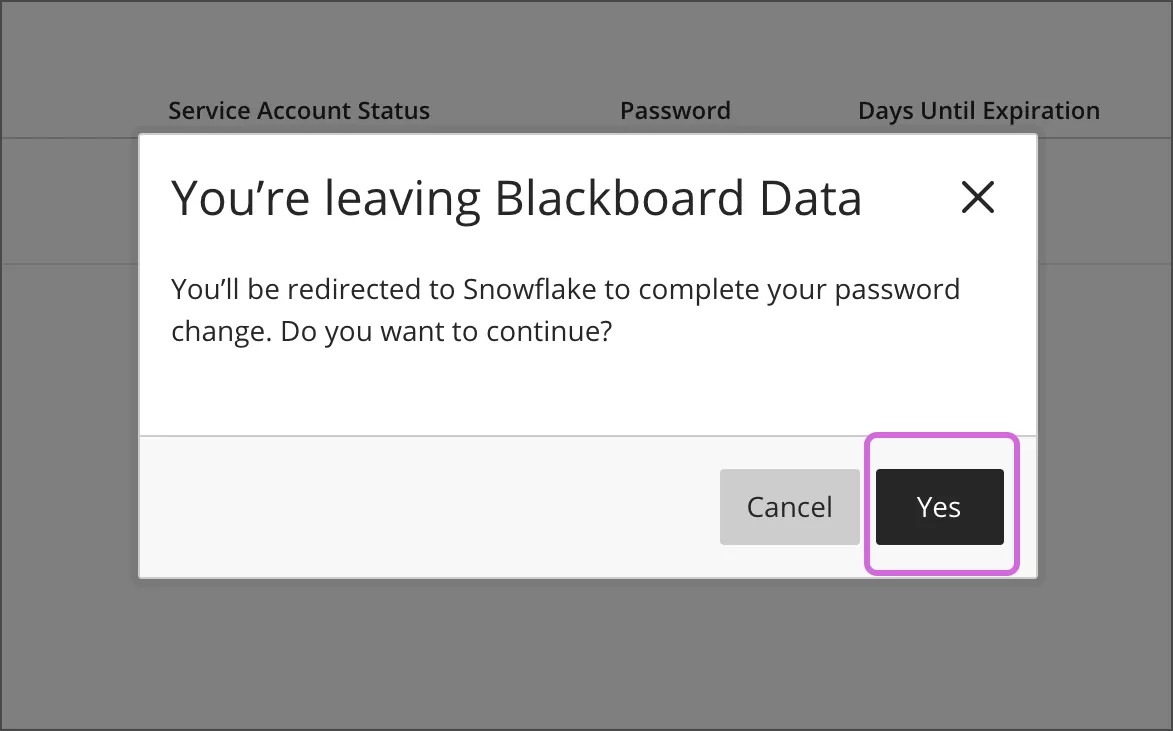
URL scanning software, like antivirus, can block your access to Snowflake's redirect link. This won't allow you to complete a password change. Try from another browser that doesn’t use this software or change your antivirus settings.
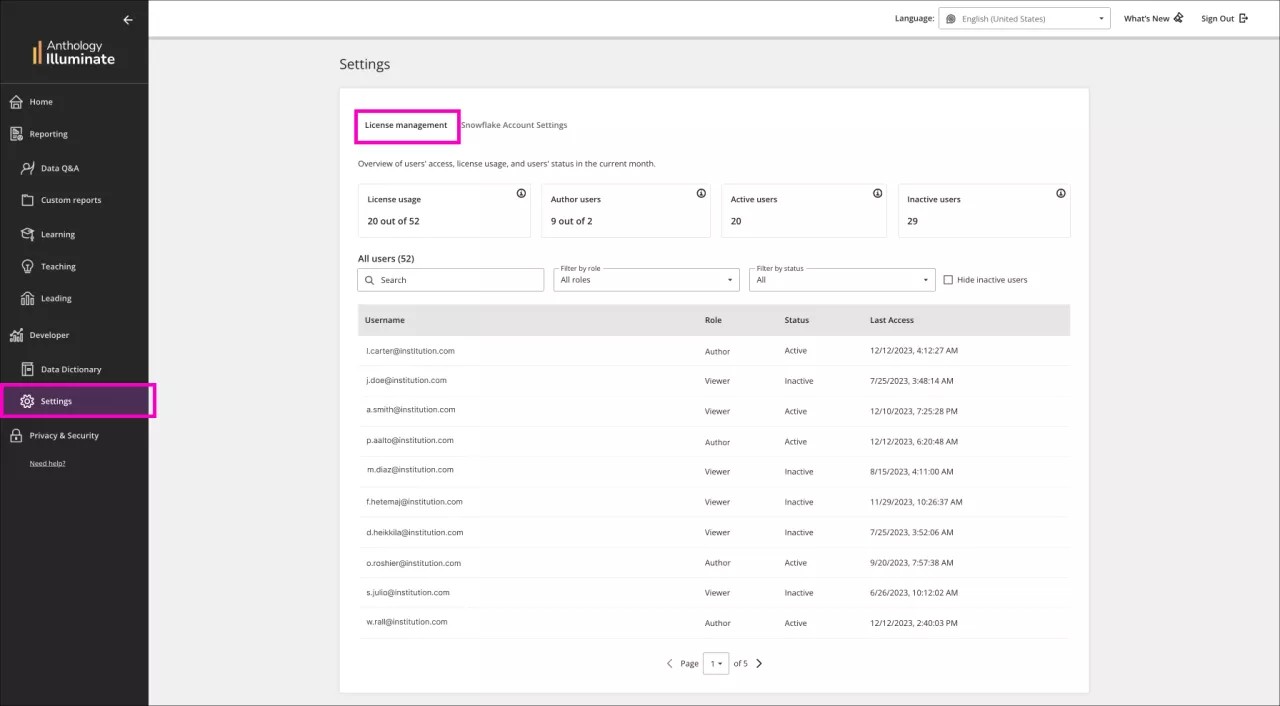
License and User Management
It provides an overview of the license usage, users' access, and their status in the current month.
Only available for institutions with Institutional Authentication.
How to access:
- In the left panel, go to Developer and Settings.
In the first tab, License Management, you can find all the information in detail.
Number of:- License used vs. The total: Licenses used out of the total in the current calendar month. Total is the quota set for your account and contains Viewers and Authors.
- Author users: Users who can create reports in Enhanced Reporting (Custom Reports) and access Standard Reports.
- Active users: Users (Author and Viewers) who accessed Illuminate Reporting this calendar month via Standard Reports, Custom Reports, or Data Q&A.
- Inactive users: Users (Viewers) who haven't accessed any of the Illuminate Reporting areas during the current calendar month.
A table with detailed information about each user:
- Username
- Role
- Status
- Last Access (date and time)
Credits Usage
Keep track of the credits* used compared to the remaining ones.
A Snowflake credit is approximately 1 hour of usage of Snowflake.
- Log in to Anthology Illuminate.
- Select the menu option.
- Select Settings.
- Under the Snowflake Account Settings tab
- Find the Credits Usage card with information about the current month.