A course is a single collection of content and activities designed to be offered in one of three modalities: face-to-face, online, or hybrid. A course can be versioned for
- various time frames.
- various delivery styles, such as self-paced or facilitated.
- offerings at various locations.
- other defined parameters.
Courses can be saved with a template for each version available. There may be multiple templates associated with each course. For example, a course may be offered in 4-, 8-, or 12-week durations and a template for each delivery option can be associated with the course when the course is created.
Before creating a course in TDM
Best practice is to make sure that all the following have been completed before you create a course in TDM.
- A TDM admin has created any relevant categories in TDM.
- The instructor manager has created any relevant instructor accounts, with the correct role and permissions, and added their instructor profiles to TDM.
- You have created any images you want to use for course tiles.
Once these tasks have been completed, you can confidently begin building your TDM course.
Create a TDM course
- Sign in to TDM.
- Select Administration.
- Select the Course Management tab.
Add Course
Fill out the information for the course you want to create. Fields marked with an asterisk (*) are required.
- If necessary, type a unique ID. (This may be autogenerated depending on how TDM settings have been configured).
- Choose the language in which the course is offered from the menu.
- Type the course name.
- Type a short summary of the course, which will show in the catalog view, and a description, which will show on the peek panel when the course is selected in the catalog.
- Choose categories and prerequisites by typing terms or selecting from the menu.
- Associate approved instructors by typing terms or selecting from the menu.
- Associate approved course templates by selecting Course template search. You will see the advanced course search in the Blackboard Learn environment, and you can choose multiple templates to be associated with each course for different delivery options (for example, for 4-, 8-, or 12-week durations). The courses you choose will be saved in the Associate Course Templates box in a comma-separated list of IDs.
- Set the availability of the course from the menu and, optionally, set a range of dates during which the course will be available in the catalog. If you make the course available and do not set a date range, it will remain available until its availability is manually changed.
Course media settings
Course media settings allow you to add visual elements to course tiles. These elements make courses easier for learners to identify. You can add an image that will show up on a course tile; otherwise, the default catalog image is displayed. You can also add a video URL to enable a video playback icon on the image when the course is clicked in the catalog.
- Select Change media settings if you want to add an image or video playback icon to your course tile.
- Drag a file to the drop zone at the top of the peek panel or select Upload to navigate to the file to add an image.
The image must be at least 310 pixels wide, 126 pixels tall, and no more than 2 MB. It must be a JPG, PNG, or GIF file.
- Select the Enable Video toggle if you want to add video playback to your course tile, then add the URL for the video you want to use.
You must use the “Sharable” URL provided for the video.
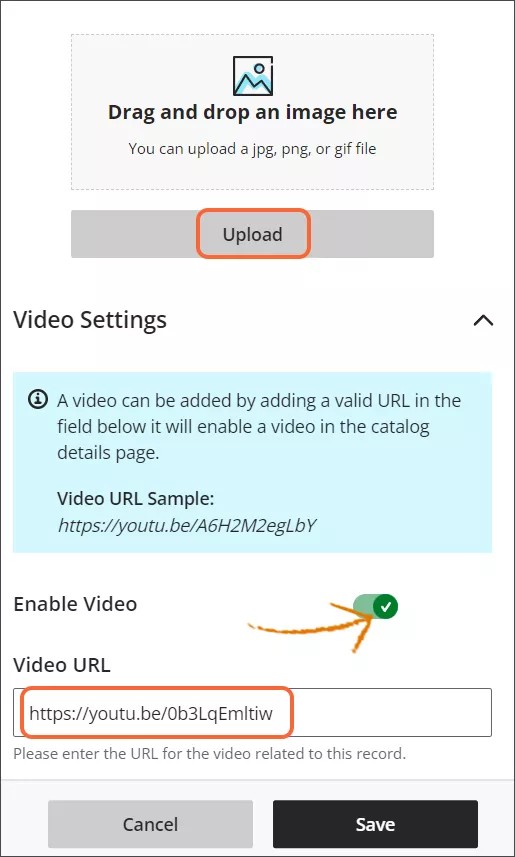
- Select Save.
Language configurations
Courses can be configured in multiple languages that appear when the user selects the alternate language for the TDM catalog.
- Select the purple plus sign (+).
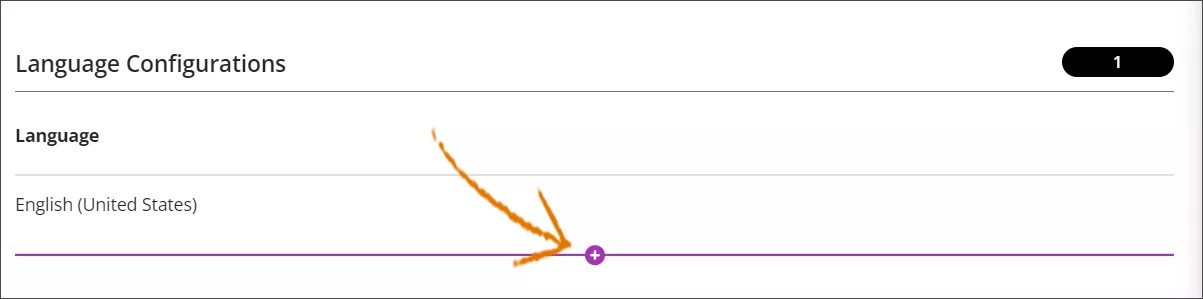
- Choose a new language.
- Type the name, summary, and description in the new language.
- Choose Create Offering if you want to create an offering for your course. Otherwise, select Save.