Copy and paste text to prevent loss
While you add text to your course, you can protect against loss of work if an internet connection loss or software error occurs. You can type in an offline simple text editor, such as Notepad or TextEdit, and then copy and paste your work into your course.
Or, before you submit or save, you can copy all of the text you want to add. Select the text and right-click to copy it. You can also use key combinations to copy and paste:
- Windows: Ctrl + A to select all the text, Ctrl + C to copy, and Ctrl + V to paste.
- Mac: Command + A to select all the text, Command + C to copy, and Command + V to paste.
Can I paste text from Microsoft® Word?
You'll have the best results if you type your text directly in the editor and format it with the available options.
You may see issues when you copy and paste text from a Word document directly into the editor. Your original formatting may not appear as you want. You also may not be able to remove or add formatting after you paste the text into the editor. To avoid the formatting issues, you can remove the formatting and reformat it with the options in the editor.
To remove the Word formatting after you paste the text in the editor, select all the text and select the Remove Formatting icon. Only use this option if you understand that all formatting will be removed. All bullets, numbered lists, indentations, line spacing, centered text, and font formatting and sizing will be removed.

Or, before you add your text in the editor, you can paste it into an offline simple text editor, such as Notepad or TextEdit, and clear the formatting. Then, you can paste the text into the editor and format it as you want.
Add text
The editor appears wherever you can add and format text, such as in assignments, tests, discussions, blogs, and journals.
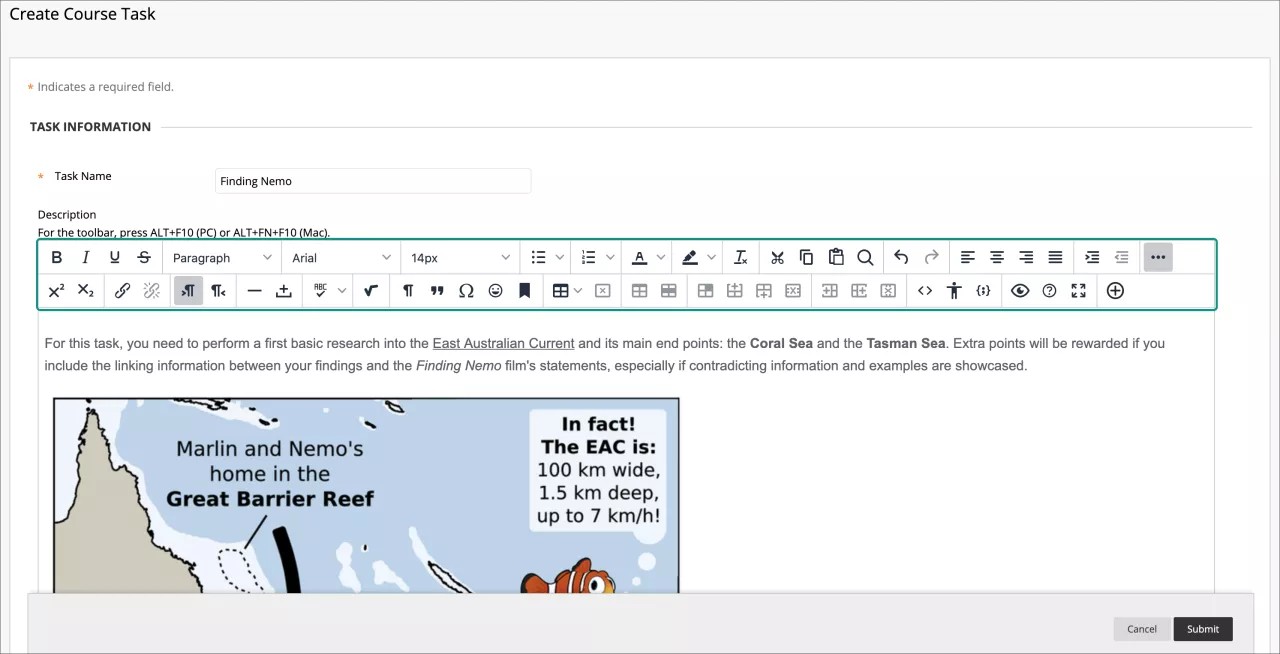
You can also use the options in the editor to attach files, embed multimedia, and insert equations, links, and tables. You have creative control over how your content appears and the flexibility to change the order and appearance.
The default view is WYSIWYG (What You See Is What You Get). You can select the Source code icon and edit or add code, or the Insert/edit code sample icon.
You can also right-click text to access commonly-used options. The menu changes based on the location of the cursor and whether or not you've selected text.
To use your keyboard to jump to the editor toolbar, press Alt + F10. On a Mac, press Fn + OPT + F10. The focus is placed on the first icon on the left in the top row. Use the right and left arrow keys to move forward and backward. The up and down arrows don't work to navigate to different rows. Use the arrow keys to move to the end of one row and then up or down to the next available row.
Work with lists
In the editor, you can add bullet and number lists to your text.
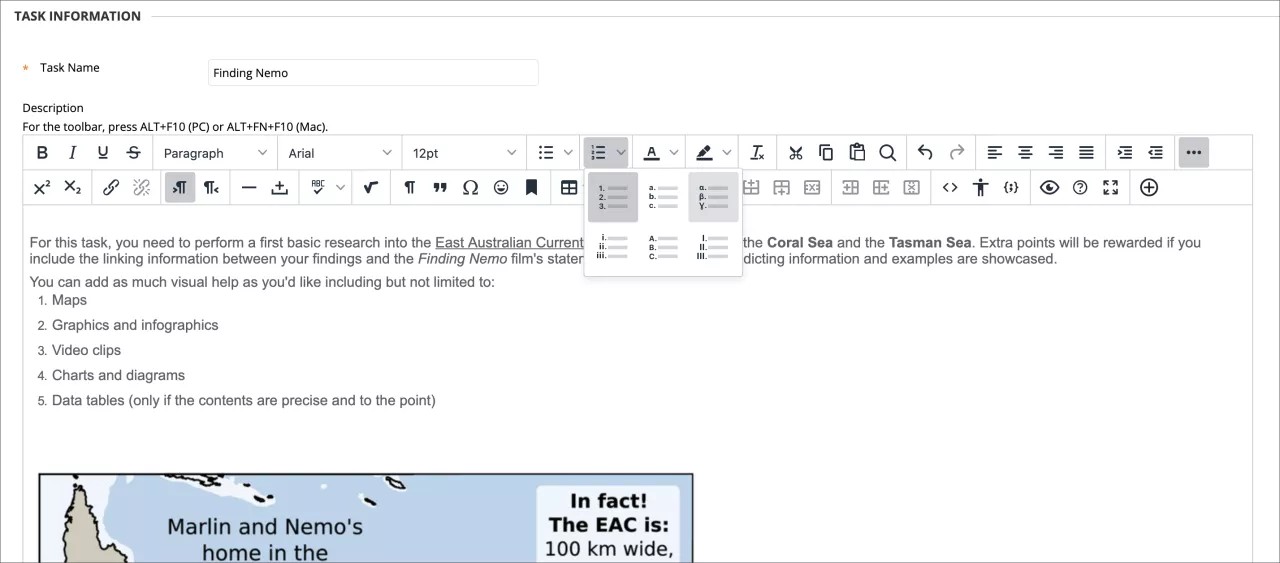
- Number List: Choose from the available list options:
- Default: Numerals
- Alphabetic
- Roman numerals
- Greek symbols
- Bullet List: Choose from filled circle, open circle, or square.
Adjust spacing between bullet and number items
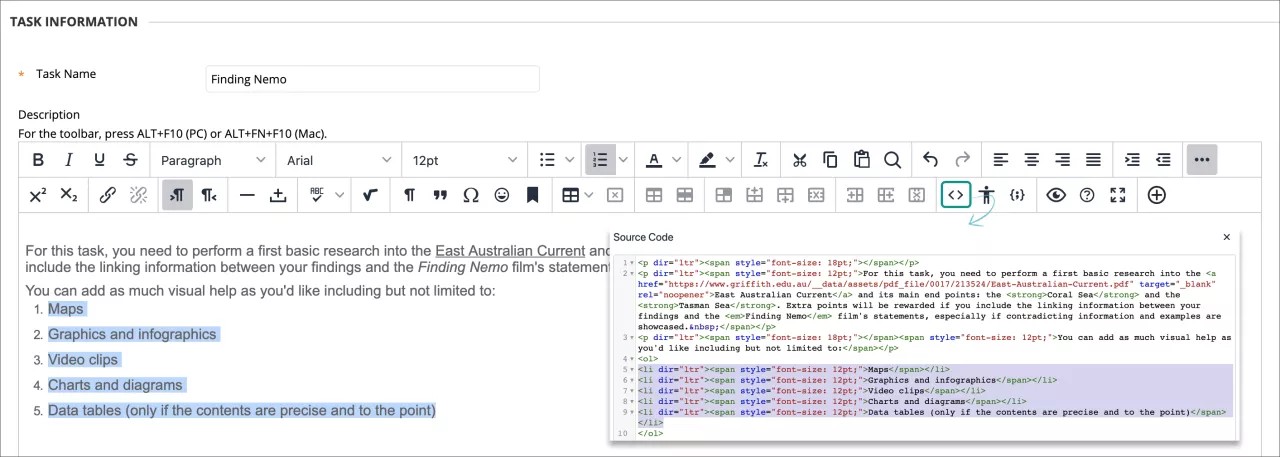
You can adjust spacing between bullet and number items in the Source code view or in the WYSIWYG (What You See Is What You Get) view.
By default, bullet and number lists have the same spacing as lines in a paragraph. Each item in the list uses the <li> tag to create each bulleted or numbered item.
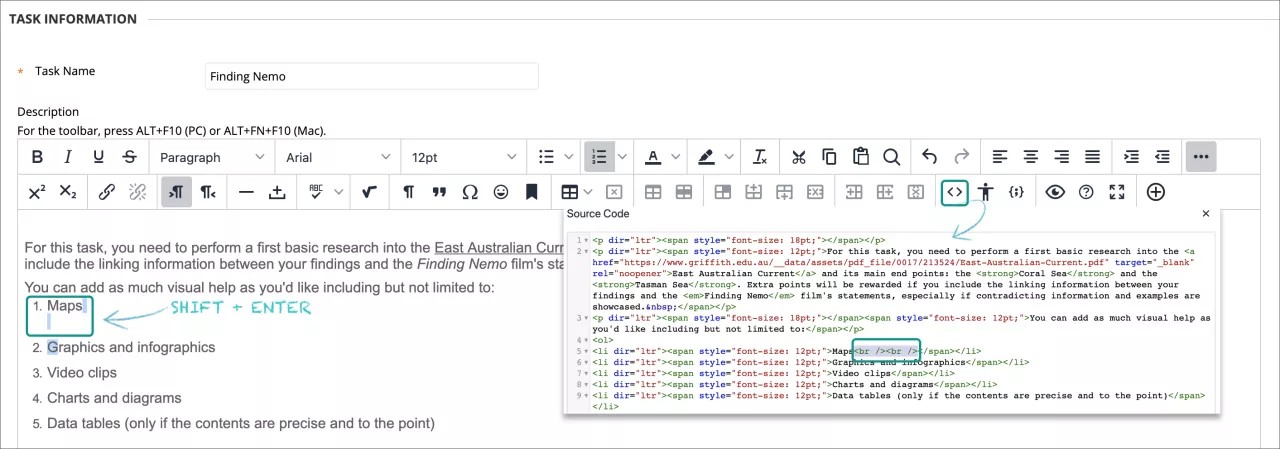
Adjust spacing in WYSIWYG view
In WYSIWYG view, after you create your list, place your mouse pointer at the end of each bulleted or numbered line and press Shift + Enter. You're adding a line space between each list item. If you continue to press the key combination, additional line spaces are added. In code view, you'll see <br /><br /> for each line space. This code appears inside each bulleted or numbered item's closing tag (</li>).
Adjust spacing in code view
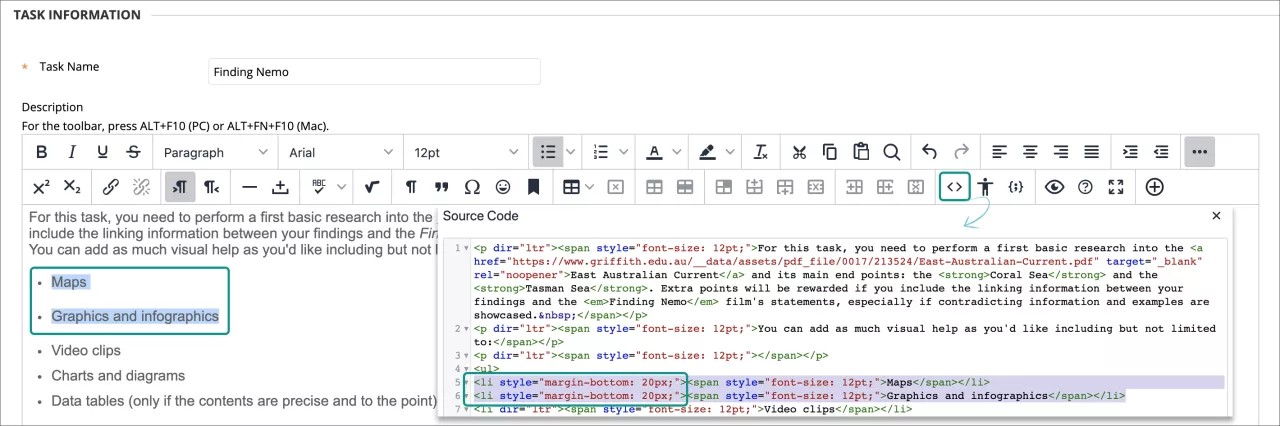
If you want to control the amount of spacing between list items, you need to work in code view. Select the Source code icon to open the code window. You can add an amount to each list item's tag. For example, where you see <li>, replace each with <li style="margin-bottom: 20px;">. For the 20px, you can add the amount you need. The spacing is added to the bottom of each bulleted or numbered item, creating space between the list items.
You can adjust paragraph spacing with the same methods.
Insert horizontal lines
You can add lines and horizontal rules to content you add in the content editor.
Select the Horizontal line icon to add a thin horizontal line to the current mouse pointer position, spanning the entire width of the text area.
Check your spelling
Your institution controls if this option is available.
Select the Spell Checker icon to activate the automatic spell checker option. You can change the language's dictionary from the menu. Institutions and instructors can disable spell check. Your institution chooses which spelling dictionaries are loaded in.
When you activate the Spell Checker and there are words to be reviewed, a new window will appear showing you one by one every potentially misspelled word or any word that has not been found in the loaded dictionary. You will see them also in the text area background as wavy, red underlined. You will have the option to change the word for one of the suggested alternatives, ignore, ignore all or close the Spell Checker window.

If you choose to change it, select one of the suggested alternatives from the list and select change. The Spell Checker will present you with the next word to review. When it checks them all, the Spell Checker window will close.
If there are no words to review, the Spell Checker will show you the message No misspellings found.
Add links
You can specify a link to a website, a file from your computer, or the course's file repository, such as the Content Collection if your institution has access to it.
Select text or an object, and select the Insert/Edit Link icon to add a new link or edit an existing link. To remove a link, select the link and select the Remove Link icon. You can also link and remove links with the right-click menu. You must use the http:// protocol when you type or paste an address for the link.
Unless you select text or an object that has already a link, the Remove Link icon is grayed out and unavailable.
In the Open link menu, choose where to open the link, such as in a new window. You can also type an optional title for the window or frame displayed when users select the link.
Find and replace text
Select the Find icon to search for matching text and, optionally, replace it with other text.
Find text
In the pop-up window, type the text to find in the Find box.
The gear settings icon allows you to choose between three finding options: Match Case to match upper and lower case, Find whole words only and Find in selection. If the text is located, it will appear highlighted within the text box.
Select Find to locate all matches in the text, which will appear highlighted automatically, or the right upper corner X to close the window.
Replace text
In the Replace with box, type the text to replace the located text with and choose an action:
- Replace: Replace the next instance found.
- Replace All: Replace every matched instance.
You can also select the Find button to search with no replacements.