The email tool allows you to send email to other people in your course without launching a separate email program, such as Gmail, Hotmail, or Yahoo. You can send email to individual users or to groups of users.
Video: Send Email
Watch a video about sending email in Blackboard Learn
The following narrated video provides a visual and auditory representation of some of the information included on this page. For a detailed description of what is portrayed in the video, open the video on YouTube, navigate to More actions, and select Open transcript.
Video: Send Email shows how to use the Send Email tool.
How email works in Blackboard Learn
Blackboard Learn keeps no record of your email, whether you send or receive it. Any email you receive from Blackboard Learn appears in your external email inbox. Keep a copy of important messages in case you need them at a later date.
You can send email to these users:
- All Users: All users in your course
- All Groups: All groups in your course
- All Student Users: All students in your course
- All Teaching Assistant Users: All teaching assistants in your course
- All Instructor Users: All instructors in your course
- All Observer Users: All of the observers in your course
- Select Users: Select the users from a list
- Select Groups: Select groups from a list
- Single/Select Observer users: Send email to a single observer or select observers in your course
Recipients of each email won't see the email addresses of other recipients.
Get started with email
Blackboard Learn doesn't recognize email addresses and file names with spaces or special characters, such as ?, !, #, &, %, or $.
Remember to include a subject line so the email is sent successfully. If you leave the subject line blank, the message may not be delivered or may be marked as spam.
- You can find the Blackboard email tool in these areas:
- On the course menu, select Tools > Send Email.
- On the Control Panel, select Course Tools > Send Email.
- On the My Institution tab, select Tools > Send Email and select a course.
- On the Send Email page, select a link, such as All Users.
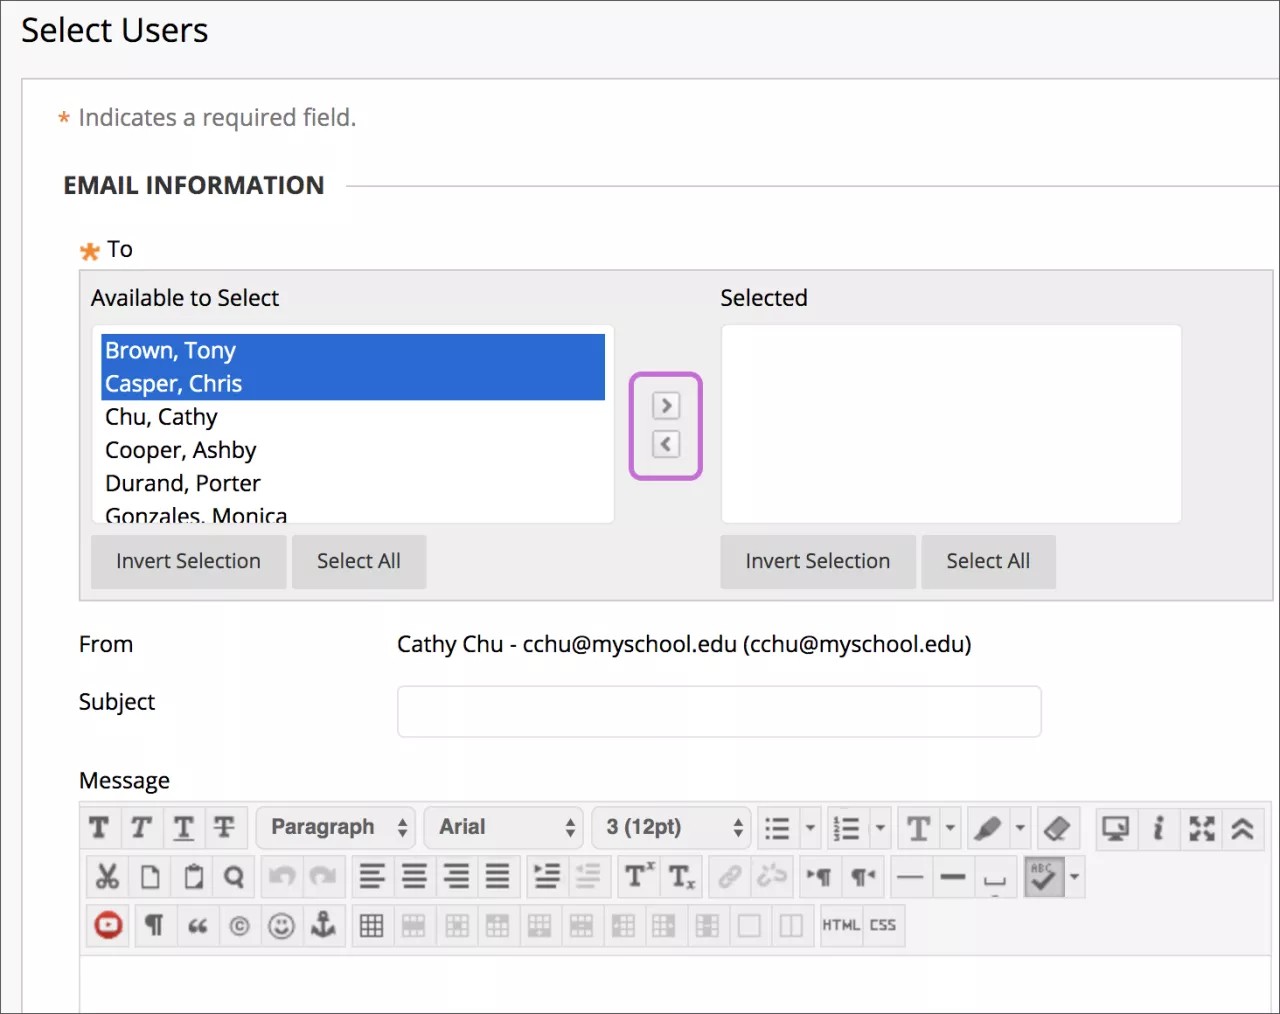
- For Select Users or Select Groups, select the recipients in the Available to Select box and select the right-pointing arrow to move them into the Selected box. Use the left-pointing arrow to move a user out of the recipient list. Select Invert Selection to select users whose names aren't highlighted, and deselect users whose names are highlighted.
To select multiple users in a list on a Windows computer, press the Shift key and select the first and last users. To select users out of sequence, press the Ctrl key and select each user needed. On a Mac, press the Command key instead of the Ctrl key. You can also use the Select All function to send an email to all users.
- Type your Subject. Your message won't be delivered without a subject.
- Type a Message.
- Select Attach a file to browse for a file from your computer. You can attach multiple files to your message.
- Select Submit.
After you send an email, a message appears at the top of the Send Email page that lists all recipients. The message isn't a confirmation that any users received the message, just that the message was sent.
Add an email link to the course menu
You can add a link to the course menu for you and your students to have instant access to the email tool. You can also customize the name of the link.
- Change Edit Mode to ON and select the plus sign above the course menu. The Add Menu Item list appears.
- Select Tool Link.
- Type a Name for the link.
- In the Type list, select Email.
- Select the Available to Users check box.
- Select Submit.
The new link appears last in the course menu list. Press and drag the arrows icon to move the link into a new position. Access the link's menu to rename, delete, or hide the link from students.
Troubleshoot
- Your email address isn't visible unless you choose to make it visible to course members. Select the arrow next to your name in the page header to open the menu > Settings > Personal Information > Set Privacy Options. On this page, you can choose the information you want course members to see.
- You can change your external email address used in your course. Select the arrow next to your name in the page header to open the menu > Settings > Personal Information > Edit Personal Information. Type your preferred email address and select Submit. Some institutions don't allow users to change their email addresses of record. To learn more, contact your institution.
- Email providers, such as Gmail, Hotmail, or Yahoo may identify email from Blackboard as junk mail, and either automatically delete it or move it to a junk mail folder. If you have problems, check your junk mail options and settings.
- To help prevent email from being abused in your course, you can control which sender options are available to students.