This information applies only to the Ultra experience.
Student Overview
Use the Student Overview as a single place to get relevant information on a student and personalize your communications with them. You can see how your students have performed over time with analytics. You can also use the message feature to quickly follow-up with a student about any of the information on the Student Overview.
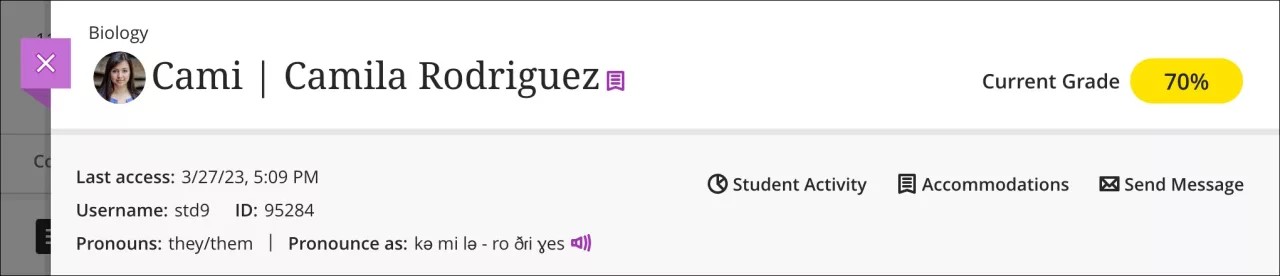
The Student Overview's header includes important information about your students. You'll find:
- Student name and surname
- Date a student last accessed your course
- Overall grade, if you've turned this feature on
- Accommodations, if you have added any for due dates or time limits
The Student Overview also has additional information, if a student has provided any:
- Additional name
- Username
- Student ID
- Pronouns
- Pronunciation description
- Name pronunciation recording
Three other features can be accessed from the Student Overview:
- Student Activity report. This provides you with an overview of how a student is interacting with your course over time. Observe how a student's engagement and performance have changed on a week-to-week basis. Visit the "Student Course Activity Data" topic for more information about the feature.
- Accommodations. You can provide due date and time limit accommodations for specific students.
- Send messages. Contact your students about their grades or progress.
Access the Student Overview
You can access the Student Overview through five different locations:
- Gradebook on the Students tab
- Roster
- Messages
- Discussions
- Table view of the Course Activity report. Visit the "Course Activity Report" topic for more information about the report.
At any access point, select a student's name to bring up the Student Overview.
Grades Tab
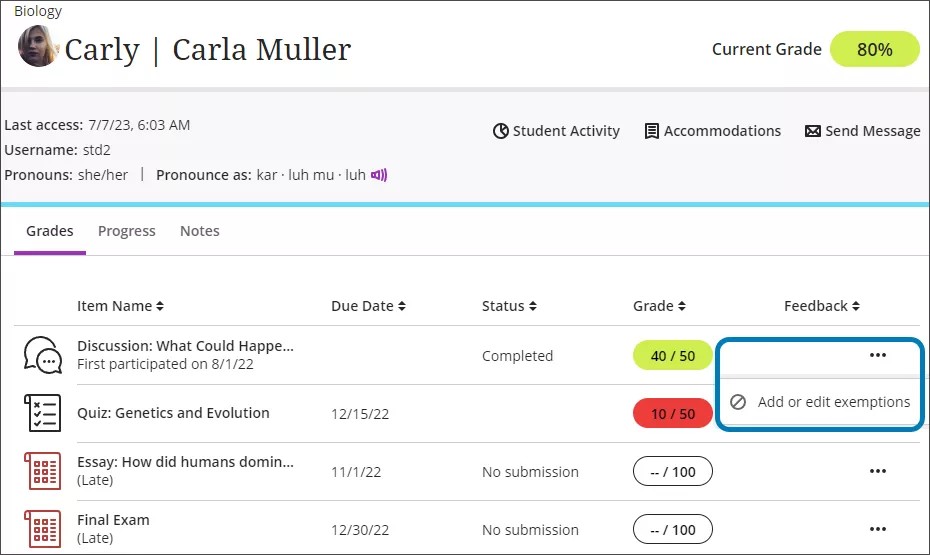
There are five columns in the Grades tab: Item Name, Due Date, Status, Grade, and Feedback. Each column can be sorted in ascending or descending order. Select the ellipsis icon to exempt any item from being graded for that specific student.
Visit the “Attempt Management” topic for more information about exemptions.
Select anywhere in the row to bring up a student's submission for any item. You can grade or review the item from this panel. Gradable items will function differently based on the type of gradable item and the settings available for that feature.
Progress Tab
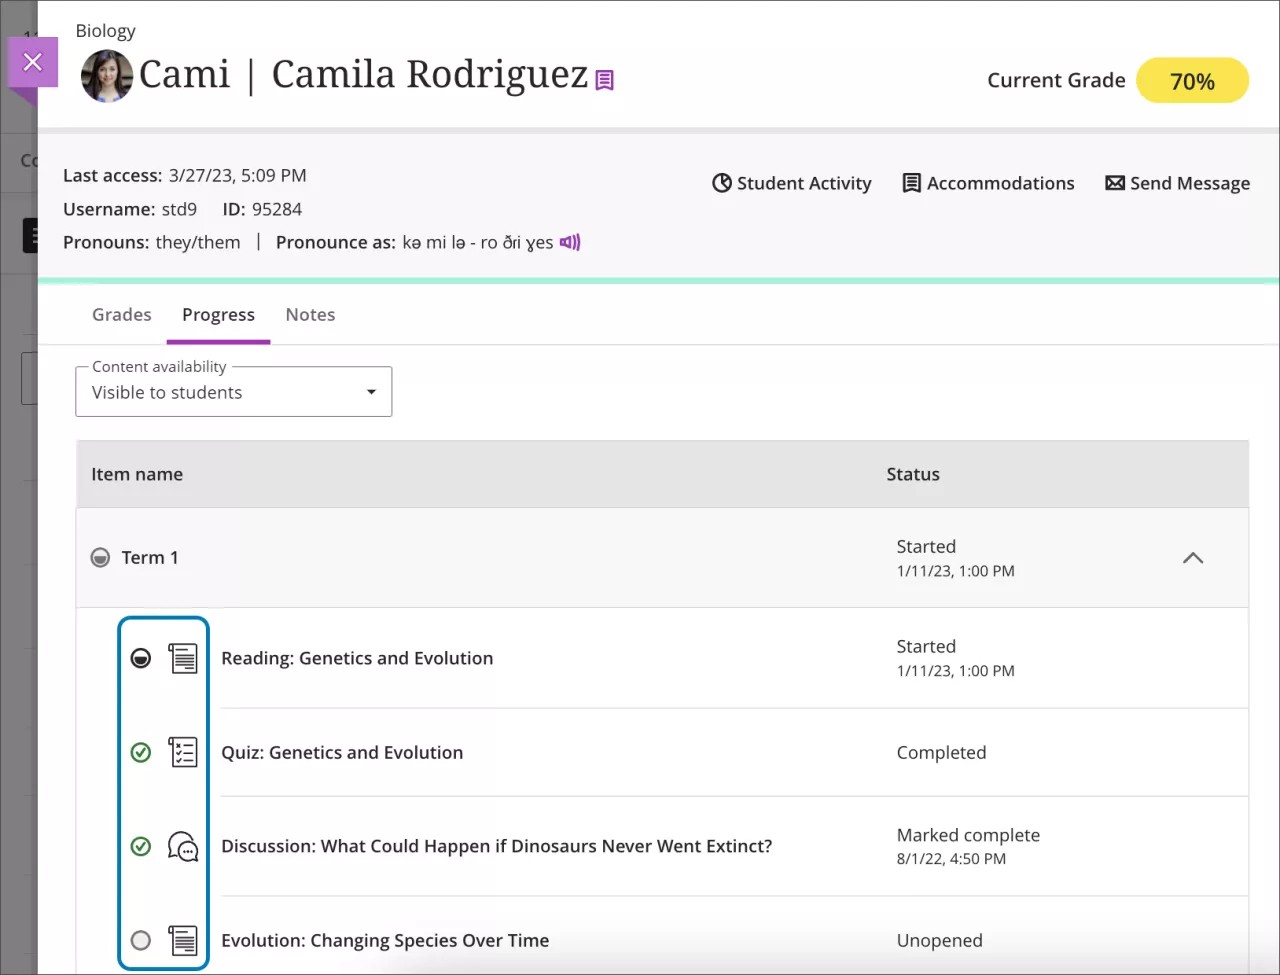
The Progress tab displays item names and statuses. By default, the tab only displays content visible to students. There are four statuses:
- Unopened, illustrated by a circle icon
- Started, illustrated by a half-filled circle icon
- Completed, illustrated by a green check mark
- Marked complete, also illustrated by a green check mark
You can change the filter to show all content by using the Content availability menu at the top of the tab and selecting All. This view includes the items that aren't visible to the student. This helps you better understand students' progress with all course content.
Visit the “Progress Tracking” topic for more information about the feature.
Notes Tab
The Notes feature allows you to leave notes for yourself and other instructors in the course about your students. Notes are private and can only be accessed by instructors, administrators, and higher roles.
Notes have many uses for informing your teaching and interaction with students:
- Track the evolution of a student over time and leave useful notes on their progress
- Write down agreements with a student, such as an extension on an assignment or a meeting
- Note students with behavioral issues or a history of academic dishonesty
- Record considerations for grading, such as a student having difficulties at home or who's taken medical leave
Select the Notes tab. You can review older notes or add a new note. The most recent notes appear at the top of the list. Select within the Add a note field to create a note.
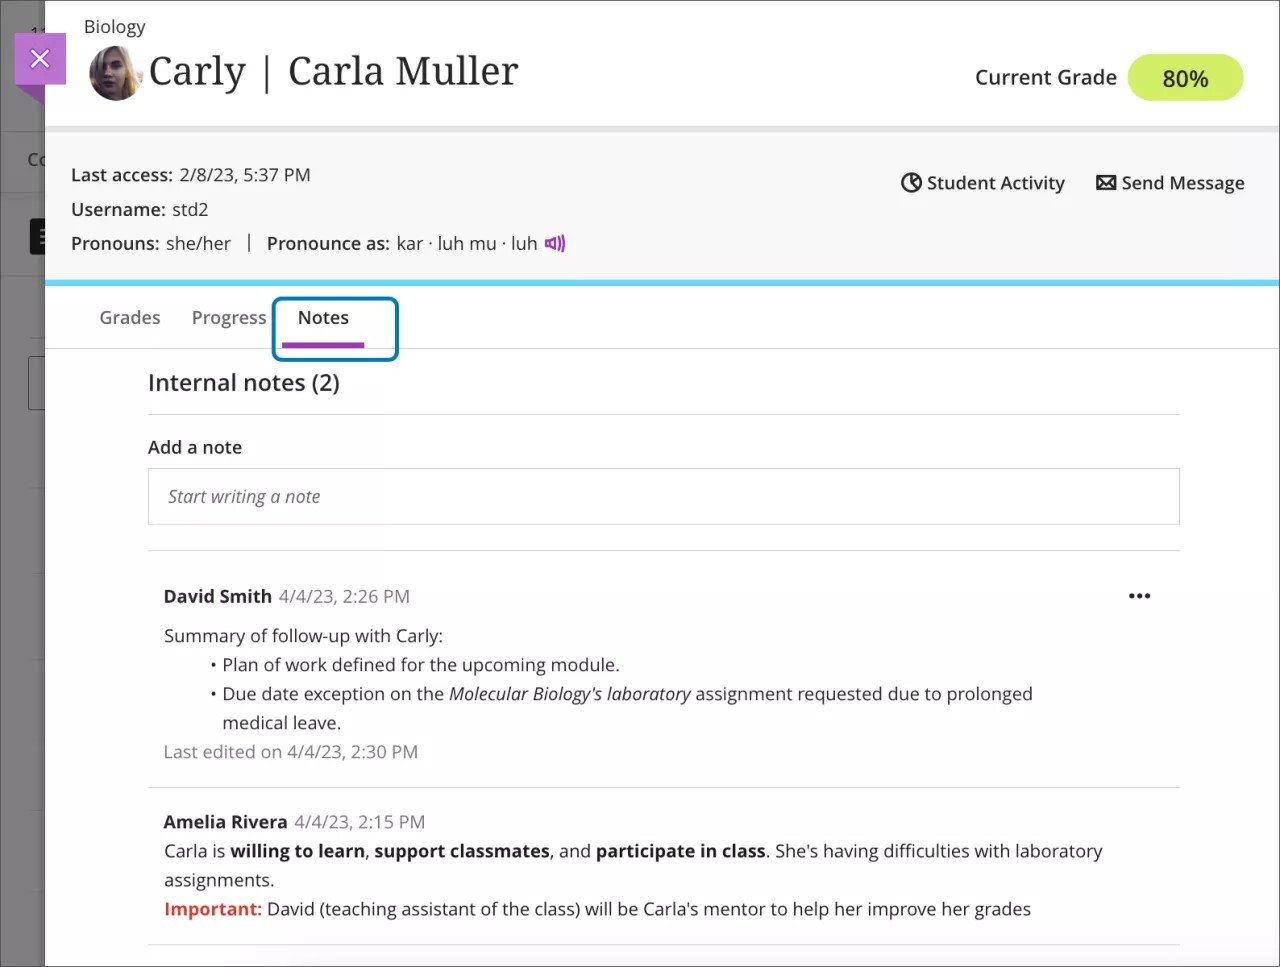
The text editor has several options for formatting. For instance, you can bold or italicize text, change colors, apply styles, and adjust font size.
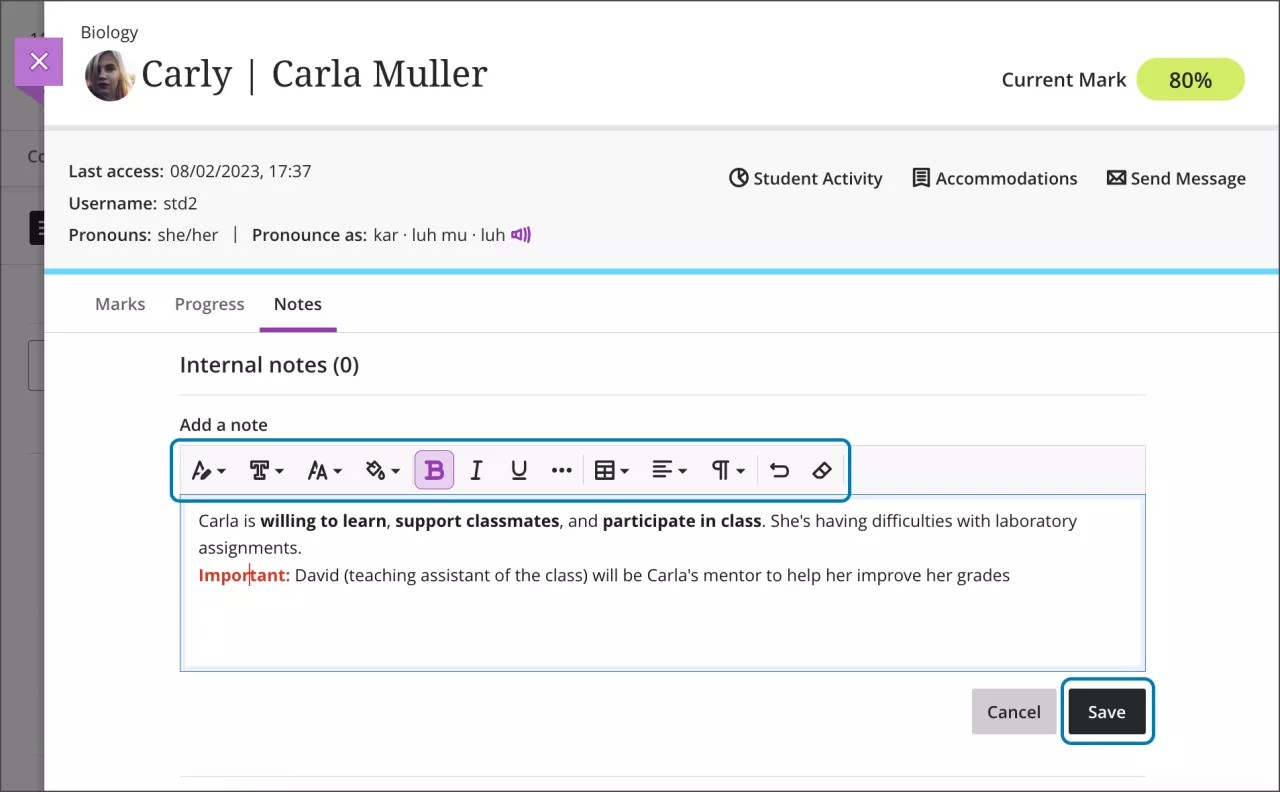
Select the Save button to save your note. Each note has the author of the note and a timestamp with its creation date. You can return to your older notes to edit or delete them by selecting the ellipsis icon. Other instructors can’t edit your notes and you can't edit the notes of other instructors. If a note is edited, there is a separate timestamp for the latest edition.

Note: Administrators can clean up the Notes tab in cases of irrelevant or outdated notes. Harmful comments can also be deleted this way.