Create Content
Your course creation starts on the Course Content page. You'll find it's easy to discover features and complete actions.
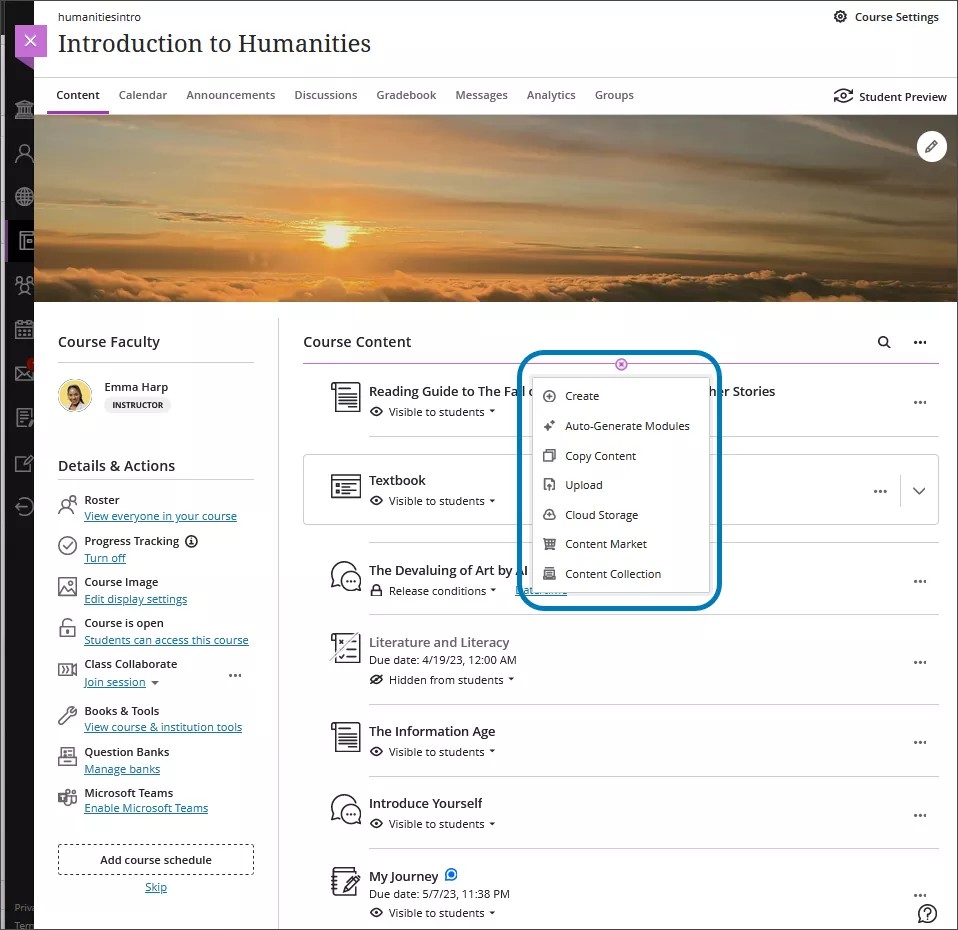
Add content
Select the plus sign wherever you want to add content. You can also expand or create a folder or learning module and add content. Create new content, upload something you already have, or add content from external sources or from another course.
Create: Add learning modules, documents, links, folders, assignments, tests, discussions, and journals. A panel opens and you can choose the content type you want to add.
Auto-Generate Modules: If your institution has turned this feature on, you can create learning modules with the help of the AI Design Assistant.
More on the AI Design Assistant
Import Content: Want to copy an entire Original course or import a course package? Open the menu on the right side above the content list and select the Import Content option.
Copy Content: Copy an entire course or select items from the courses you teach.
More on exporting and archiving your course
Upload: Browse for files on your computer. They will appear in the content list. Students select a file title to download it. Supported file types include DOC, DOCX, HTM, HTML, MP3, MPG, PDF, PPT, PPTX, XLS, XLSX, RTF, TXT, ZIP, and most image types.
Cloud Storage: Instantly connect to multiple web apps where you store files, such as OneDrive® and Google Drive™. You may choose multiple files from cloud storage to add to your Course Content page in one action. The files you add are copies. If you make a change to a file in cloud storage, you need to upload a new copy in your course.
Content Market: Discover and add content and tools from external sources. Access valuable learning materials from Blackboard's partner publishers, such as Macmillan and Cengage.
More on copying and importing content
Content Collection: Add files from your institution's shared repository. You can store and find content in personal, course, and institution folders in the Content Collection. If you stored files from other courses in the Content Collection, you'll be able to easily find and add them.
More on browsing and adding files from the Content Collection
Control what students see
Students can't access your content until you decide to show it, but you can always see it. Select an item's visibility to change it. You might show only the first week of content—and keep the rest hidden as you refine it. Have fun! Experiment! You can also create rules to release content based on date, time, or how a student performs on other items in your course. When you create these rules, you can choose whether the item is visible to students before they have access.
With your keyboard, tab to the visibility list and press Enter to open the menu. Use Alt/Option + the up and down arrows to select an option.
Organize with folders
You can create two levels of folders to organize your content. Students can navigate easier when they don't have to search for materials. Optionally, add folder descriptions to help students understand what content you've included in them. After you already have two levels of folders, you can't create a third level or upload a folder into the second-level folder.
Organize with learning modules
You can use learning modules in your course as containers for organized collections of content. Modules let students navigate from one content item to the next without distractions or extra clicks.
Reorder content easily
Point to an item to reveal its management functions. Select and drag the item to a new location in the list.
With your keyboard, you can move an item to a new location, move an item into an expanded folder, and move a folder into another expanded folder.
- Tab to an item's move icon.
- Press Enter to activate move mode.
- Use the arrow keys to choose a location.
- Press Enter to drop the item in the new location.
Edit and delete content
In an item's row, open the menu to access the Edit and Delete functions. You can make changes or delete an item from your course. If you delete a folder or learning module that has content, the content is also removed from the Course Content page.
Add goals and standards
You and your institution can use goals to measure student achievement across programs and curriculums. After you successfully upload a file to your course, you can align one or multiple goals. Students won't be able to see the goals you align with a file.
Watch a video about adding content
The following narrated video provides a visual and auditory representation of some of the information included on this page. For a detailed description of what is portrayed in the video, open the video on YouTube, navigate to More actions, and select Open transcript.
Video: Add content to the course content page explains how to add content to your course by creating new content, copying content from other courses, uploading content, or adding content from your Content Collection.