This information applies only to the Original Course View. Your institution controls which tools are available.
This information applies only to the Original experience. Your institution controls which tools are available.
Create new content for your course using OneDrive Integration
Microsoft OneDrive provides you with the ability to:
- Attach Office 365 files including Word documents, PowerPoint presentations, and Excel from the Rich Text Editor
- View and organize your personal Microsoft office files
- Create collaborations where members of your course can engage together in real-time
- Create read-only access to embedded Office 365 files in your course
Open a file from OneDrive
Your administrator needs to register the OneDrive LTI tool for Learn in the Administrator Panel, before you can use OneDrive.
Microsoft OneDrive has been integrated with your Blackboard Learn Original courses and if enabled, will allow you to add files from OneDrive to any content item using the Original course full rich text editor. These can include, but are not limited to:
- Folders
- Learning Modules
- Item
- Lesson Plan
To use OneDrive, you may need to sign into a Microsoft account to view and select files.
How to add files from OneDrive in your course
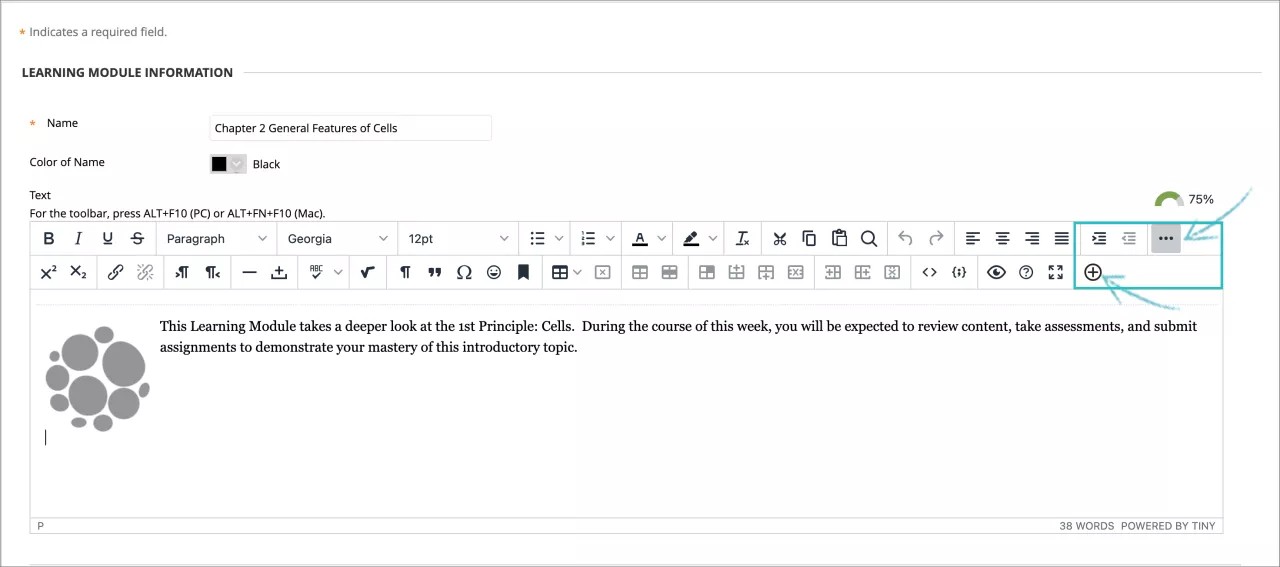
- In your Original course, access a content area from your course menu and select to build one of the items listed above. If your content is already available, select Edit the content.
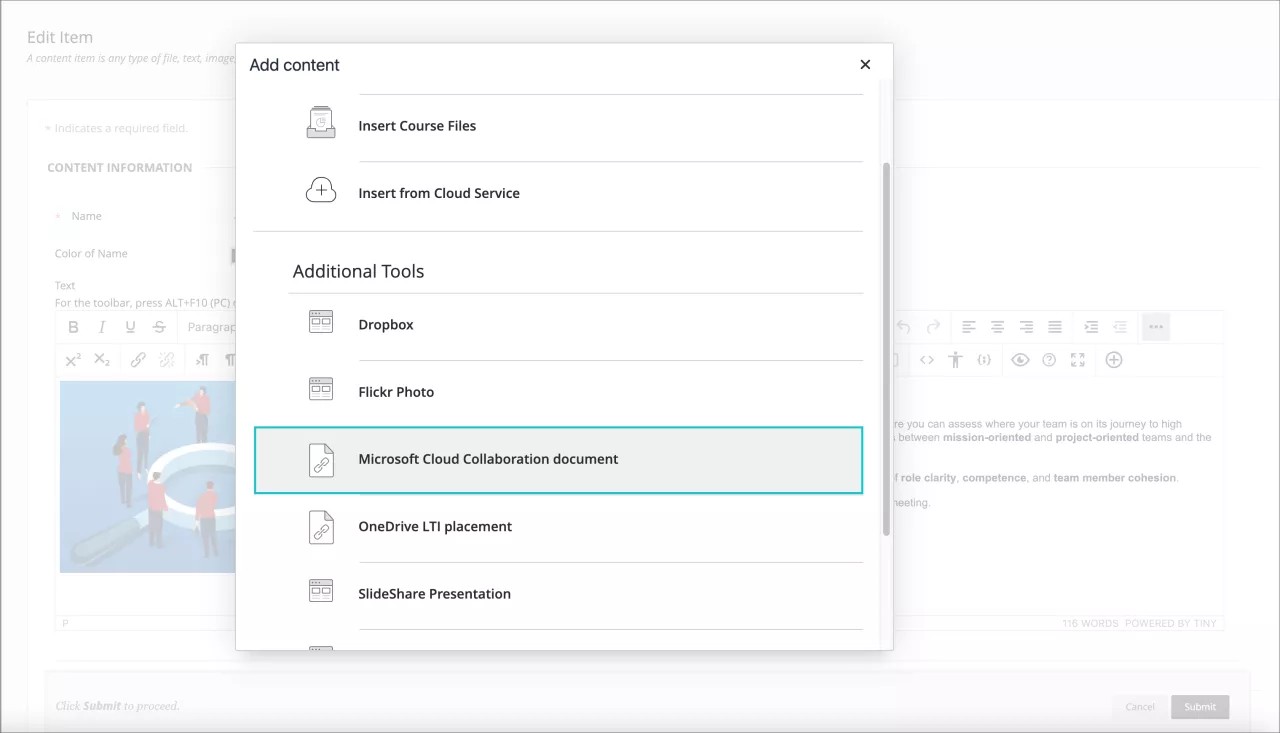
- From the Rich Text Editor displayed, ensure the additional options are displayed by selecting the three-dot icon. Select the round plus symbol to display the Add Content menu.
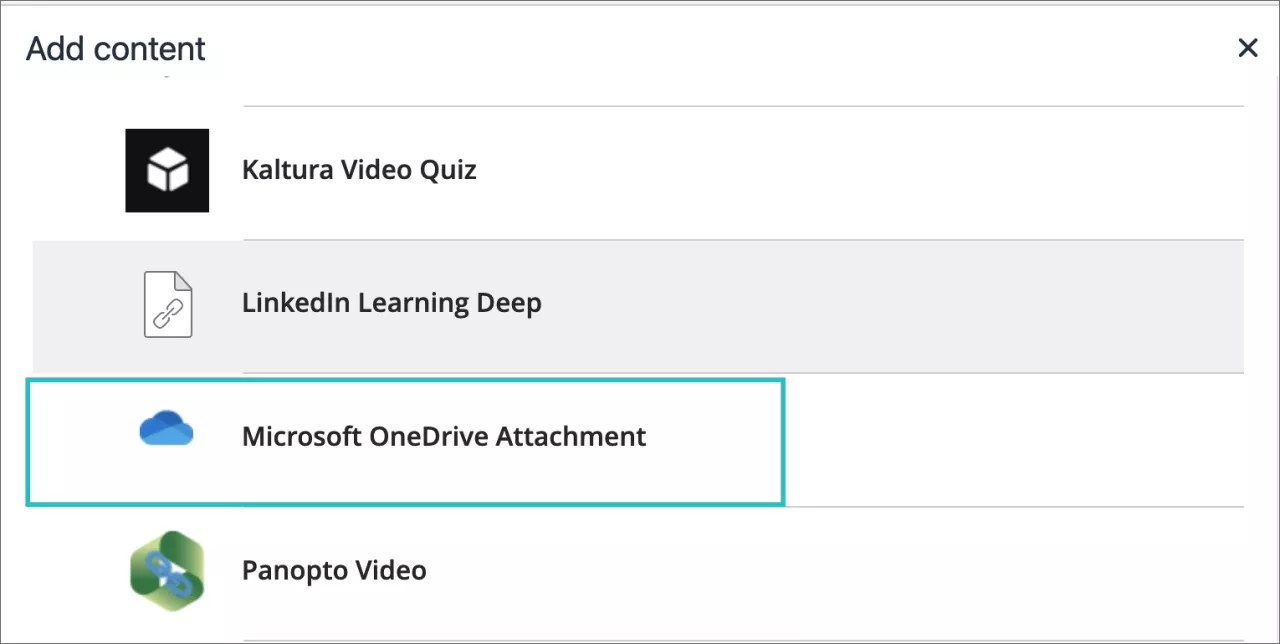
- Select Microsoft OneDrive Attachment.
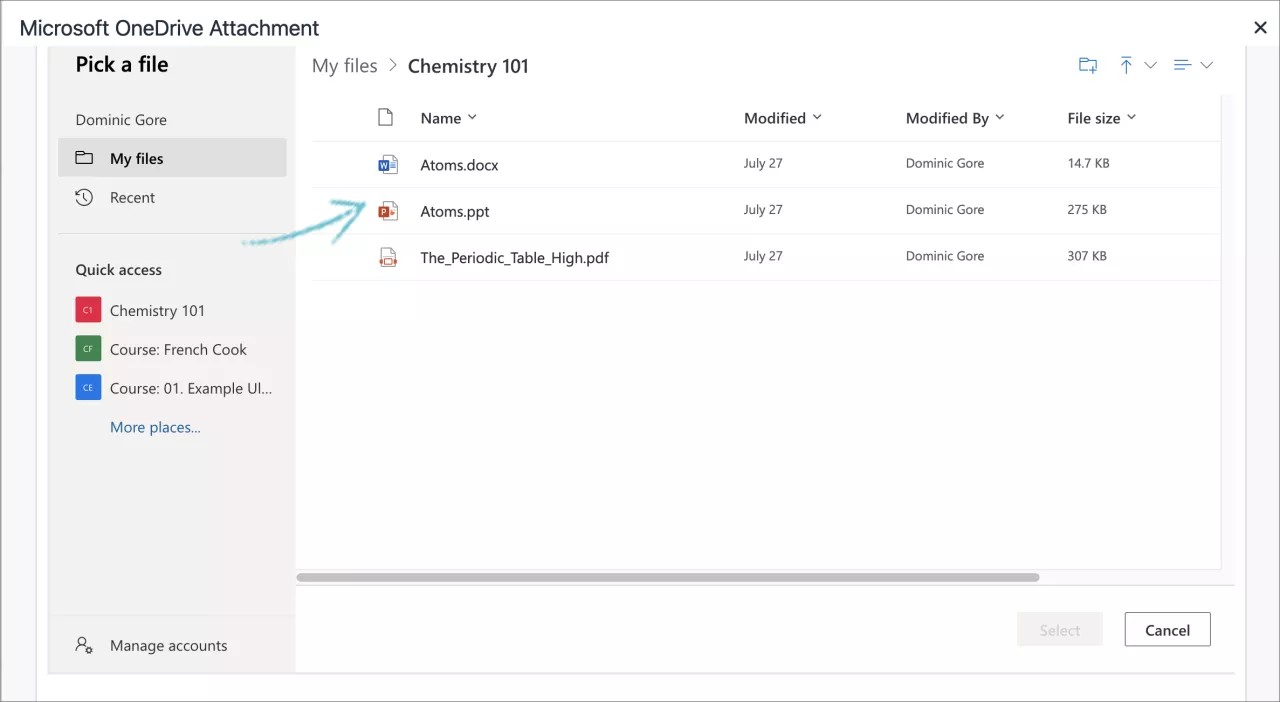
- If you haven’t signed into Microsoft, you may need to do so to continue. Use your Microsoft regular account information and follow the instructions provided.
- Once you've logged in, you'll see your OneDrive space, where you can select the file you’d like to add to your course.
- The file will appear in the Rich Text Editor. Select Submit to complete the changes on your content.
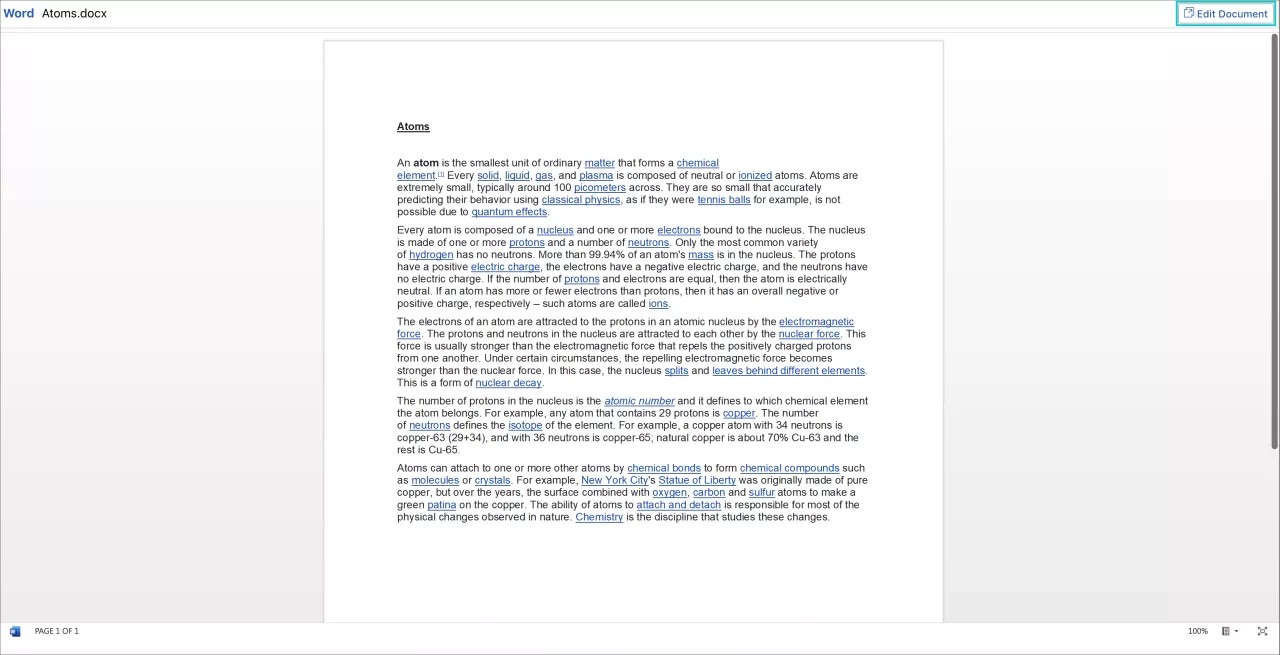
- Selecting the name of the file will open it, and will allow you to view it. Select Edit Document to edit the document live within Office 365.
The file added will be an embedded, read-only display for students.
Create a OneDrive collaborative file
Your administrator needs to register the OneDrive LTI tool for Learn in the Administrator Panel, before you can use OneDrive.
Collaborative documents provide students opportunities to engage with one another as well as with the course content. As an instructor you can create a Microsoft OneDrive collaborative document from within Learn Original courses.
The supported file types for new documents are:
- Microsoft Word
- Microsoft Excel
- Microsoft PowerPoint
How to create a OneDrive collaborative file
- In your Original course, access a content area from your course menu and select Create to create one of the items listed above. If your content is already available, select Edit to modify the content.
- From the Rich Text Editor displayed, ensure the additional options are displayed by selecting the three-dot icon. Select the round plus symbol to display the Add Content menu.
- Select Create a collaborative OneDrive document
- From the panel displayed, you can choose to Create a brand new collaborative file choosing from Word, PowerPoint or Excel, or you can choose to Select Existing Document to browse your files.
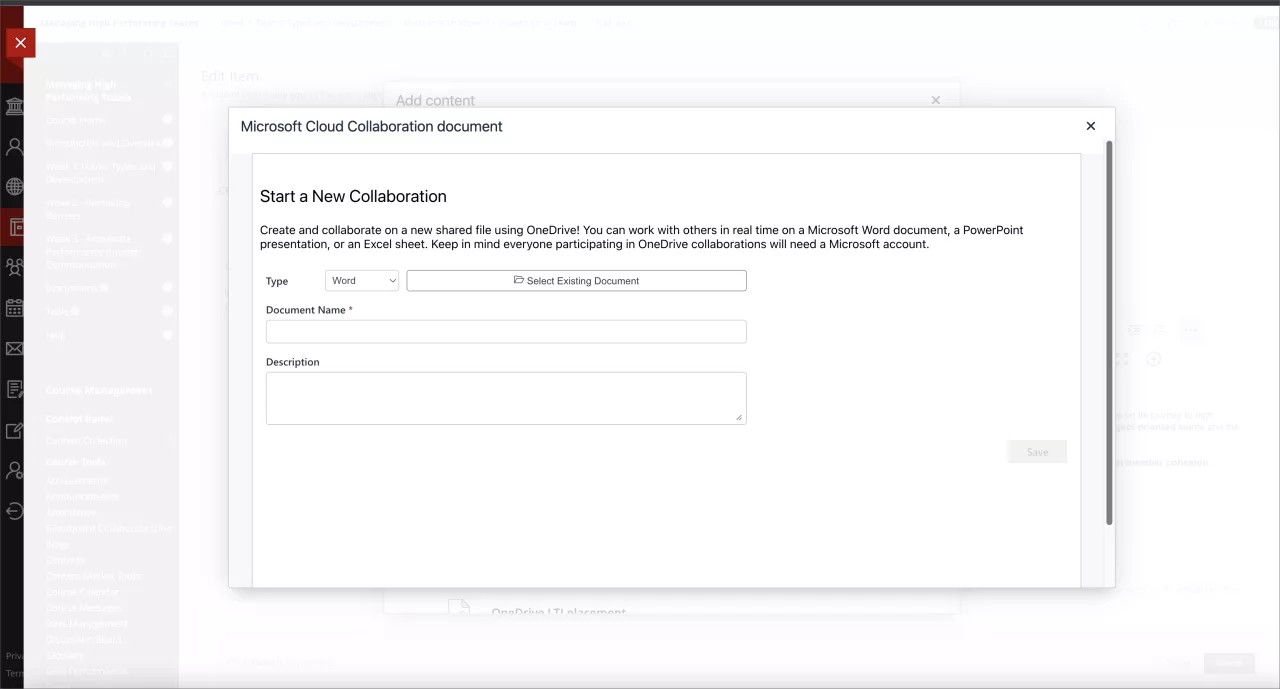
- Select Save once the process is complete.
- The file will appear in the Rich Text Editor. Select Submit to complete the changes on your content.
- Select the name of the file to open it, and to view it. Selecting Edit Document will launch Office 365 and allow you to edit in real-time.
- Students will have permissions to view and edit this file as well. They can select "Edit Document" to begin collaborating on the document.