This information applies only to the Original Course View. Your institution controls which tools are available.
You can grade participation in blogs for individuals and groups. You can grade the quality of the discussion, as well as the number of entries and comments that are made by an individual or a course group.
How blog grades behave
When you enable grading for a blog, a column is created automatically in the Grade Center. As students submit blogs, icons begin to appear in the Grade Center, on the blog topic page, and on the Needs Grading page:
- The Needs Grading icon appears when student activity has met the threshold you chose in the blog settings. For example, if you choose to be notified after four students submit their work, this icon appears after at least four students submit their blogs.
- The In Progress icon appears when these conditions occur:
- Student activity doesn't meet the minimum number you set.
- You didn't select the Show participants in needs grading status check box in the blog settings.
You can grade a blog entry in the Grade Center, on the Needs Grading page, or by going to Control Panel > Course Tools > Blogs within a course.
Edit the column information in the Grade Center to determine whether or not students can view their grades and feedback in My Grades.
More on grade columns and items in the Grade Center
As you grade students' blog entries, the grades show immediately in the Grade Center. When you edit an assigned grade from the blog topic page, the Grade Center is updated.
Change a topic from graded to ungraded
You can't change a graded blog topic to ungraded. You need to delete the graded blog topic from the Blogs listing page and the Grade Center and create a new ungraded topic.
Alternatively, to retain entries, set the blog's Grade Center column to not be included in calculations. In essence, the blog continues to be considered graded by the Grade Center, but any results or grades assigned are ignored in other calculations.
Grade individual blog entries
Begin grading blogs from the Grade Center, the Needs Grading page, and the Course Tools section in the Control Panel.
- On the blog topic page, select the blog entry or entries to grade. The user's blog entry or entries open in the content frame.
- Type a point total in the Grade box. If you associated a rubric for this graded blog, expand and complete the rubric.
- To edit an existing grade, select the Grade box and change the grade.
- You can also include feedback for the student in the Feedback to Learner box. Select the editor icon represented by the letter A to open the pop-up editor window. You can embed an audio/video recording of your feedback in the editor as you grade blogs.
- Select Add Notes to leave notes that appear only to you and the grader role.
- Select Submit to add the grade, feedback, and grading notes to the Grade Center.
Grade a group blog
On the blog topic page, you can read all the entries for a group blog and add one grade for all members. If you haven't assigned a group member's grade, the Needs Grading icon appears in the Grade Center, on the blog topic page in the All Group Members list, and the group blog is listed on the Needs Grading page.
On the group blog page, the grading sidebar appears, listing all group members.
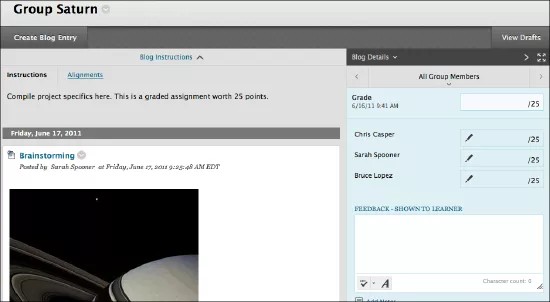
When you add a grade for a group blog, the grade is automatically given to all group members. All members are assigned a grade, regardless if a member didn't contribute, although you can change this grade. Students can view their group blog grades in My Grades and in the group blog by selecting their names in the All Group Members menu.
Give a different grade to group members
You can assign an individual group member a different grade than the group. If you change a group member's grade and then assign a new grade to the group, the new group grade doesn't affect the individual's grade. Students only see their own grades, not what each of their group members earned.
In the grading sidebar, select the pencil icon to change the group grade for a member. Type a new grade and select the check mark icon to save it. This grade becomes an override grade.
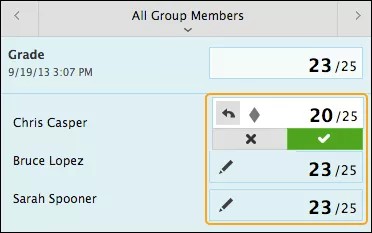
The group grade and the individual group member's edited grade appear in the Grade Center. Grayed out cells appear in the group blog column for course members who aren't part of the group.
Change a group member's grade back
You can revert a member's edited grade to the original group grade that all group members received.
In the grading sidebar, select the pencil icon for the member with the edited grade. Select the left-pointing arrow to change the grade to the original group grade. The override icon is removed and the change appears in the Grade Center.