This information applies only to the Original Course View. Your institution controls which tools are available.
Your course, your style.
Every instructor has a different style of teaching. In course structures, you can set up your course based to your teaching style.
About course structures
Even if you're new to online instruction, course structures enable you to create a course in a short amount of time. Use a course structure's course menu links, instructions, and content examples to jump-start your course organization and create a meaningful learning experience for students.
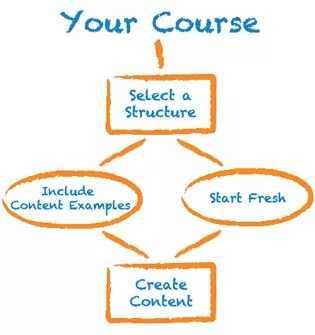
After you complete three basic steps, your course will be ready for students.
Select a course structure
Before you begin, you can export or archive your course before you add a course structure to ensure you have an original version.
More on exporting and archiving courses
A selected course structure's content is added to your course and doesn't replace existing menu items and content. You can delete unnecessary items.
Choose a course structure on the Teaching Style page.
If the Select Course Structure section isn't visible, your institution has disabled it.
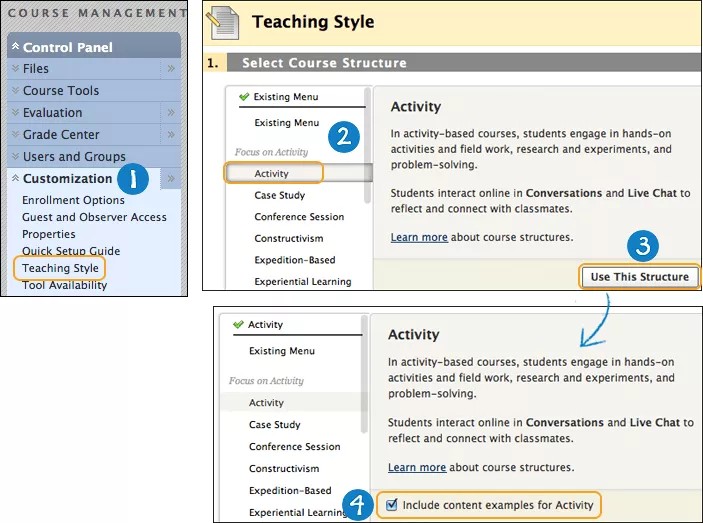
- On the Control Panel, expand the Customization section and select Teaching Style.
- On the Teaching Style page, in the Select Course Structure section, the left column displays all course structures in a list. Select a course structure to browse its description and preview its course menu. In the preview, you can select a course menu link to learn the purpose of that item in the course structure.
- Choose a course structure and select Use This Structure. Your chosen course structure is indicated by a green check mark at the top of the course structure selection tool.
To revert, select Existing Menu in the course structures' list and select Use This Structure. No changes are made to your course.
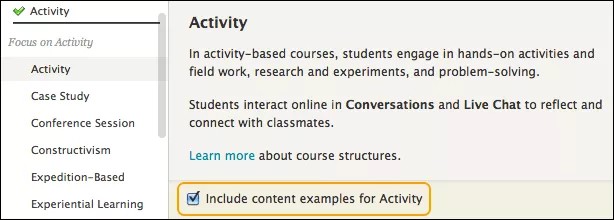
- After you choose a course structure, the Include content examples check box is revealed. Select the check box to add content items and instructions as well as the course structure's menu links. If you don't include content examples, only menu links are added to your course.
- Select Submit to import the course structure and optional content examples to your course. Select Cancel to exit without making changes to your course.
Or, choose a course structure in the pop-up Quick Setup Guide. If your institution has enabled it, the pop-up window appears each time you enter your course until you disable it at the bottom of the window. You can also access the pop-up window using these steps:
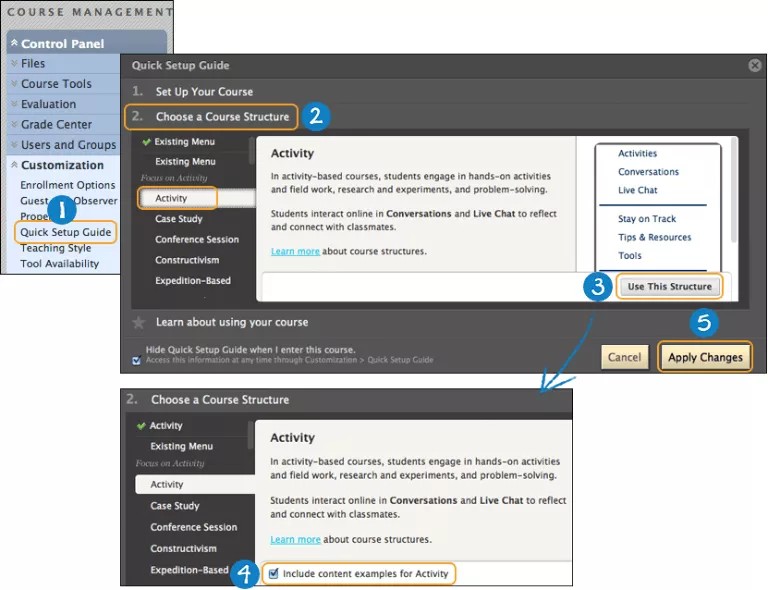
- On the Control Panel, expand the Customization section and select Quick Setup Guide.
- Expand the Choose a Course Structure section. The left column displays all course structures in a list. Select a course structure to browse its description and preview its course menu. In the preview, you can select a course menu link to learn the purpose of that item in the course structure.
If the Choose a Course Structure section isn't visible, your institution has disabled it.
- Choose a course structure and select Use This Structure. Your chosen course structure is indicated by a green check mark at the top of the course structure selection tool.
To revert, select Existing Menu in the course structures list and select Use This Structure. No changes are made to your course.
- After choosing a course structure, the Include content examples check box is revealed. Select the check box to add content items and instructions as well as the course structure's menu links. If you don't include content examples, only menu links are added to your course.
- Select Apply Changes to import the course structure and optional content examples to your course. Select Cancel to exit without making changes to your course.
If you browse and choose a different course structure from the list after selecting Use this Structure and opt to Include content example, the Include content examples for phrase doesn't update until a new course structure is applied.
Add only one structure to a course. Adding more than one course structure in the same course can result in duplicate menu items and content. To prevent this, create or request an empty course to experiment with additional course structures.
More on selecting a course structure
Include content examples -OR- start fresh
Including a course structure's content examples populates your course with items appropriate to the course structure type. The content examples are intended to be edited for your own use and are designed to inspire both experienced and novice Blackboard Learn instructors.
| Include Sample Contents | Content Included |
|---|---|
| Yes | If you decide to include content examples, your course will contain:
Users who are familiar with Blackboard Learn can include content examples to see samples of course material and explore new tools and features. When you add a course structure to your course, a folder named "sample_content" is added to your course's storage repository—Course Files or the Content Collection. The folder contains the files used in the course structure's examples. If you already have folders in Course Files or the Content Collection, the "sample_content" folder appears in an "ImportedContent" folder. If you add multiple course structures to the same course, additional "ImportedContent" folders appear. |
| No | If you have experience using the features in Blackboard Learn and are comfortable building different types of material in your course, you can exclude content examples.
If you don't include content examples, the course structure's course menu links are added but provide empty areas where you can create content. |
If you want to include the course structure's content examples, select the Include content examples check box. If you have content in your course, the course structure's content appears also.
Create content
After you choose a course structure, you can customize your course. The next list provides essential tasks for preparing your course for students.
Change Edit Mode to ON to reveal editing features.
Organize the course menu
You can rename, reorder, delete, hide, and add course menu links as needed. Deleting a content area link from the course menu is a quick way to delete an entire area as well as the items within it. However, the content area and all items within it are permanently deleted. This action is final. If you're unsure, hide the content area instead.
If a tool link on the course menu doesn't work, the tool isn't enabled. You can delete the link or ask your institution to enable it.
If you did not include content examples, the course structure's course menu links provide empty areas where you can create content.
Create content items, tool links, and files
After your course menu is organized, you can upload files from your computer, edit existing content, and create new content and tool links. Using a wide variety of content types and tools provides a rich, interactive learning experience for your students.
More on creating content in a course area
Edit, move, copy, and delete content
When you add a course structure with content examples to your existing course, the content examples appear in addition to the existing content and are unavailable to students. You can edit, move, copy, or delete any of the content.
As you're building your course, if you're still developing some content or don't want students to see it, make it unavailable.
More on managing and editing course areas and content
Preview your course as a student
As an instructor, you want to be confident that your course is well-designed and functions as intended—before your students see it. Use student preview to review the course content and validate the course behaviors, such as those that control the availability of course content or require a particular interaction from the student to be triggered.
Course structures FAQs
This collection of frequently asked questions provides answers to common questions about course structures. It also provides links to more detailed information available in Blackboard Help.
Should I include content examples?
Content examples include pedagogical information, instructions, and course items. Even if you have experience working in Blackboard Learn, the pedagogical information and content examples can give you ideas about tools or new approaches.
Content examples are unavailable to students, and you can edit, move, copy, or delete them.
How do I know what students see or don't see in my course?
As an instructor, you want to be confident that your course is well designed and functions as intended—before your students see it. Use student preview to review the course content and validate the course behaviors, such as those that control the availability of course content or require a particular interaction from the student to be triggered.
What if I have some online content prepared already?
Course structures are added to your course and don't replace your existing content. Include content examples when you add a structure to your course and discover new ways to present the content you've already developed.
How do I limit the number of tools available to my students?
You can control which tools appear to students when they access the Tools page. For example, if you don't intend to use the course messages tool, make it unavailable. No one can see it or access it, including you, until it's available again. If a tool is unavailable, existing content isn't deleted. After the tool is available again, the content becomes available.
If you want to determine which tools are available to students in your course, use these steps:
- On the Control Panel, expand the Customization section and select Tool Availability.
- On the Tool Availability page, make the availability adjustments required.
- To make a tool available, select the tool's check box.
- To make a tool unavailable, clear the tool's check box.
- Select Submit.
If no selection check box appears for a tool, it's been turned off by your institution. Tools with a dash ( - ) in a column don't have availability settings in the system that can be changed.
How do I copy or move content items?
You can copy and move content items to rearrange your course material. For example, if a content area contains a large number of items, move them into folders to help users navigate.
Some content items have copy and move restrictions. For example, you can copy or move a course link, but only to another area within the same course. You can't copy assignments, tests, and surveys, but you can move them within the same course.
- Copying content doesn't delete it from the original location in your course.
- Moving content removes it from its original location in your course.
For items that can't be copied, the Copy option doesn't appear in the item's menu.
If a course area contains items that can't be moved to another course, such as a test, the option to move it to another course doesn't appear on the Move page.
- Change Edit Mode to ON and access a content area or folder that contains the item to copy or move.
- Access the item's contextual menu and select Copy or Move. If Copy or Move isn't available for an item, it doesn't appear in the menu.
- On the Copy page or Move page, select the Destination Course from the menu. The default setting is the current course. Only courses where an instructor has a role permitting content copying appear in the list. For items that can't be moved out of the current course, the Destination Course is already listed as the current course and the menu doesn't appear.
- Select Browse to choose the Destination Folder.
- Select Submit.
What if I have areas of my course that are "under construction" and not ready for students?
Planning is one of the most important aspects of developing your course. Develop an outline of what you want to include in your course. Then, build your content, test it, and get feedback on your instructional methods.
Sometimes, you can't have all of your content prepared and tested by the first day of class. Consider preparing and testing content for the first few weeks of class and making only that content available to students. Hide all content areas that you're still working on. You can develop and test the next portion of content as students are working on the material you have made available.