You can create content that combines a variety of materials to view together, such as text, multimedia, and attachments.
You can create a content item to present a combination of content that serves as a handout or document with visual aspects. You can create content items that are as simple as one line of text or include many elements.
For example, in one content item, you can include introductory text for a lesson, an image, a table of data, and links to web resources. The materials are all presented together in the content list. The longer your content item is, the more your students have to scroll to see all the other materials in the content area.
If you don't want longer content items to appear in the content list, you can create blank pages instead. You create a blank page in the same way you create a content item. However, students select the blank page link in the content area to view the materials. Blank pages save screen real estate and reduce the amount of scrolling.
Create a content item
- In a content area, learning module, lesson plan, or folder, select Build Content to access the menu and select Item.
Be sure Edit Mode is ON so you can access all of the instructor's options.

- Type a name and an optional description or instructions. You can use the options in the editor to format text, attach files, embed multimedia, and insert equations, links, and tables. You have creative control over how your content appears and the flexibility to change the order and appearance when you want.
- In the Attachments section, select Browse My Computer to upload a file from your computer. The file is saved in the top-level folder in your course's file repository: Course Files or the Content Collection. You can also attach a file from the repository.
-OR-
Drag files from your computer to the "hot spot" in the Attach Files area. If your browser allows, you can also drag a folder of files. The files will upload individually. If the browser doesn't allow you to submit your item after you upload a folder, select Do not attach in the folder's row to remove it. You can drag the files individually and submit again.
You won't be able to drag files to upload if your institution uses an older version of Blackboard Learn.
You can use the file name or provide another name for the file.
- Select the appropriate options for availability, tracking, and display dates. Display dates don't affect an item's availability, only when it appears.
After you submit, the new content item appears last in the content list.
You can email a link to a file you add to a content item. In the Content Collection or Course Files, access the file's menu and select 360° View. Copy the permanent URL address and paste it in an email.
Choose file download location
In most browsers, you can select where the files that you open in courses are downloaded. For example, in Chrome, navigate to Settings > Advanced > Downloads. You can select the location for file downloads and choose if you want the browser to ask each time. In Safari, you have the same capabilities. Navigate to Preferences > General > File download location. You can perform an internet search to learn about file download choices in other browsers.
Edit and move content items
You can change the item's content at any time. Open the item's menu and select Edit.
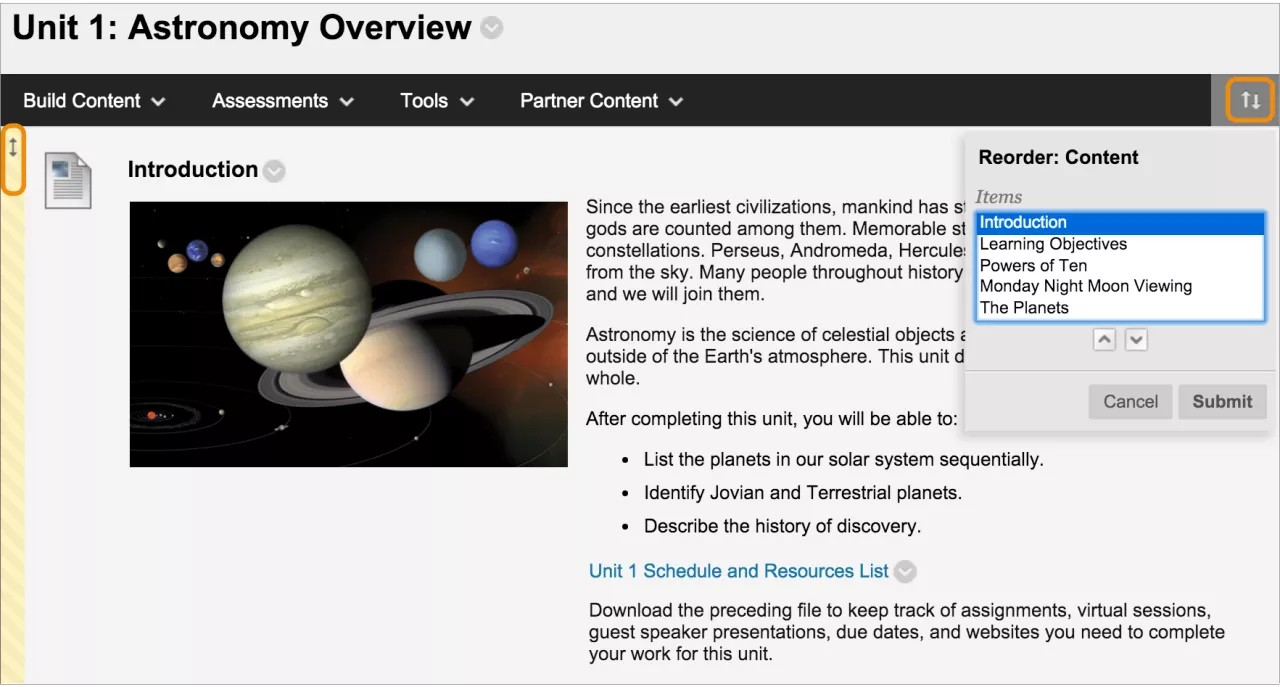
You can change where the item appears in the list with the drag-and-drop function or the keyboard accessible reordering tool.
What happens to content items if I preview the Ultra Course View?
Your content items become documents in the Ultra Course View. You may see some loss of formatting to text and files that you added in the editor. Learn more about Ultra documents in the next sections.
More on previewing the Ultra Course View