This information applies only to the Original Course View. Your institution controls which tools are available.
Provide students with the information they need to understand the intent of the lesson.
A lesson plan is a container for content that can hold lesson profiles, instructional objectives, and the content items students need to complete a lesson.
You can add information for students to view alongside the content to help them understand the objectives and intended result of their learning.
For example, you can include how their knowledge will be measured, the needed materials, and what they should have learned after the instruction. The more information students have at the start of the lesson, the more prepared they are for the content ahead.
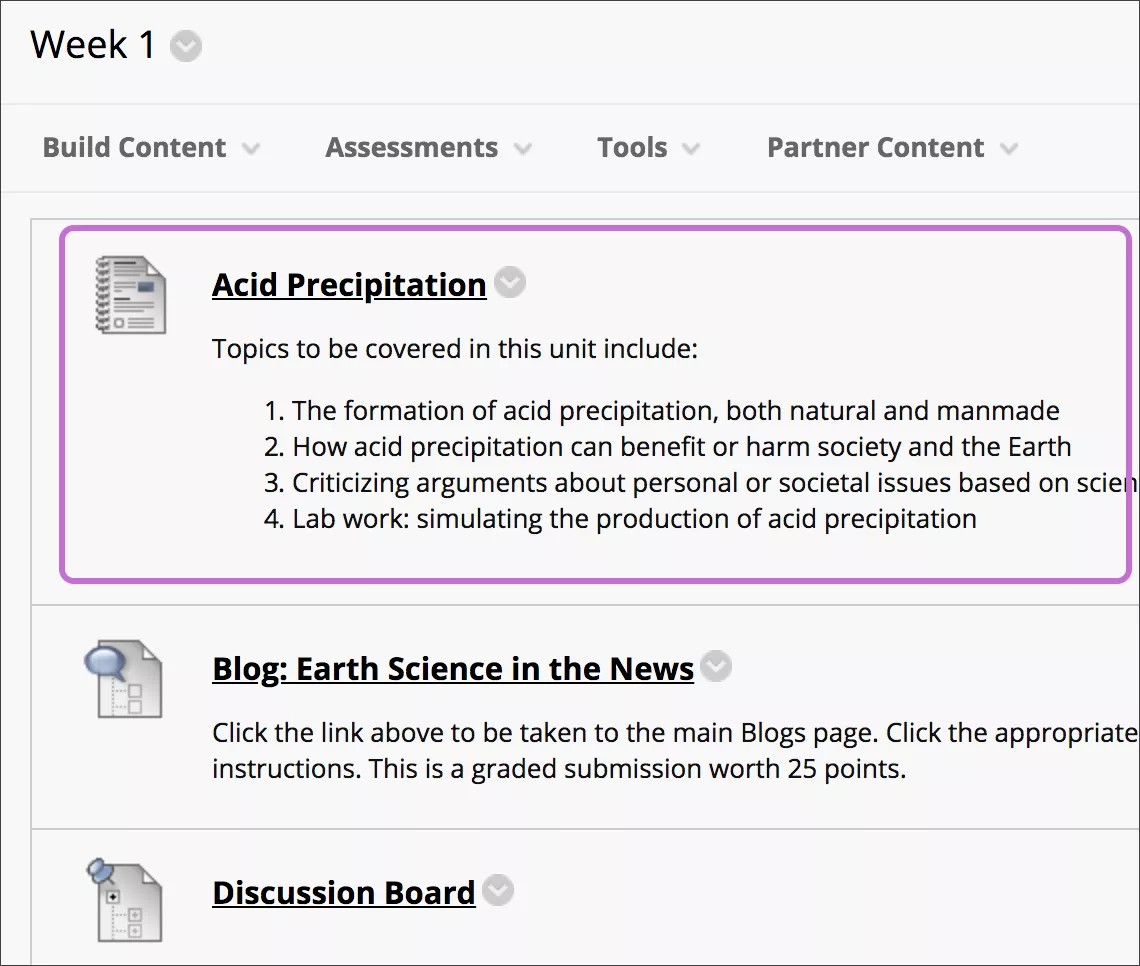
How do lesson plans appear to students in a content area?
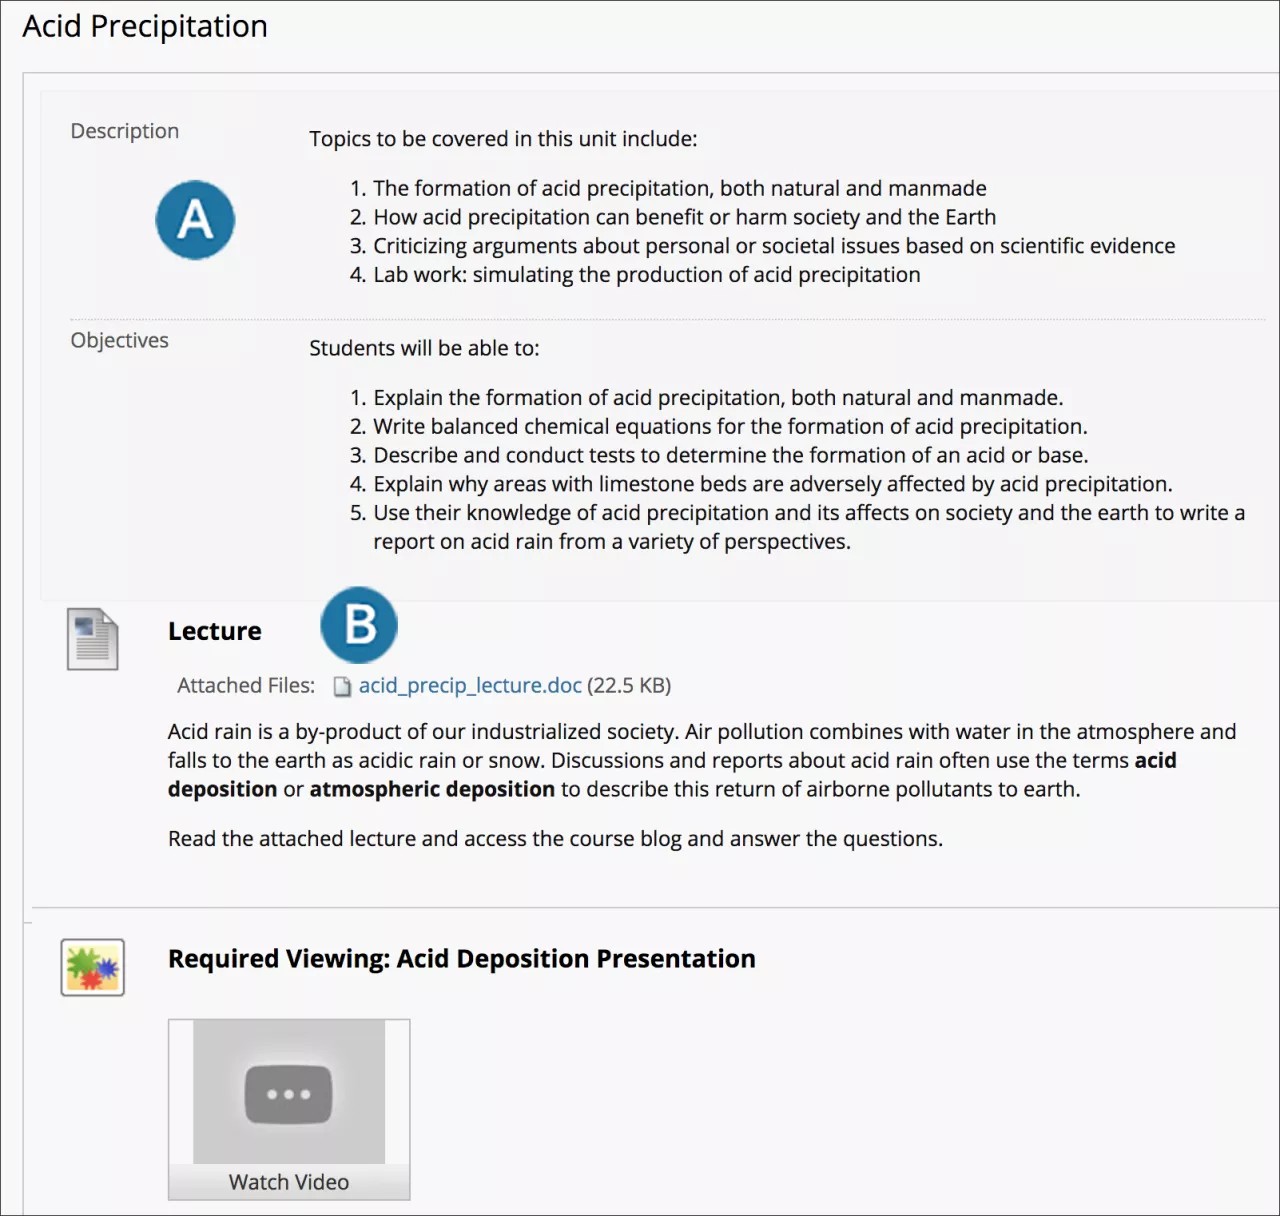
- The lesson profile and instructional objectives appear in the top portion of the page.
- Content appears in the lower portion of the page.
Create a lesson plan
You can make lesson plans available to students or use them solely as a planning tool. The lesson plan tool is on by default, but your institution controls its availability.
Be sure Edit Mode is ON so that you can access all of the instructor's functions.
Typically, you create lesson plans in a content area, but you can also create them in folders. Select Build Content to access the menu and select Lesson Plan. Type a name, optional description, and select the appropriate options for availability, tracking, and display dates. Display dates don't affect a lesson plan's availability, only when it appears.
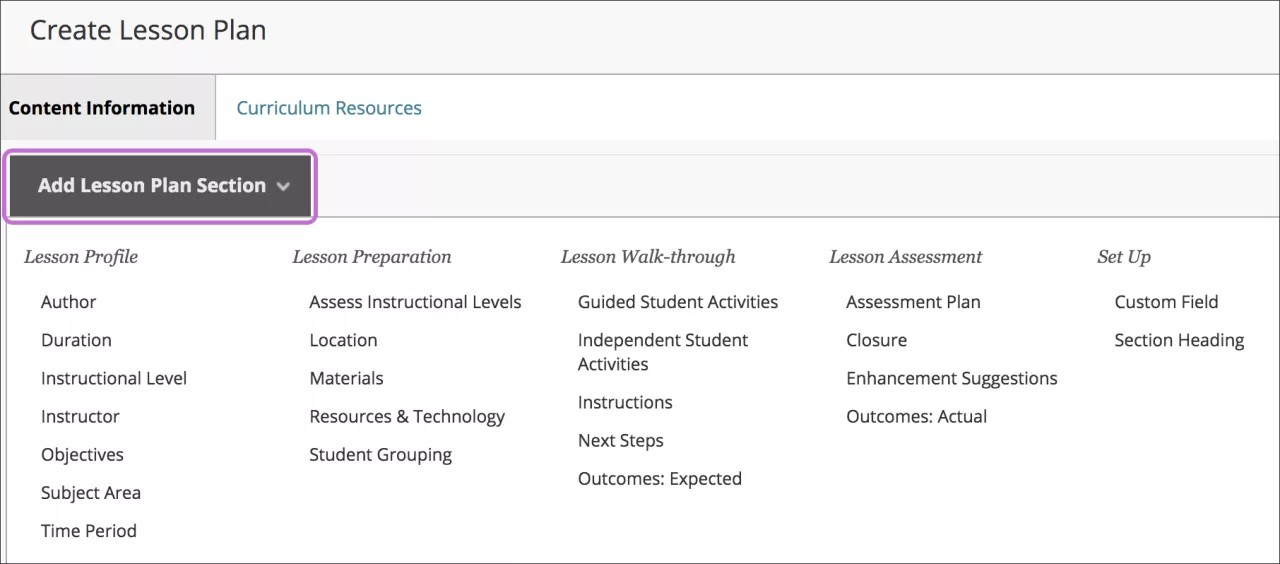
You create lesson plans in two steps based on the two tabs that appear on the Create Lesson Plan page.

Content Information: Add general information about yourself and the objectives. This information appears at the top of the lesson plan in a gray box when students access the lesson plan.
Curriculum Resources: Add content items. You can create all content types in a lesson plan just as you can in a content area, learning module, or folder. You can add content items, file attachments, links to websites, tests, assignments, and multimedia.
Edit default elements
After you type a name and optional description, you can add information for the default elements: Instructional Level, Instructor, Objectives, and Subject Area.
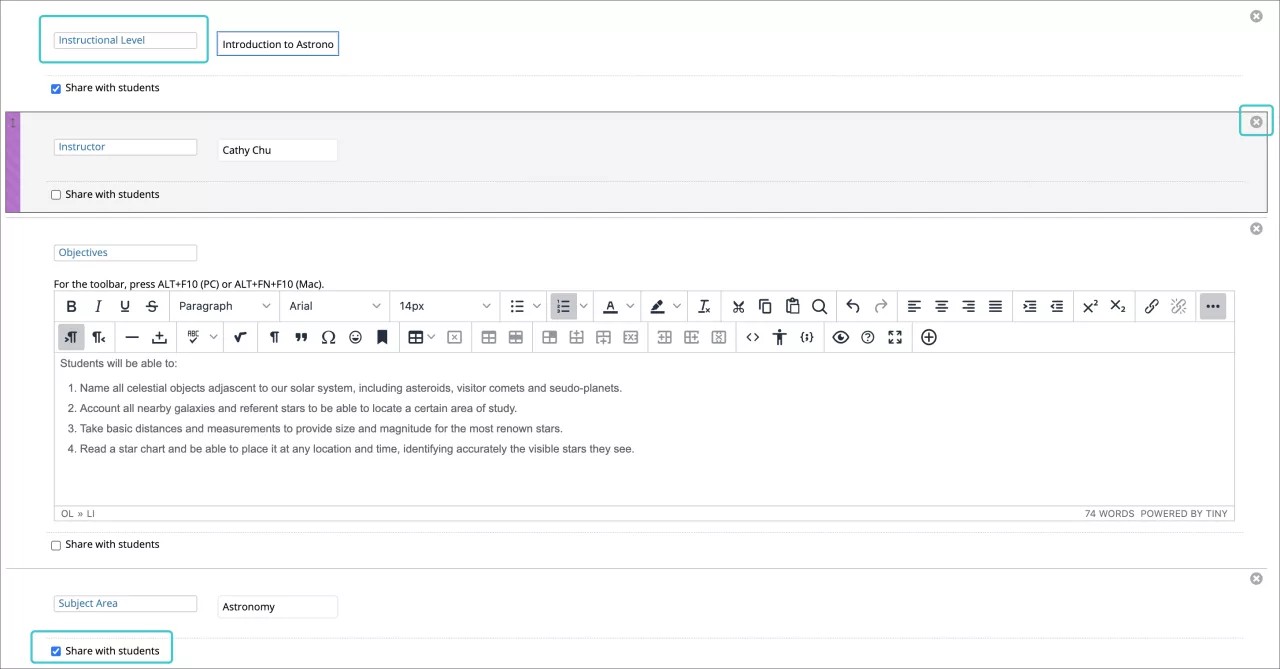
Select an element's title to edit it. Select the X to delete an element. You can drag an element to a new location.
Select the check box for Share with students for each element that you want to appear in the lesson plan when students view it. If you don't add information to a default element, it doesn't appear in the lesson plan and doesn't require deletion. Clear the check box next to Share with students for any information that is only for you.
Add new elements
You can add new elements that describe your lesson. On the Content Information tab, select Add Lesson Plan Section to access the menu and select an element. The new element is added to the bottom of the list on the Create Lesson Plan page. You can drag the element to a new location.
Select Save and Exit to leave the lesson plan. You can edit the lesson plan later to create content items.
-OR-
Select Save and Continue to display the Curriculum Resources tab and create content now.
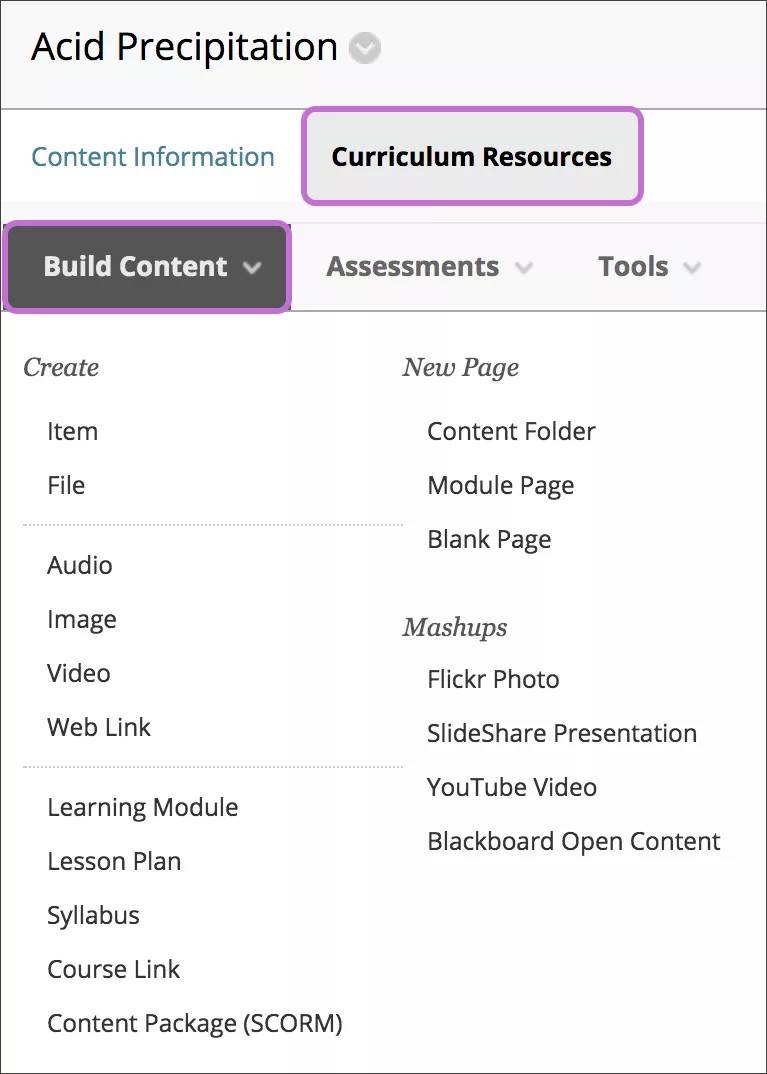
More on the types of content you can add
Instructor view of a lesson plan
Select the lesson plan's title to access the content.
You can change the order of items with the drag-and-drop function or the keyboard accessible reordering tool.