About files and multimedia
You can add files, images, audio, and video when you create content in your course. For example, in discussions, you can browse for a media clip from your computer or your course's file repository: Course Files or the Content Collection.
More on the Content Collection
Based on the content type, you can use the functions in the editor to embed content in your text. You have creative control over how your content appears and the flexibility to change the order and appearance when you want.
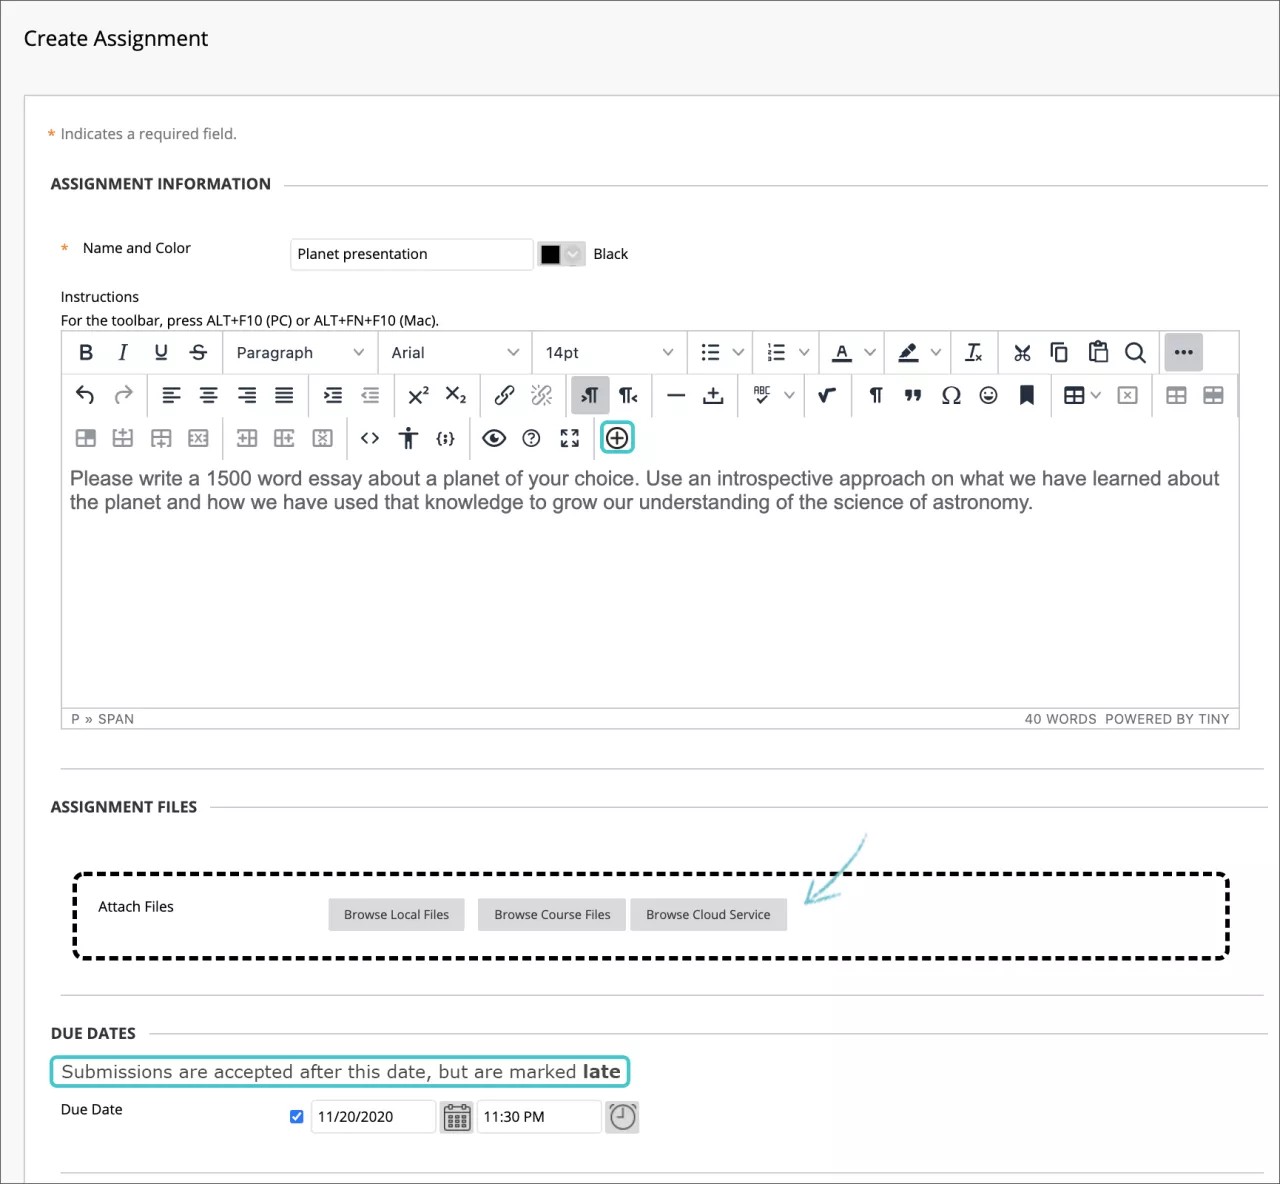
In some instances, you can browse for files in a separate attachment section. You may also be able to drag and drop files from your computer into the Attachments area. Drag files from your computer to the "hot spot" in the Attach Files area. If your browser allows, you can also drag a folder of files. The files upload individually. If the browser doesn't allow you to submit after you upload a folder, select Do not attach in the folder's row to remove it. You can drag the files individually and submit again.
The supported formats for embedding images are PNG, GIF, JPG, SVG, BMP and ICO. For audio they are MP3 and WAV, and for video they are MP4 and MOV.
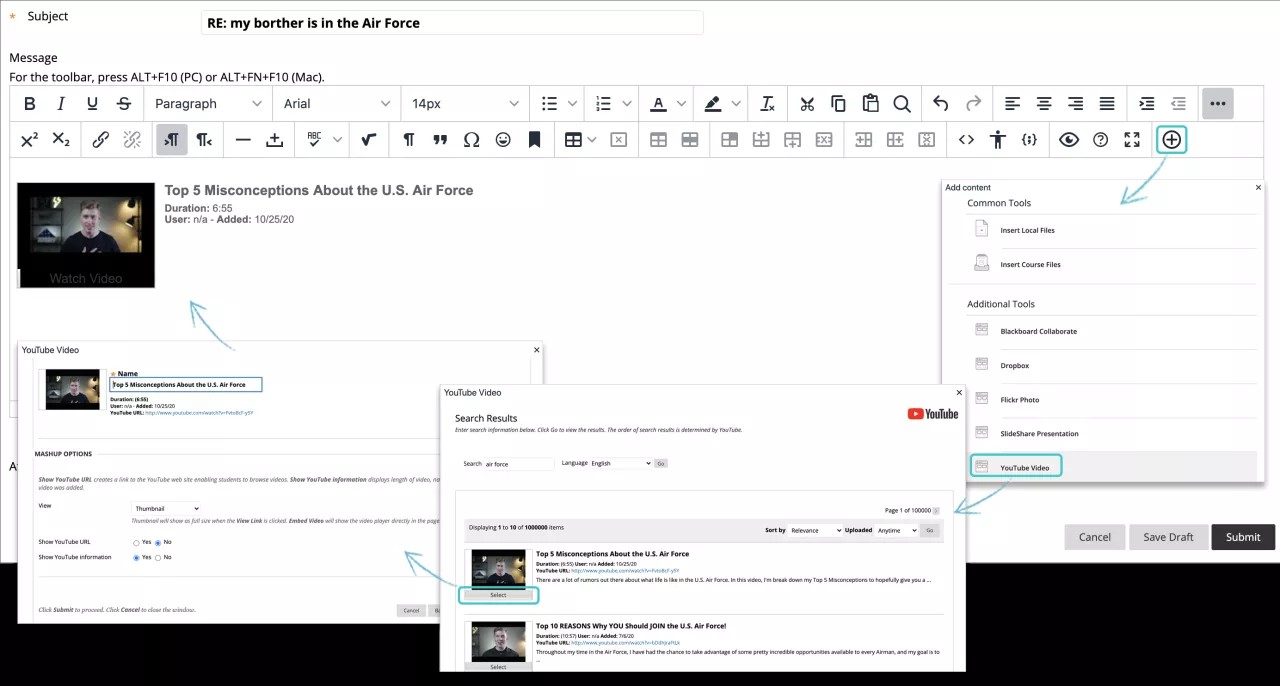
You can also add social media from other websites to your content. These social media elements that appear in a course are called "mashups." A mashup combines elements from two or more sources. For example, when you view a YouTube™ video as part of the course content, you're experiencing a mashup.
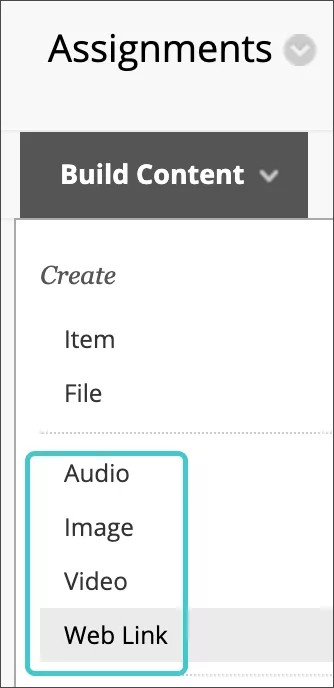
Or, use the Build Content menu to embed multimedia as standalone items in the content list.
Add files to your content
Wherever you can attach files in your course, you can browse for files from your computer or your course's file repository: Course Files or the Content Collection.
When you use the Add Content function in the editor, you can determine exactly where the file's link appears within your content. When you use the Attachments section, the file you uploaded appears immediately after the title of the content item.
More on methods for adding files
The Browse Course and Browse Content Collection windows include tabs and functions so you can browse and search for files easily.
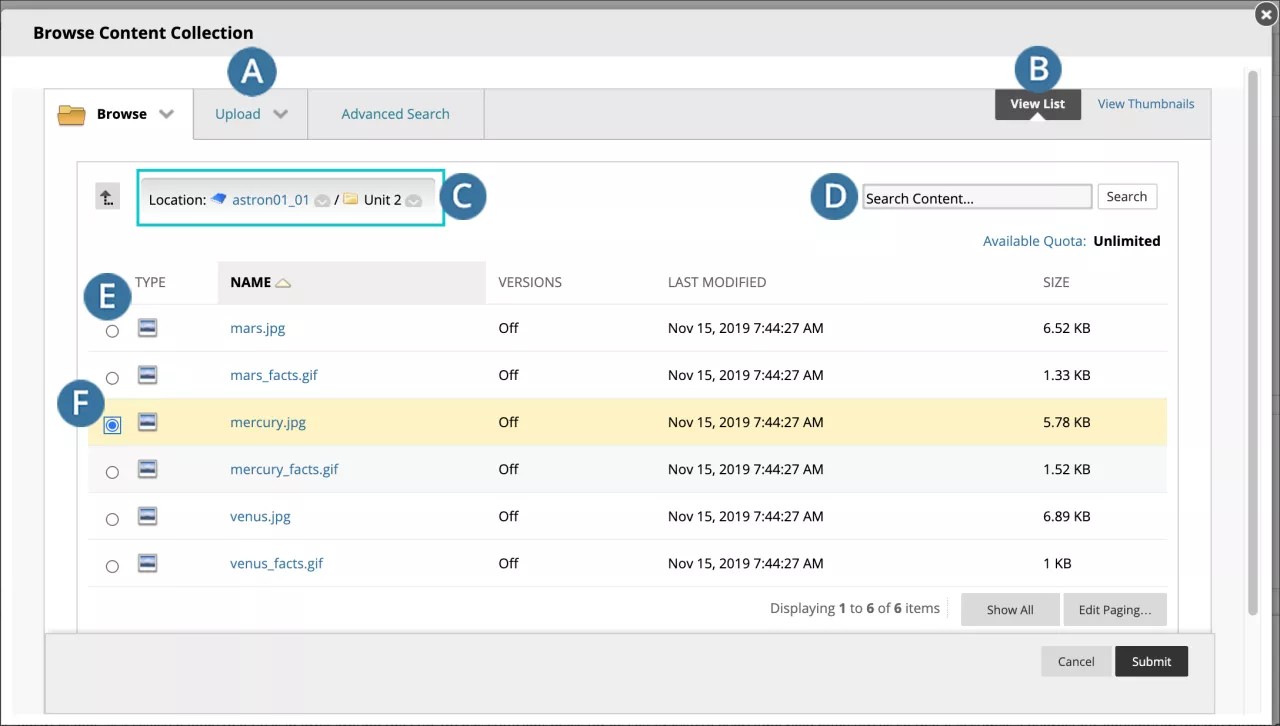
A. Browse, Upload, and Advanced Search tabs:
- Browse for folders you have access to. If you have Course Files, you only have access to the files for the course you're in. With the Content Collection, you may be able to access files for other courses and those files shared institution-wide.
- Upload one file, multiple files, or a zipped package.
- Perform an advanced search. You can search file and folder names, metadata, file contents, date created, and more.
B. View List and View Thumbnails: View files and folders as a list of file names or as thumbnail icons.
C. Breadcrumbs: Navigate to other folders. Use the Select to use the current folder location icon to link the folder that appears last in the breadcrumbs in your course. Note the folder appears in the Select Items area.
D. Search Content: Perform a basic search for file and folder names.
E. Use the check boxes to select files and folders to include in your content item. You can select the header check box to select all visible items. When you link to a folder, use caution as students receive the read permission by default on all of the folder's contents. Read permission allows students to view all the files and sub-folders in the selected folder.
F. Selected Items.
In most browsers, you can select where the files that you open in courses are downloaded. For example, in Chrome, navigate to Settings > Advanced > Downloads. You can select the location for file downloads and choose if you want the browser to ask each time. In Safari, you have the same capabilities. Navigate to Preferences > General > File download location. You can perform an internet search to learn about file download choices in other browsers.
Upload content from Dropbox
If your institution has enabled the Dropbox Education integration, you and your students can link directly to your Dropbox content in most content areas with the content editor Add Content feature. Students can also upload files directly from Dropbox when they submit assignments.
When you access Dropbox Education the first time from Blackboard Learn, you're prompted to either create an account or authenticate to your current account. After you log in, browse Dropbox and select content.
Add images in the editor
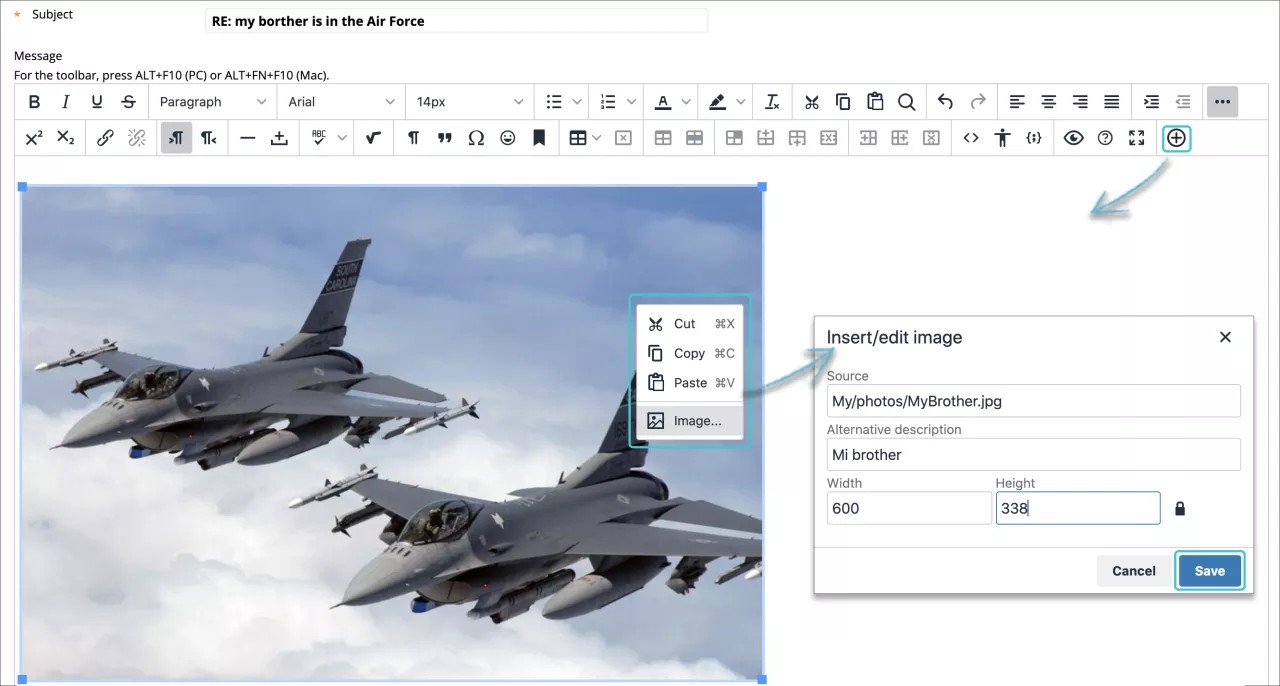
You can determine where images appear in relation to your text. You can place the cursor where you want the image to be placed and select the Add Content icon. In the new window, choose one of the Common Tools or Additional Tools available according to the content type you are creating, then browse for the image file.
You can resize an image. Once the image is created, press and drag an image's corners or sides. You can also edit an image with the right-click menu, manually modify its size in pixels and add a title that appears when a user points at it.
Copying and pasting links from the URL bar to Images, PDFs, or other Files in the content collection won't function properly. These URLs are temporary and break later.
You can add the common image types, such as GIF, JPG, JPEG, BMP, PNG, and TIF.
Add images in the Build Content menu
You can embed an image so it appears as a standalone piece of content in the content list.
In a content area, learning module, lesson plan, or folder, select Build Content to access the menu and select Image. Type a name, optional description, and alternative text. Select the appropriate options for dimensions, availability, tracking, and display dates. Display dates don't affect an image's availability, only when it appears.
Each inserted file, link image or other media will be inserted in a "new line" to prevent consecutive inserted items from colliding. Line Breaks will be created when an image is inserted into a pre-existing text line. To make this text flow around the image, delete the linebreaks.
Browse for an image file from your computer or your course's file repository: Course Files or the Content Collection. If the Add Content function is available, you can also browse for a Flickr photo. You can preview the image before you submit.
After you submit, the title and image appear in the content list. You can change the content at any time. Open the image's menu and select Edit.
You can change where the item appears in the list with the drag-and-drop function or the keyboard accessible reordering tool.
Add audio and media files in the editor
When you create content, you can determine where media clips appear in relation to your text. Select the Add Content icon to embed a media clip in the text area or edit an existing selected media item. You can also use the right-click menu to edit some properties of an existing selected media clip.
Blackboard Learn supports these media file types:
- Audio: AIFF, MP3, MIDI, MP, WAV, and WMA
- Video: ASF, AVI, MOV, MOOV, MPG, MPEG, QT, SWA, SWF, and WMV
Media settings
With the right-click menu you can edit the properties of an existing selected media clip.
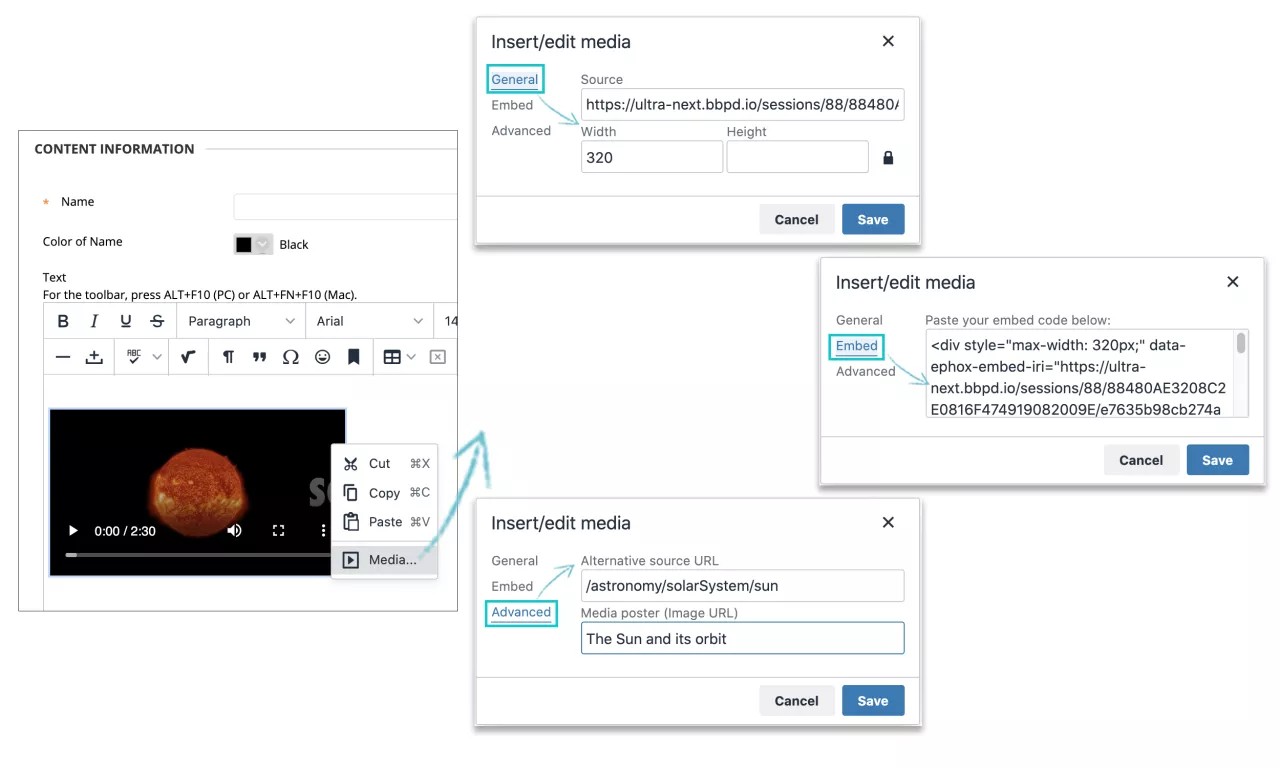
From the menu, you can select General, Embed or Advanced properties. The General properties you can change are the source, and the dimensions of the video (width and height) measured in pixels. If not set, the actual size will be used. If you select the padlock icon to Constrain Proportions and add a measurement, the file is resized without horizontal or vertical distortion.
The Embed properties option presents you with a text area where you can write or modify the embedding HTML code for the video to appear. This feature is intended for advanced web developers.
The Advanced properties include an alternative source or image URLs.
Image settings
The following image settings are not available within the content editor anymore. For you to display these settings, add the image file from your computer, for example, using the Attachments section. When the file you selected is uploaded and visible, select the Display Media File within the page option from the File Action menu.
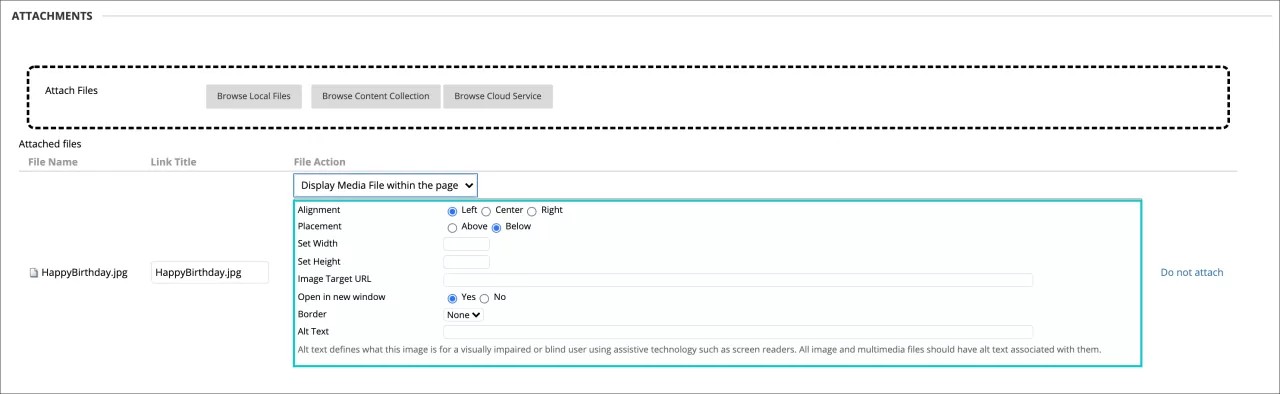
You can add alternative text that describes the image for people who use screen readers or visit web pages with images turned off. You can also add a title that appears when a user points an image.
You can control image placement and appearance. Pixels are used for dimensions, space, and the border width. You can also add a target URL for the image to behave as a link and decide if the target page will be opened in a new window.
Add a feedback recording
You can embed an audio/video recording of your feedback in the editor as you grade attempts. The recording option appears in the feedback editor for most graded items in your course. Students watch or listen to your feedback alongside any text you include.
This function isn't supported on all browsers. For the best experience, use Chrome or Firefox.
More on adding audio/video feedback
Add audio and video in the Build Content menu
You can embed audio and video so they appear as standalone pieces of content in the content list.
In a content area, learning module, lesson plan, or folder, select Build Content to access the menu and select Audio or Video. Type a name, optional description, and select the appropriate options for dimensions, availability, tracking, and display dates. Display dates don't affect the media's availability, only when it appears.
Browse for an audio or video file from your computer or your course's file repository: Course Files or the Content Collection. If the Add Content function is available, you can also browse for a YouTube video. You can preview the media clip before you submit.
We recommend that you include a transcript so students who can't hear are able to receive the same information. Browse your computer to attach your own transcript file. If the video file is an MPEG file, you can use the Include Transcript field to attach an SAMI transcript file.
After you submit, the title, transcript, and media clip appear in the content list. You can change the content at any time. Open the item's menu and select Edit.
You can change where the media clip appears in the list with the drag-and-drop function or the keyboard accessible reordering tool.
If a video file type isn't supported and doesn't appear embedded, students can download the file to watch it.
Ally in Learn Original - Instructor
View and improve file accessibility
Doesn't seem familiar? Jump to the "Ultra" help about improving file accessibility.
Your institution controls which tools are available.
Your class is full of diverse students with unique learning abilities. Providing students with more accessible content means each individual can choose formats that work best for them. If your institution uses Blackboard Ally, you can use the tool to help ensure your course content is accessible to every student.
Ally automatically scans your course content and performs steps to make files more accessible.
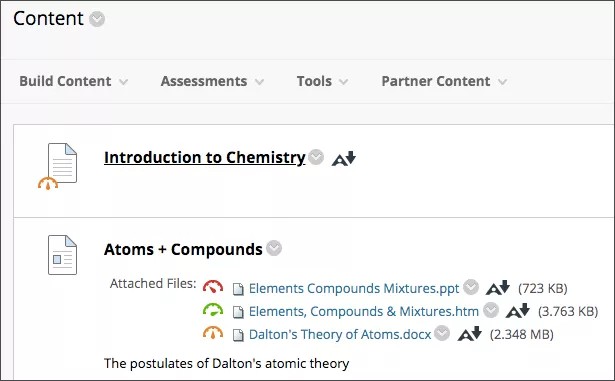
- In your course, find the file you want to improve.
- Next to the file name, an icon appears to quickly show the file’s accessibility score. Hover over the icon to view the score. File accessibility icons are always located next to your file, but the specific location will vary throughout different areas in your course. Throughout Blackboard Learn, most accessibility icons will be to the left of the file.
- To learn how to improve the file’s accessibility, select the score icon.
- Ally opens and shows you steps on how to edit your file for improved accessibility and optimize it for alternative formats.
How to improve accessibility in course content
Students don’t see the file’s accessibility score. Instead, students can choose from the alternative formats Ally generates for the file. You can help Ally create better alternative formats by following best practices for creating accessible files.
View alternative formats
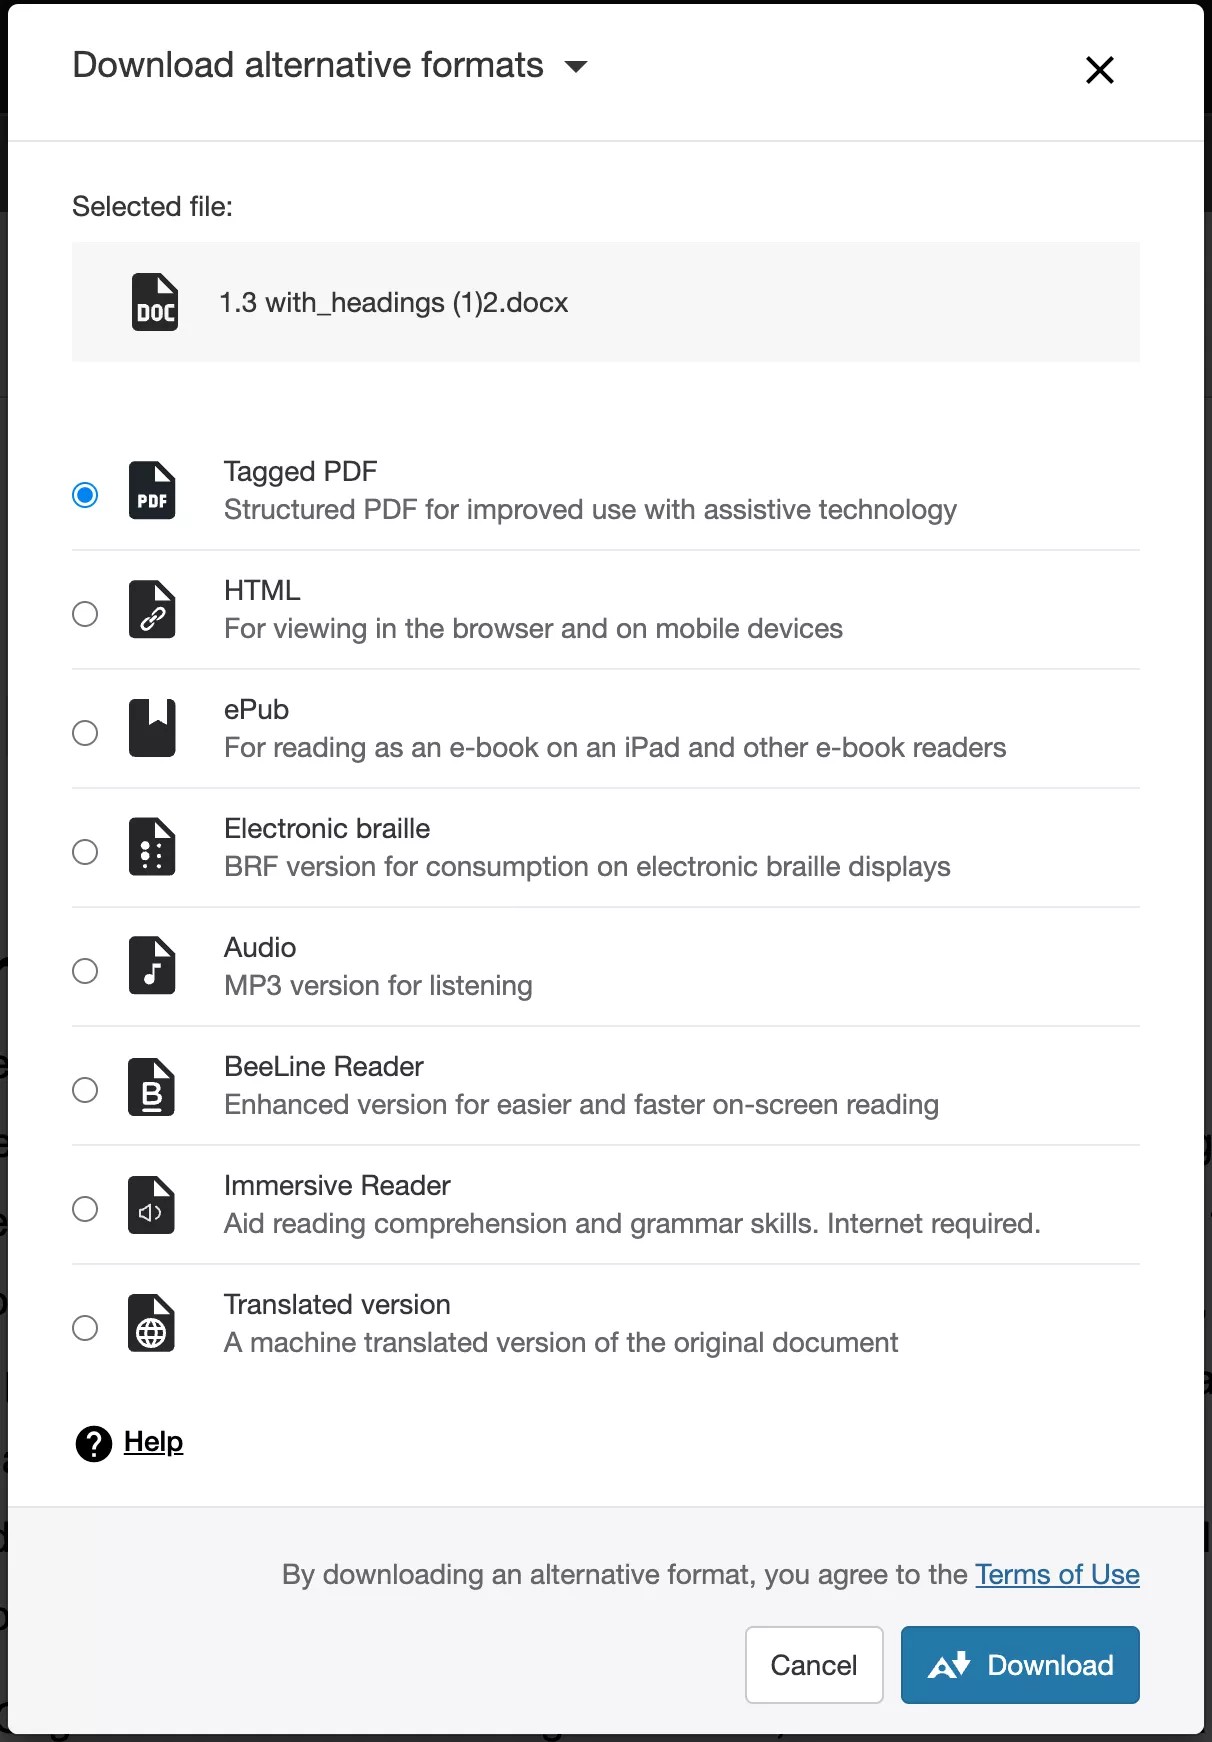
After you attach files to a course, Ally creates alternative formats of the file based on the original. For example, if the original file is a PDF, Ally creates audio, electronic braille, and ePub formats of the same content. These formats are made available with the original file so everything is in one convenient location.
The alternative formats created depend on the original file type. If you don't see an option to download alternative formats, Ally isn’t enabled for that course or the file isn't a supported content type.
Find a file in your course. Select the menu beside it and select Alternative Formats. Choose the version that is best for your needs! Select Download to save the alternative format to your device.
More on alternative formats for course content
Watch a video about viewing file accessibility in Blackboard Learn
The following narrated video provides a visual and auditory representation of some of the information included on this page. For a detailed description of what is portrayed in the video, open the video on YouTube, navigate to More actions, and select Open transcript.
Video: View file accessibility explains how to view file accessibility for files you upload to your course.