This information applies only to the Original experience. Your institution controls which tools are available.
Course Files information applies only to the Original experience.
Wherever attaching files is available in your course, you can use the Browse Course function to select a file from Course Files. If your institution has access to the content management features, you'll browse for files in the Content Collection and use the Browse Content Collection function.
More on how to tell if your institution uses Course Files or Content Collection
More on linking to files and folders in Course Files
Watch a video about browsing for files
The following narrated video provides a visual and auditory representation of some of the information included on this page. For a detailed description of what is portrayed in the video, open the video on YouTube, navigate to More actions, and select Open transcript.
Video: Attaching files from Course Files explains how to use Course Files to collect and organize your content.
Browse Course window
The Browse Course window includes tabs and functions so that you can browse and search for files easily.
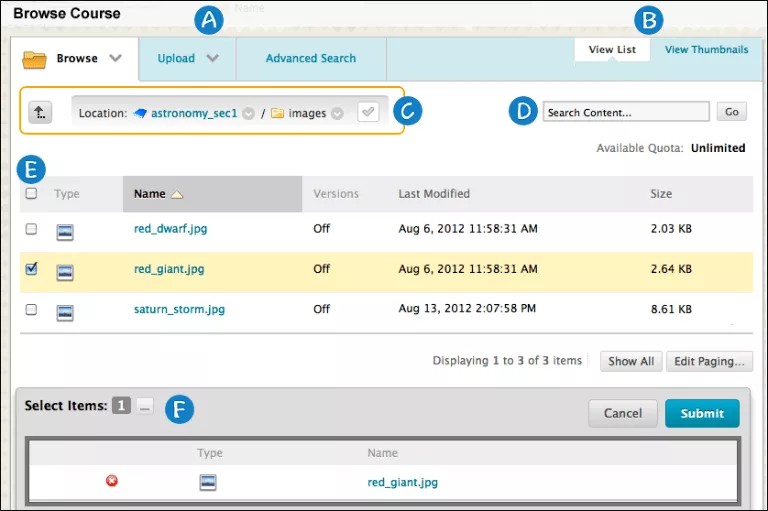
- Browse, Upload, and Advanced Search tabs:
- Browse for folders you have access to. If you have Course Files, you only have access to the course you're in. With the Content Collection, you may be able to access files for other courses and those shared institution-wide.
- Upload one file, multiple files, or a zipped package.
- Perform an advanced search. You can search file and folder names, metadata, file contents, date created, and more.
- View List and View Thumbnails: View files and folders as a list of file names or as thumbnail icons.
- Breadcrumbs: Navigate to other folders. Use the Select to use the current folder location icon to link the folder that appears last in the breadcrumbs in your course. Note that the folder appears in the Select Items area.
- Search Content: Perform a basic search for file and folder names.
- Use the check boxes to select files and folders to include in your content item. You can select the header check box to select all visible items. When you link to a folder, use caution as students receive the read permission by default on all of the folder's contents. Read permission allows students to view all the files and sub-folders in the selected folder.
- Select Items: The files and folders you select appear in this area. Select the Show List icon to view your selections. To remove an item, select the X.