In Blackboard Learn, administrators can create modules that allow instructors and students to easily download the Blackboard Learn app and access their courses from their mobile phones.
Ultra experience
If your institution has the Ultra experience, you can add a module to the Institution Page to provide students and instructors direct link to download the Blackboard Learn app.
Create a module
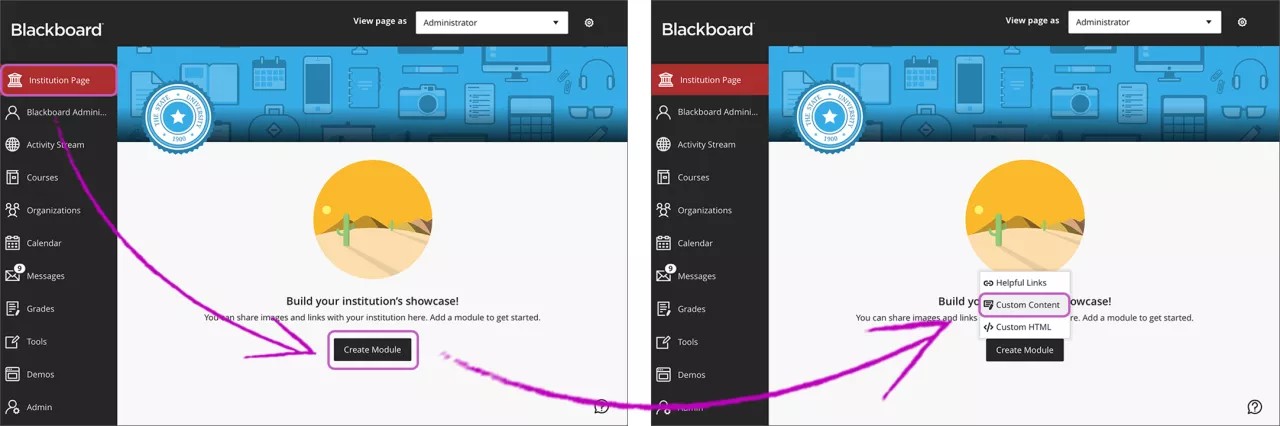
- Log in as administrator.
- Select Institution Page in the left navigation menu.
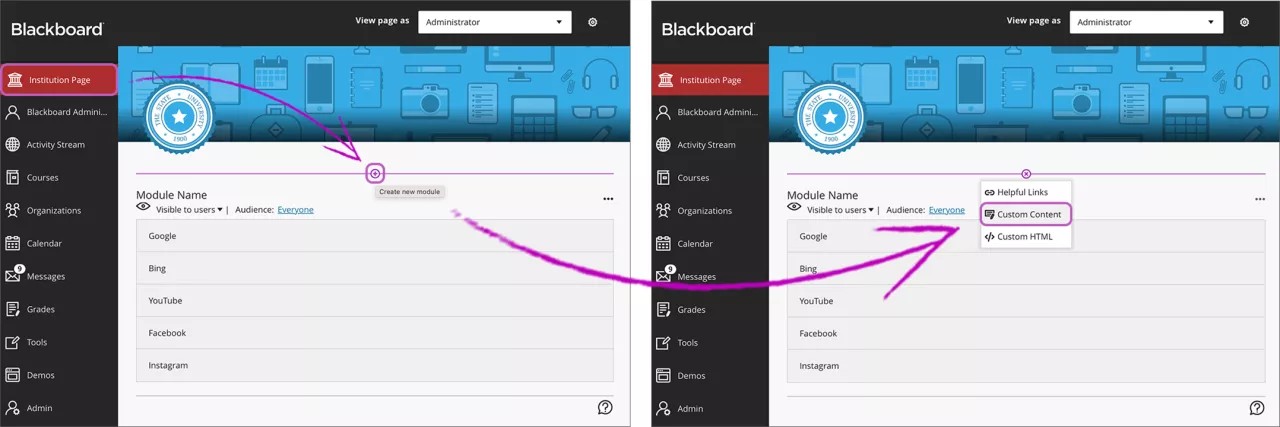
- If you haven't created modules before, select the option Create Module, and then Custom Content. Otherwise, select the plus sign in the content area and choose Custom Content.
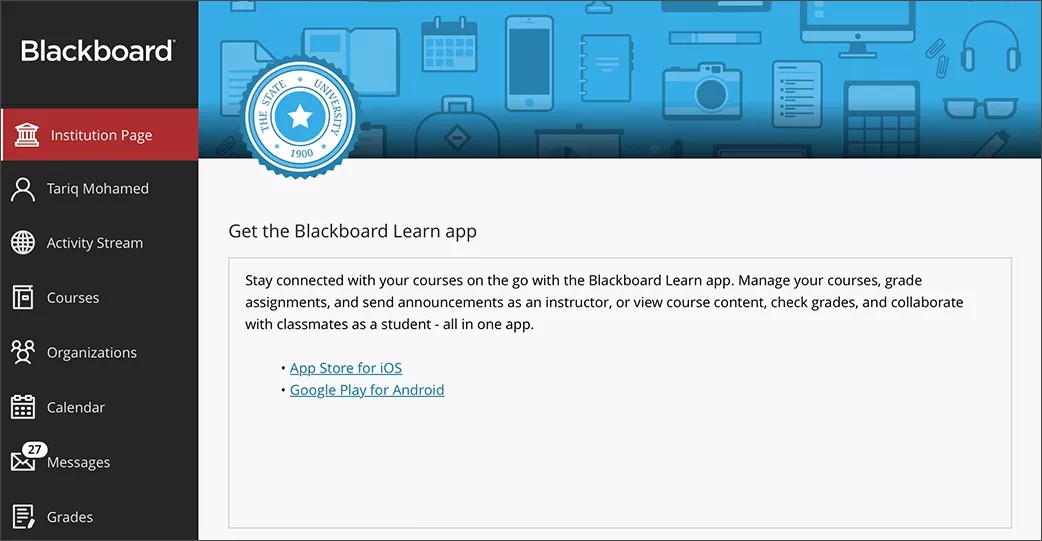
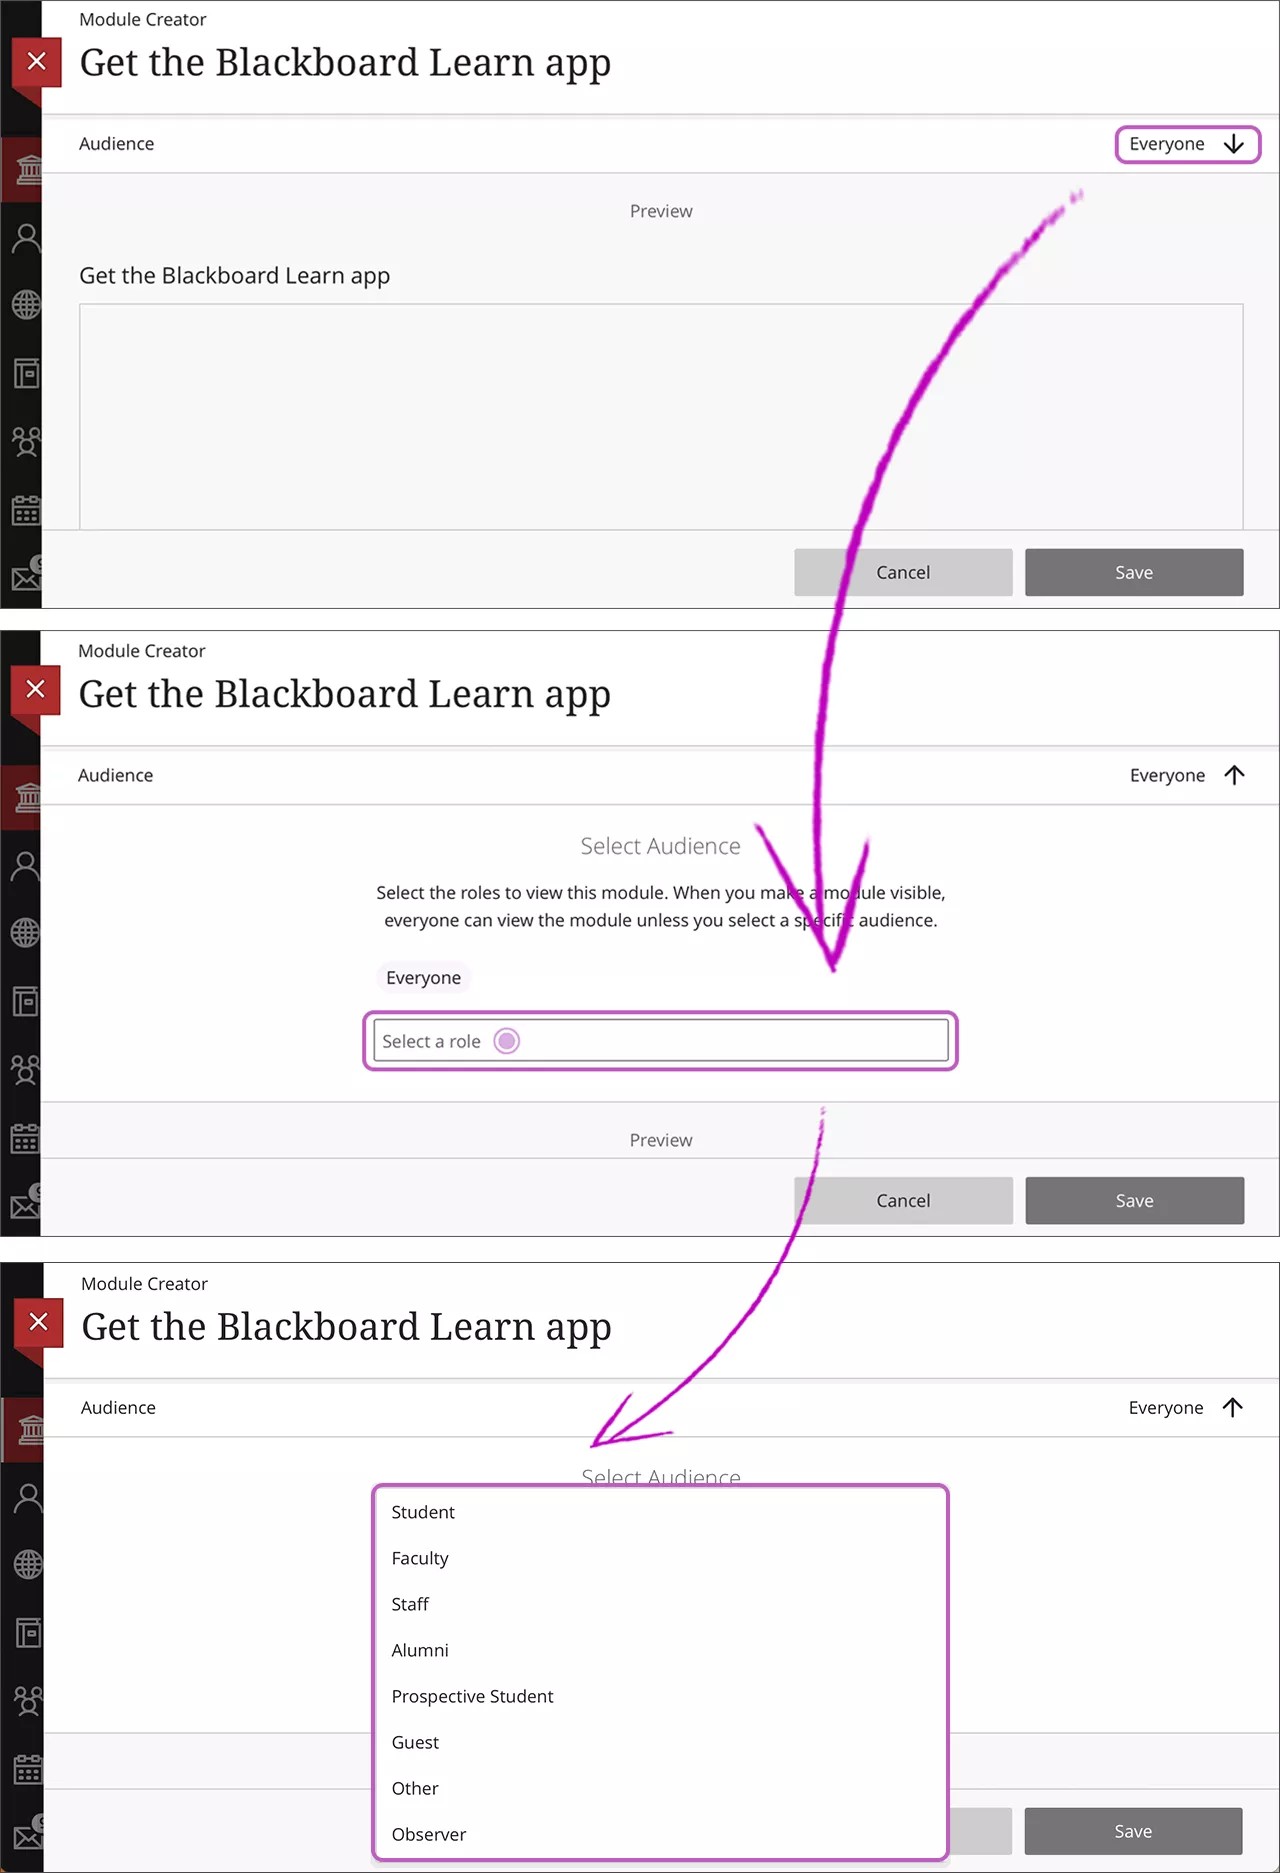
- At the top of the Module Creator screen, type the title Get the Blackboard Learn app.
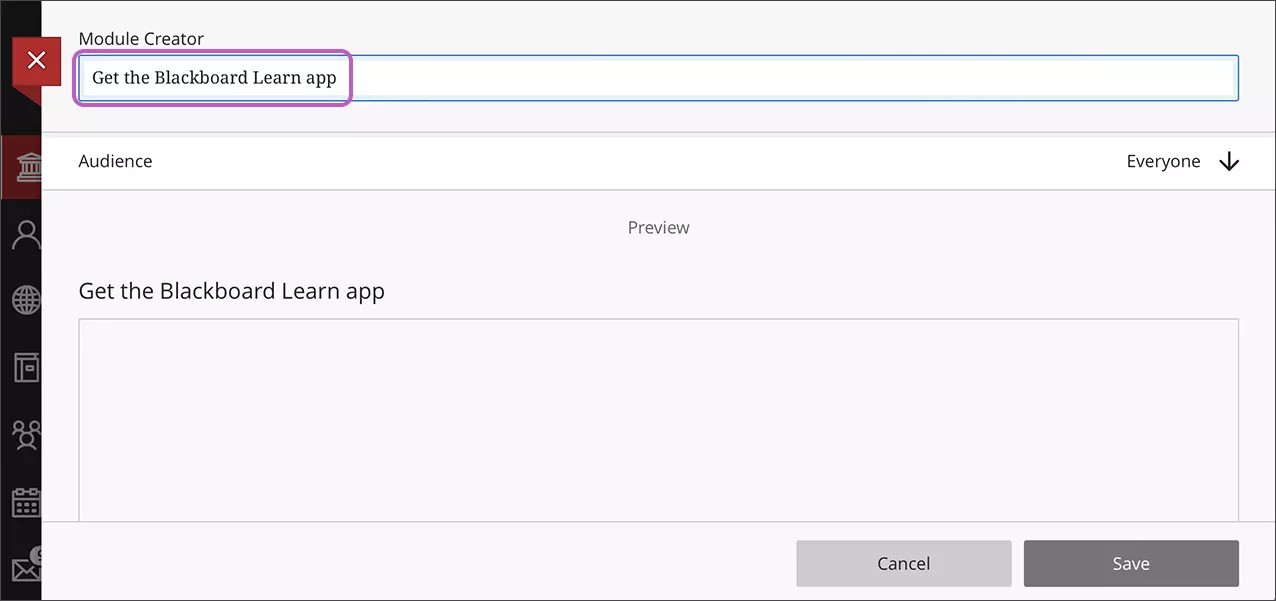
- Select Audience to choose the roles that can view this module. When you make a module visible, everyone can view it unless you select a specific audience.
- In the Module Content editor, paste this text:
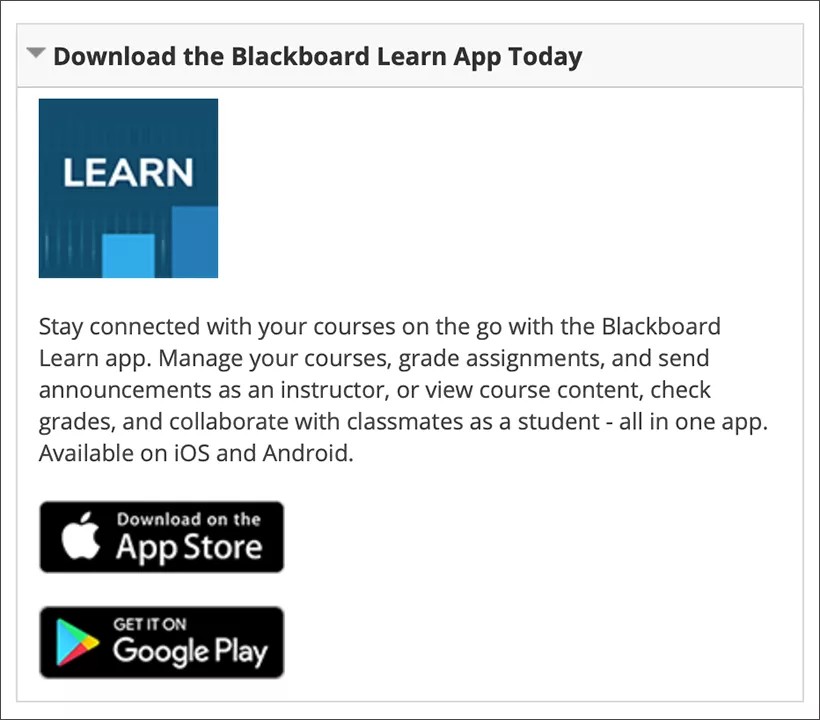
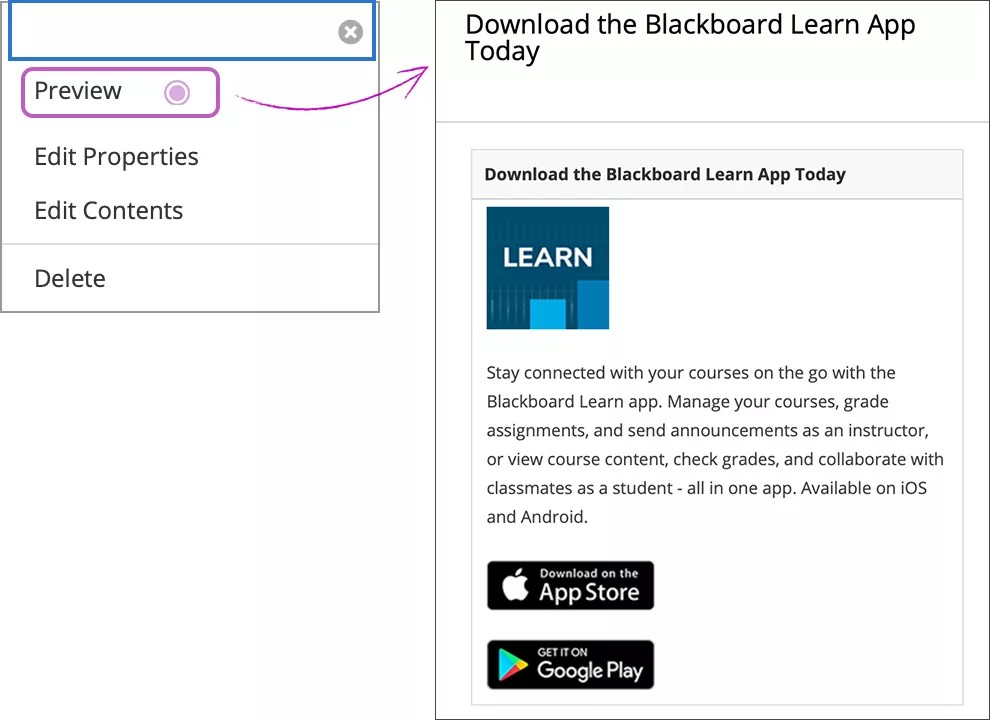
Stay connected with your courses on the go with the Blackboard Learn app. Manage your courses, grade assignments, and send announcements as an instructor, or view course content, check grades, and collaborate with classmates as a student - all in one app.
App Store for iOS
Google Play for Android

- Highlight App Store for iOS and select the Link button. Paste in this URL:
https://apps.apple.com/app/blackboard-app/id950424861
Then, highlight Google Play for Android and select the Link button. Paste in this URL:
https://play.google.com/store/apps/details?id=com.blackboard.android.bbstudent&hl=en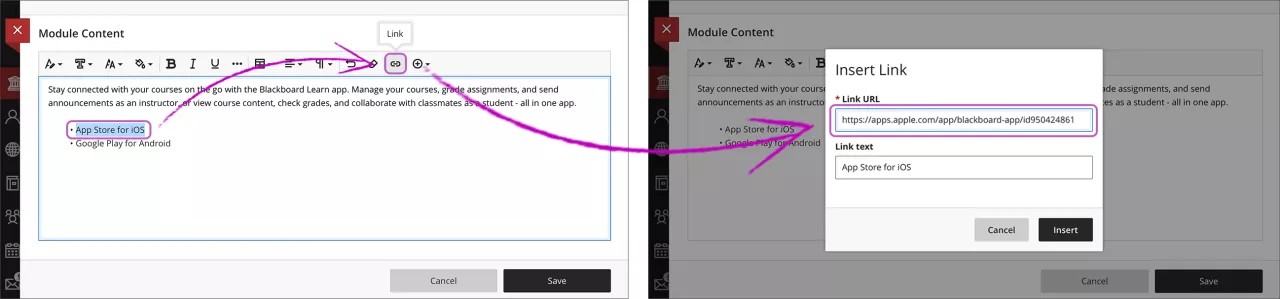
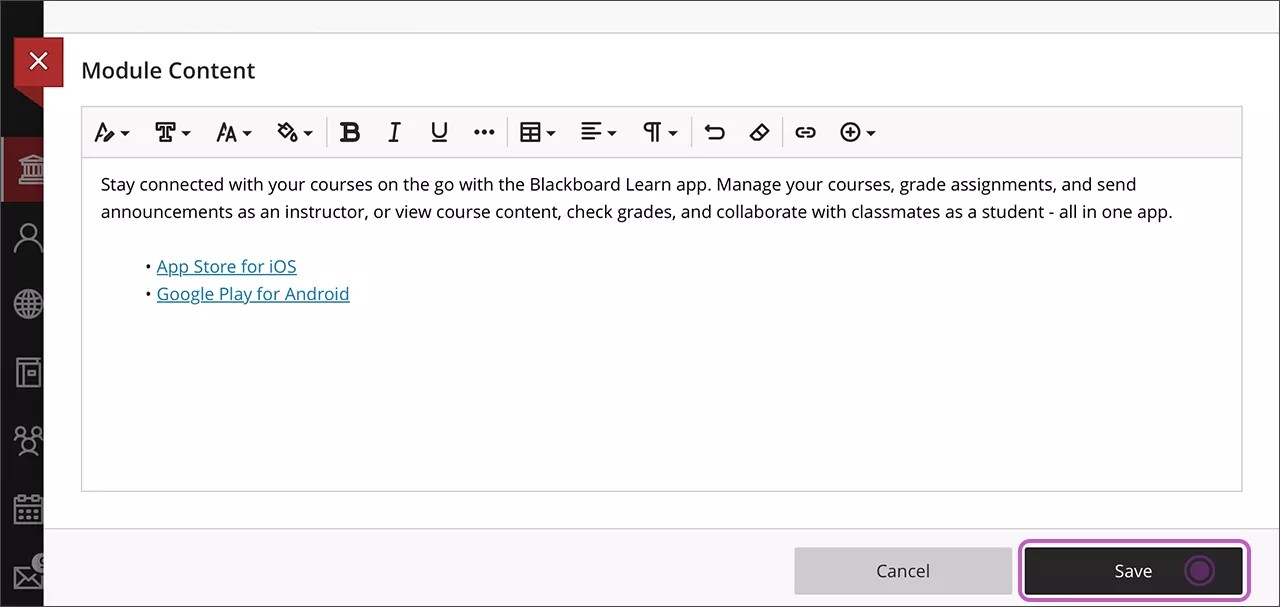
- You can use the editor functions to add formatting and change the text. Once you're done, select Save to create the module.
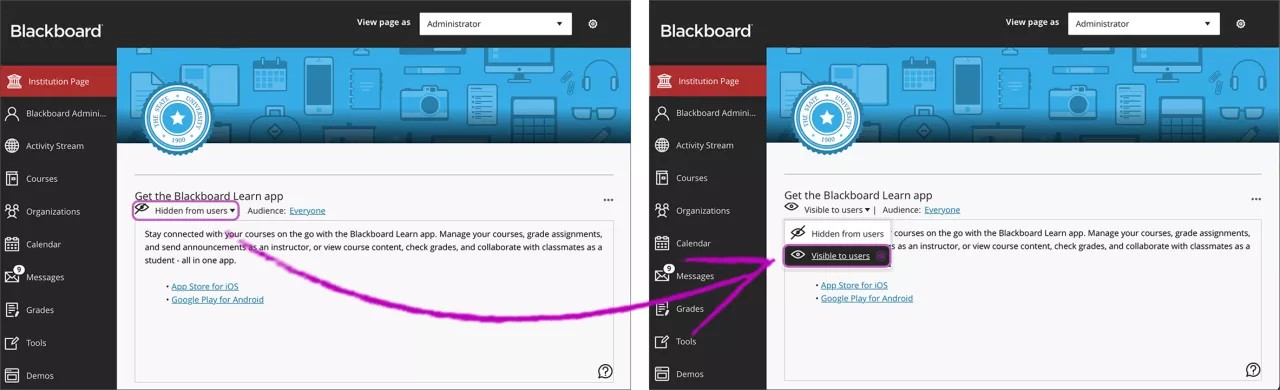
- Make the module visible by selecting the eye icon and choosing Visible to users.
Original experience
In the Blackboard Learn Original Experience, the My Institution tab is a great place to promote the Blackboard Learn app for students and instructors.
Create a module
Step 1: Create a URL module
- Log in as administrator.
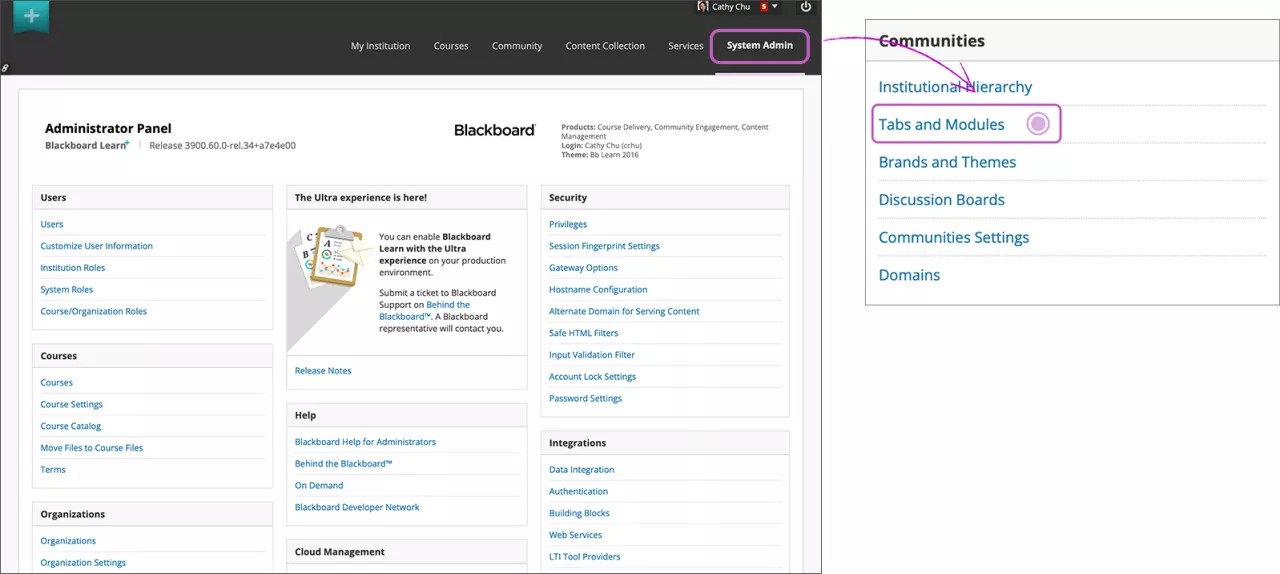
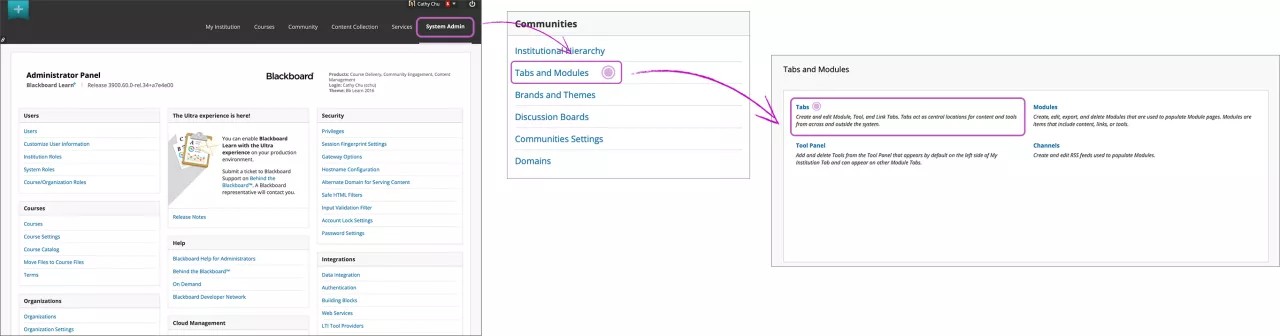
- Select System Admin on the top menu to open the administrator panel.
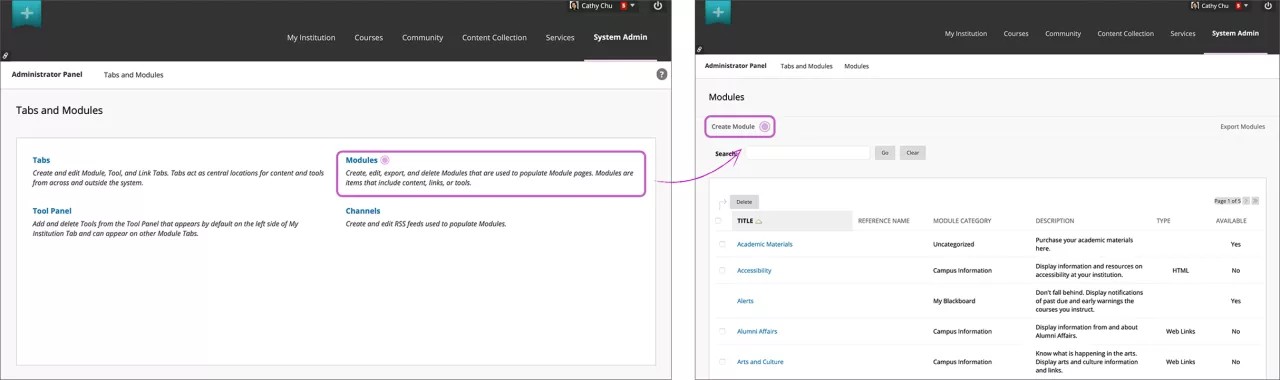
- Under Communities, select Tabs and Modules.
- Select Modules, and then choose the Create Module option.
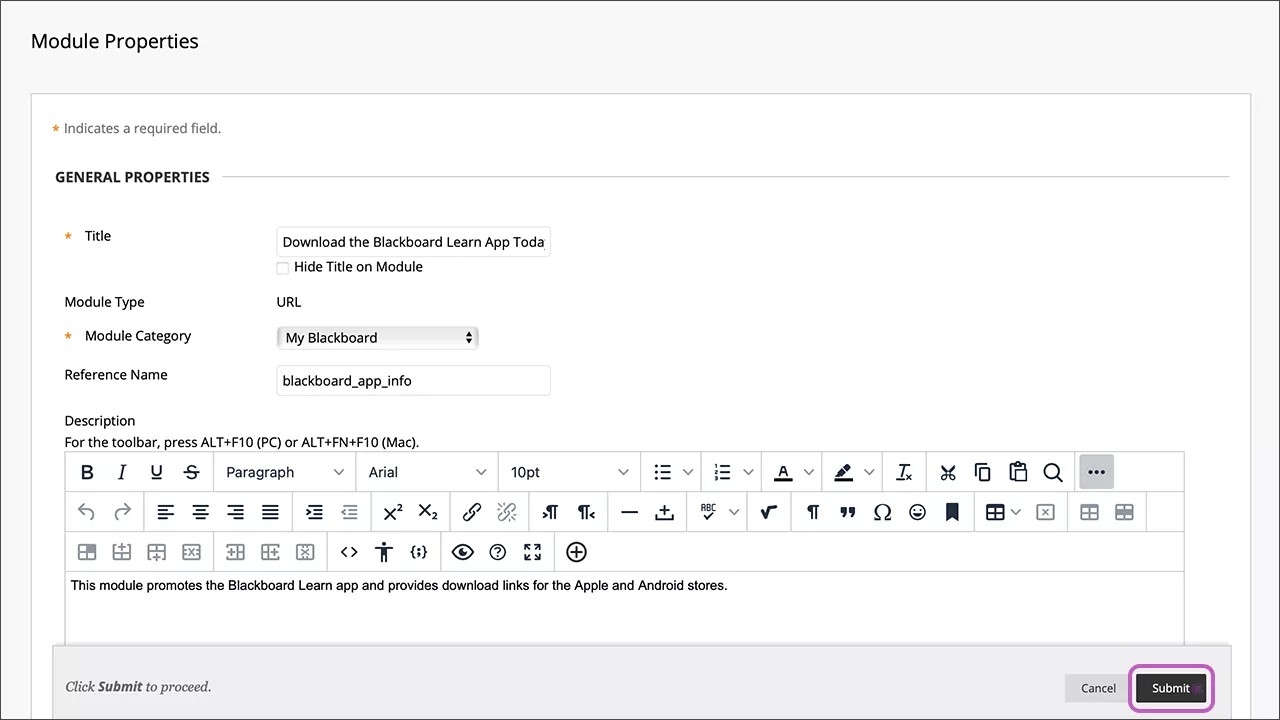
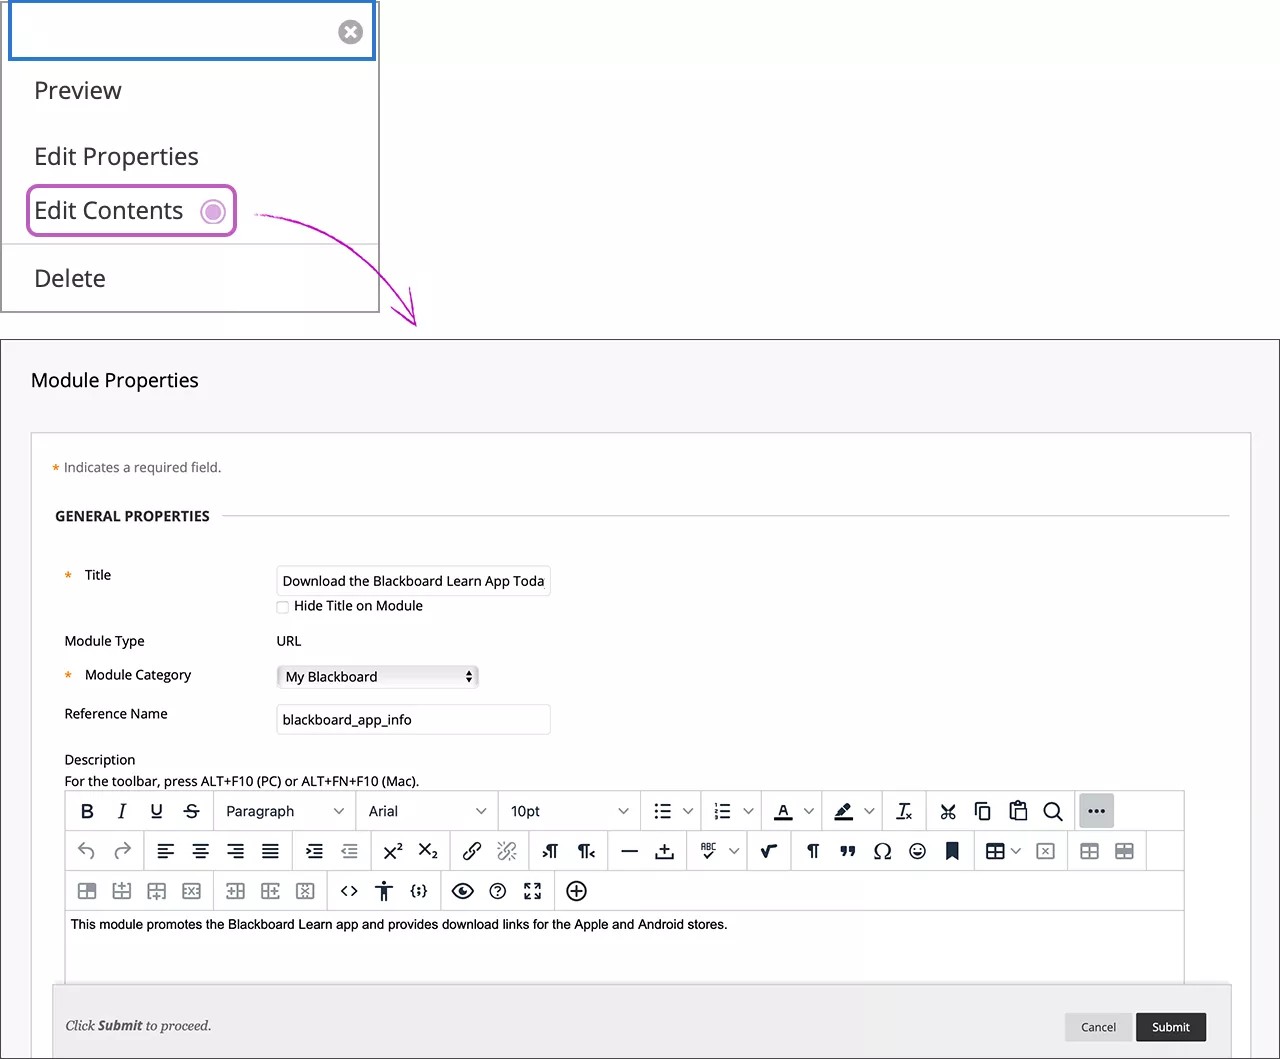
- Complete the Module Properties page with the recommended settings in the following table:
Option Description Title [r] Example: Download the Blackboard Learn App Today Module Type [r] URL Module Category [r] My Blackboard Reference Name Example: blackboard_app_info Description Example: This module promotes the Blackboard Learn app and provides download links for the Apple and Android stores. Allow users to Personalize the module No Allow users to detach the module (Your choice) System Availability Select yes when your school is ready to roll out the Blackboard Learn app Available for Use on a Course Module Page (Your choice) Available for Use on an Organization Module Page (Your choice) Available for Users to Select from Module List (Your choice) Available to Select Specific role, and choose the BbMobile User option Allow Asynchronous Loading Select this option Date and Time Restrictions (Your choice) Delegated Administration Provide the usernames for all users that should have privileges to edit and add module content - Select Submit.
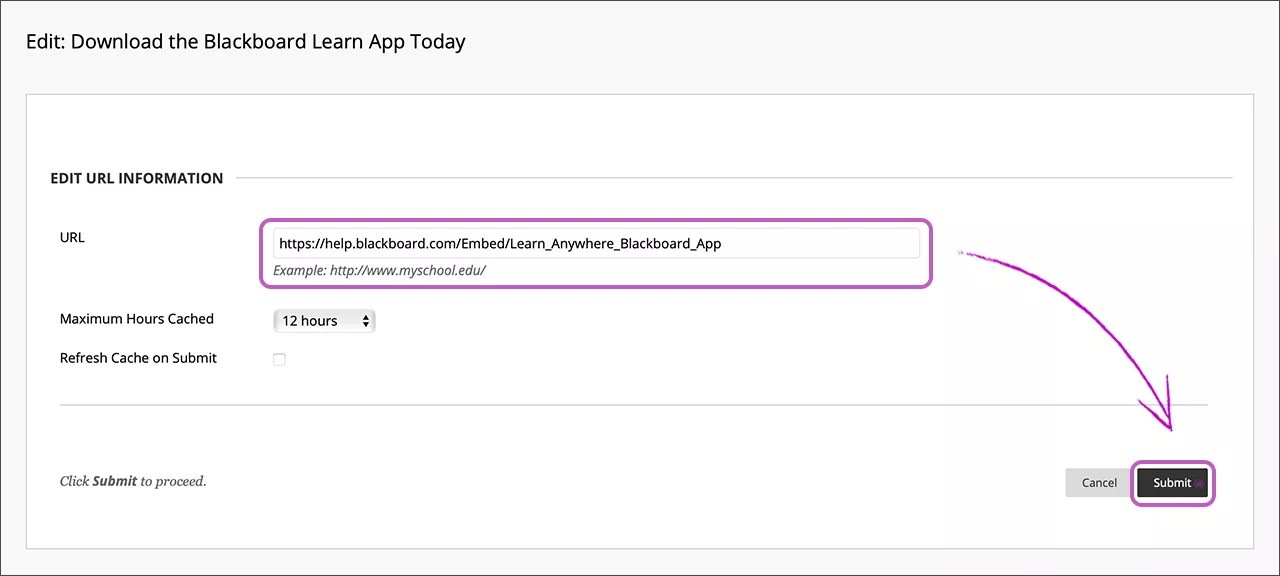
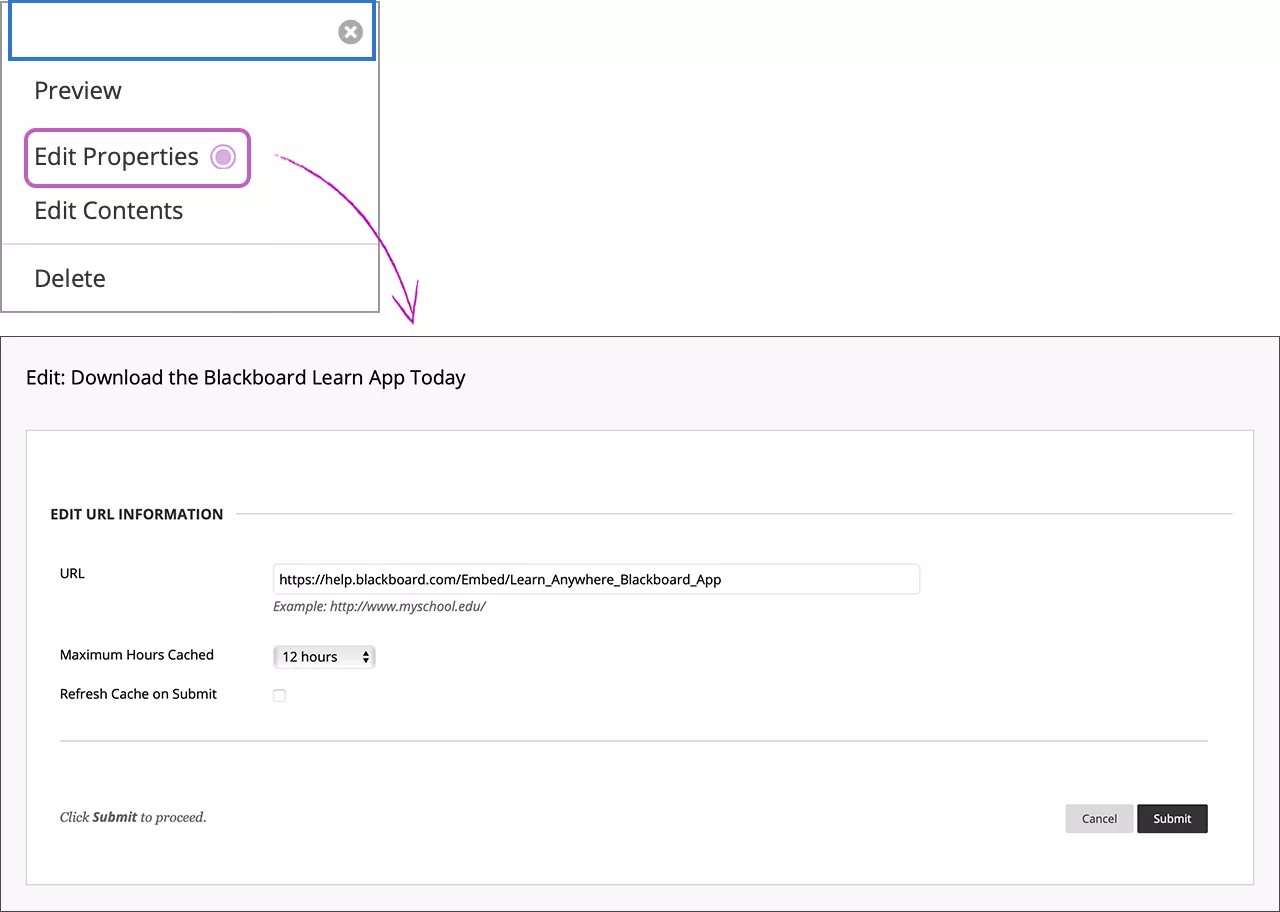
Step 2: Edit URL information
After you submit the Module Properties page, the Edit URL Information page appears.
- Complete the Edit URL Information page with the recommended settings in the following table:
Option Recommended Input URL https://help.blackboard.com/Embed/Learn_Anywhere_Blackboard_App Maximum Hours Cached Default 12 hours Refresh Cache on Submit Leave check box clear unless otherwise directed - Select Submit.
Step 3: Confirm settings
Preview the module to ensure the module appears as expected and edit/delete it as necessary.
- On the Modules page, locate the new module. You might need to scroll down or advance to the next page.
- Select the down arrow icon to open the module's menu.
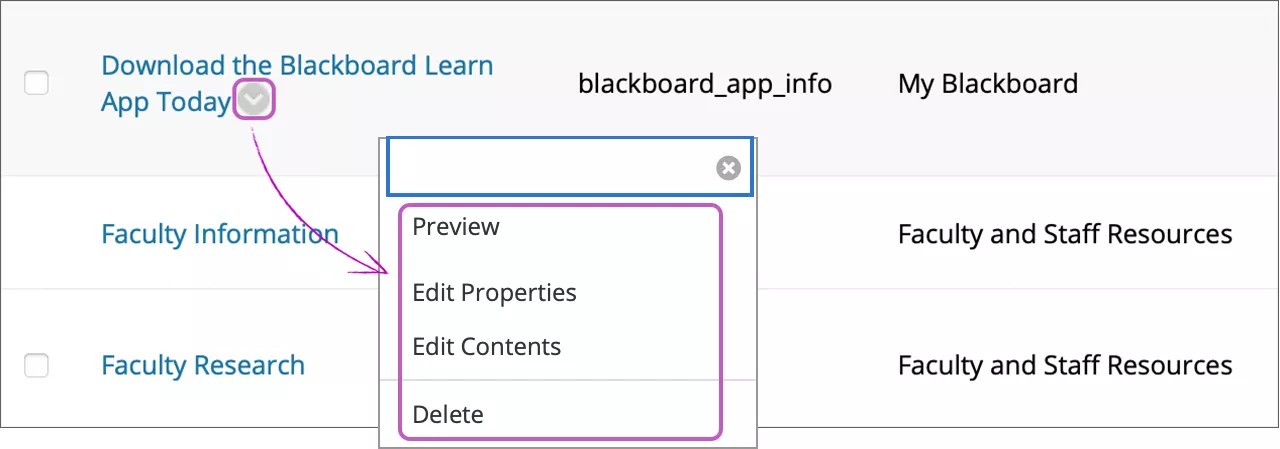
- From the module's menu, select Preview. The module's preview opens in a new window.
- After previewing the module, make changes if needed. From the module's menu, select Edit Properties or Edit Contents.
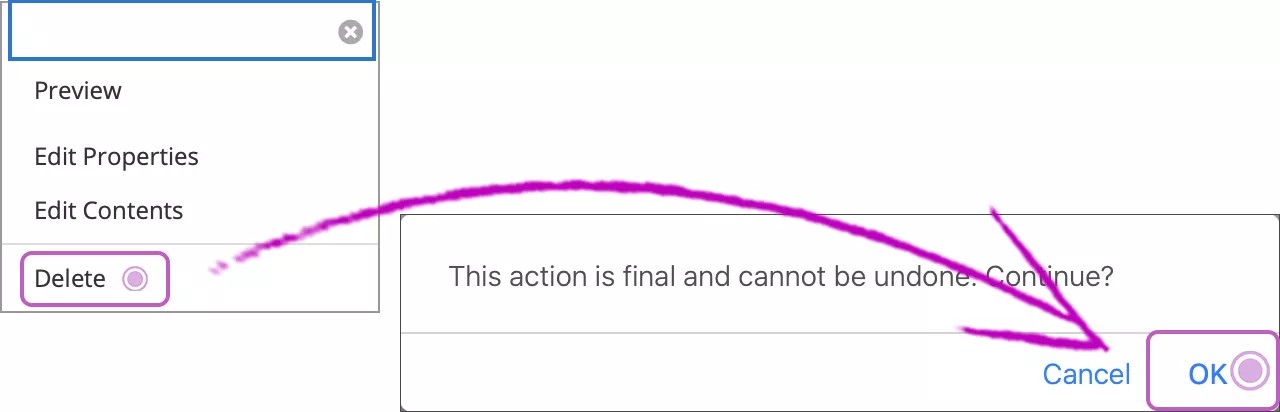
- If you want to delete the module, select the Delete option. You'll need to confirm your action.
Step 4: Place module on tab
Now you can specify where you want the module to appear.
- Select System Admin on the top menu to open the administrator panel.
- Under Communities, select Tabs and Modules.
- Select Tabs.
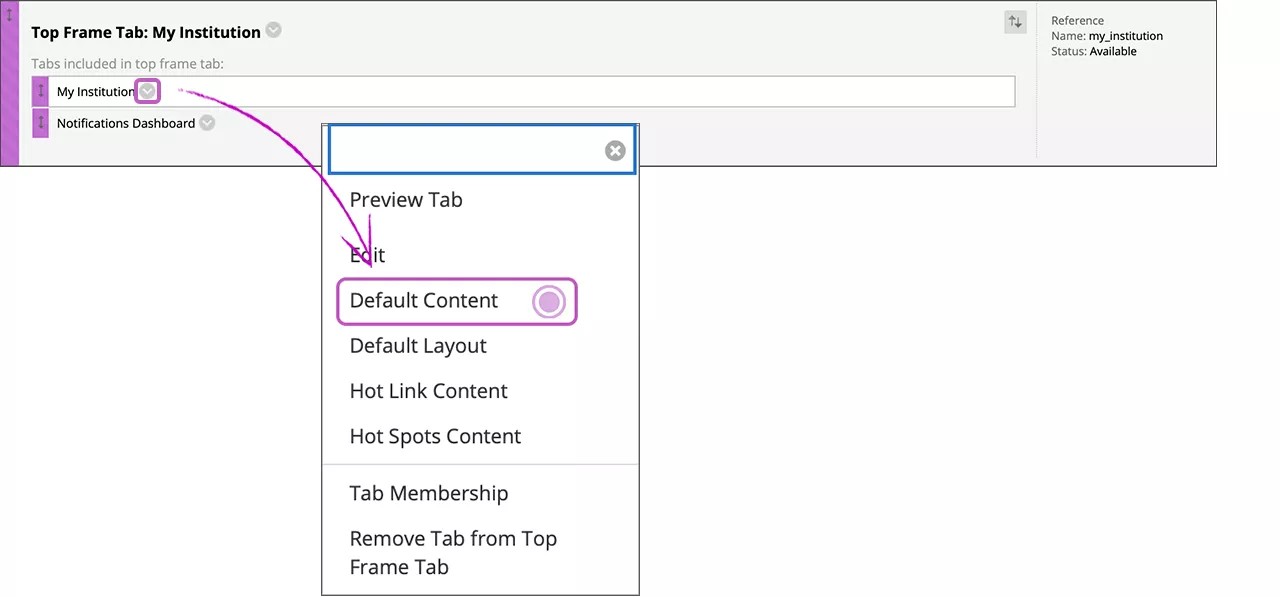
- On the Tabs page, locate Top Frame Tab: My Institution.
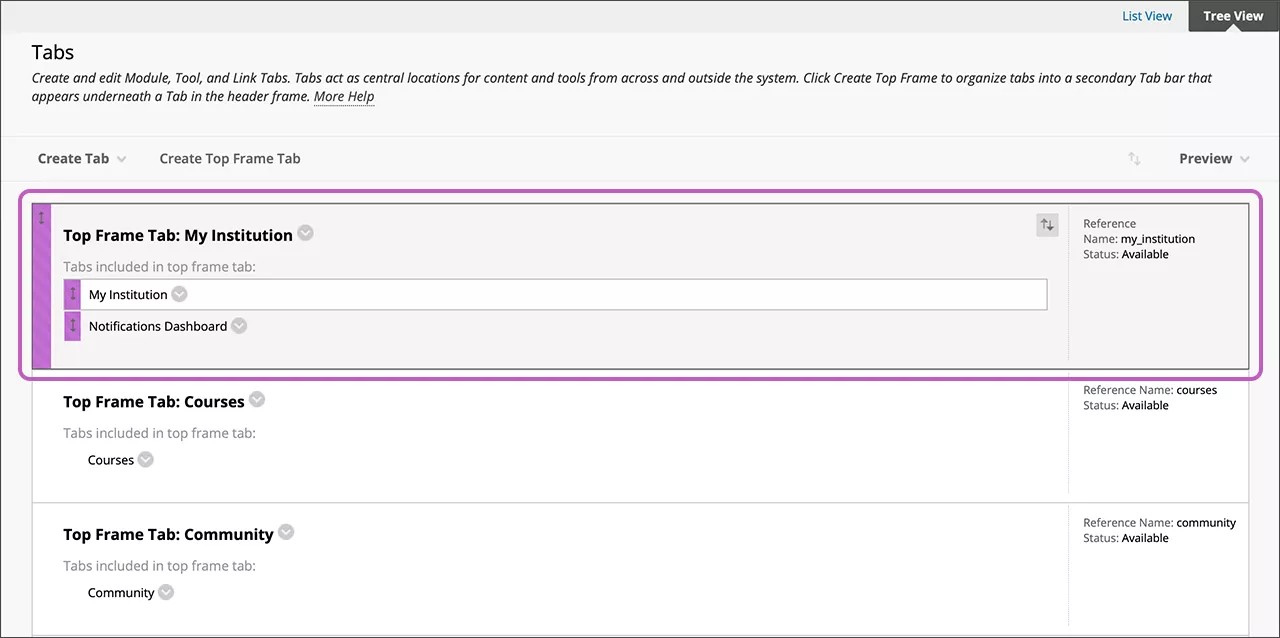
Be sure the top frame tab you selected has a status of Available so users can see it.
- Select the down arrow icon to open the tab's menu, and then select Default Content.
- From the Select Modules list, locate the module you created.
- Select the check boxes for Displayed and Required.
- Select Submit.

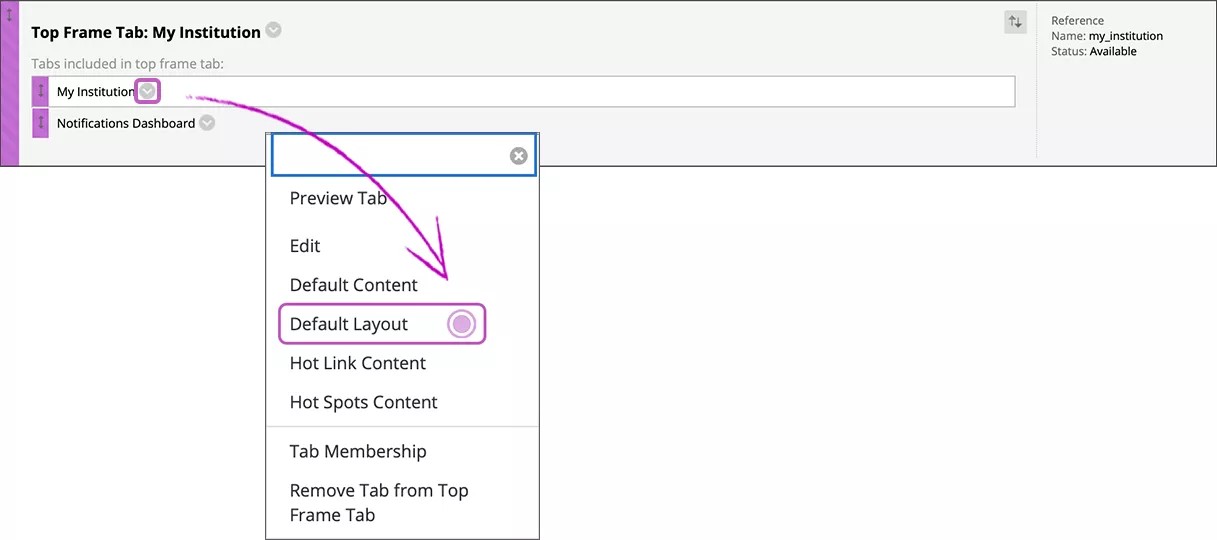
- Select the tab's menu again. Select Default Layout to adjust the position of your module.
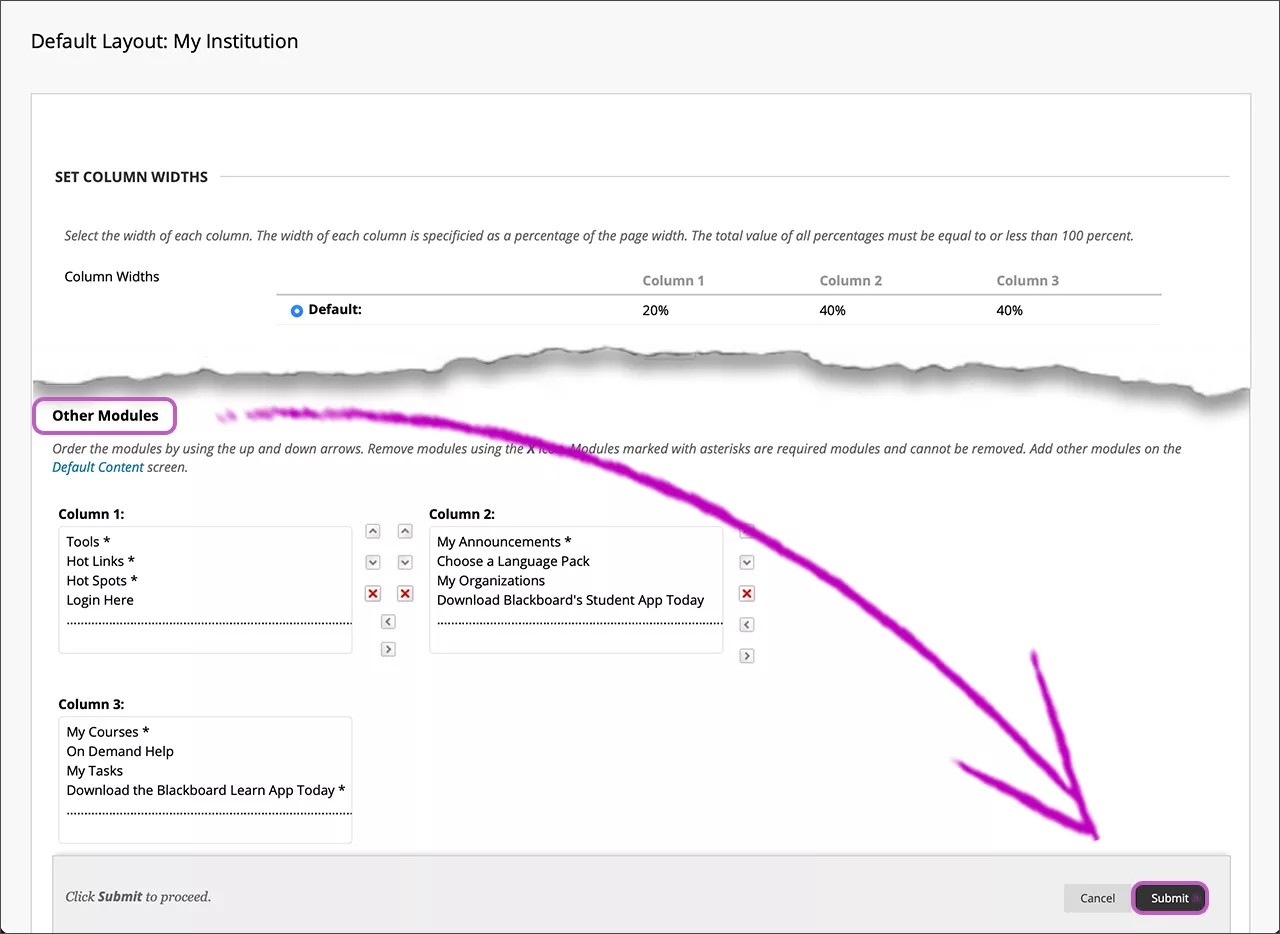
- Under Other Modules, use the arrows to move your new module to the best position on the page.
- Select Submit.
Congratulations, you're done!
More on creating and editing modules