Install Ally tools, filter, and report plugins
Ally is compatible with multiple Moodle hosting options and themes. The supported versions and themes in Ally are:
Moodle 3.11.x
- Snap
- Boost
- Clean
- More
Moodle 4.0.x
- Snap
- Boost
Moodle 4.1.x
- Snap
- Boost
Moodle 4.2.x
- Snap
- Boost
Ally plugin for 4.1 OpenLMS environments
OpenLMS will update their environments to the 4.1 version in upcoming maintenance windows. See the OpenLMS EDU release schedule. The Ally plugin for the 4.1 version will be available after the maintenance windows are executed and should be available in the OpenLMS plugin matrix.
Ally works with Moodle versions prior to 3.10.x but fixes are not supported. We suggest you upgrade your Moodle version. Guidance is available at Moodle version support.
Note: Other versions or themes not mentioned are not supported by Ally.
To configure Ally with Moodle on self-hosted environments, configure these plugins:
- Ally admin tools
- Ally filter
- Ally report LTI
Environments deployed by OpenLMS are already integrated with Ally.
Configuration steps
Download or clone the needed version of the Ally admin tool from github.
- Downloading as a ZIP file
- Change the branch version, if necessary.
Review the version.php file to see if the needed Moodle version ("requires") number and release matches your Moodle version. I.e. for Moodle 3.11
$plugin->release = '3.11.6';
$plugin->requires = 2021051700;
The "3.11.6" release should work with Moodle 3.11 installs. If these parameters don't match your Moodle installation, you may need to change the branch again.
More on the corresponding Moodle releases and version numbers
- Download the repo using the "Clone or download > Download ZIP"
- Cloning git repository
Access the tools folder.
cd [moodle location]/admin/tool
- Clone the repository
Using SSH
git clone [email protected]:anthology-ally/moodle-tool_ally ally
Using HTTP
git clone https://github.com/anthology-ally/moodle-tool_ally.git ally
Checkout the corresponding branch, I.e. for Moodle 3.11 it's MOODLE_311_STABLE
git checkout MOODLE_311_STABLE
Checking out the branch can be used for getting updates too, so, if you updated your Moodle installation, you can just check out the corresponding branch. If the branch is not found, your repo might be outdated, this can be fixed by doing fetch:
git fetch
- Downloading as a ZIP file
Download or clone the needed version of the Ally filter from github.
- Downloading as a ZIP file
- Change the branch version if necessary
Review the version.php file to see if the needed Moodle version ("requires") number and release matches your Moodle version. I.e. for Moodle 3.11
$plugin->release = '3.11.6';
$plugin->requires = 2021051700;
The "3.11.6" release should work with Moodle 3.11 installs. If these parameters don't match your Moodle installation, you may need to change the branch again.
More on the corresponding Moodle releases and version numbers.
- Download the repo using the "Clone or download > Download ZIP"
- Cloning git repository
Access the filters folder.
cd [moodle location]/filter
- Clone the repository
Using SSH
git clone [email protected]:anthology-ally/moodle-filter_ally ally
Using http
git clone https://github.com/anthology-ally/moodle-filter_ally.git ally
Checkout the corresponding branch, I.e. for Moodle 3.11 it's MOODLE_311_STABLE
git checkout MOODLE_311_STABLE
Checking out the branch can be used for getting updates too, so, if you updated your Moodle installation, you can just check out the corresponding branch. If the branch is not found, your repo might be outdated, this can be fixed by doing fetch:
git fetch
- Downloading as a ZIP file
Download the needed version of the Ally report LTI tool from github.
- Downloading as a ZIP file
- Change the branch version if necessary
Review the version.php file to see if the needed Moodle version ("requires") number and release matches your Moodle version. I.e. for Moodle 3.11
$plugin->release = '3.11.6';
$plugin->requires = 2021051700;
The "3.11.6" release should work with Moodle 3.11 installs. If these parameters don't match your Moodle installation, you may need to change the branch again.
More on the corresponding Moodle releases and version numbers.
- Download the repo using the "Clone or download > Download ZIP"
- Cloning git repository
Access the reports folder
cd [moodle location]/report
- Clone the repository
Using SSH
git clone [email protected]:anthology-ally/moodle-report_allylti ally
Using HTTP
git clone https://github.com/anthology-ally/moodle-report_allylti.git ally
Checkout the corresponding branch, I.e. for Moodle 3.11 it's MOODLE_311_STABLE
git checkout MOODLE_311_STABLE
Checking out the branch can be used for getting updates too, so, if you updated your Moodle installation, you can just check out the corresponding branch. If the branch is not found, your repo might be outdated, this can be fixed by doing fetch:
git fetch
- Downloading as a ZIP file
Verify the folder structure.
The admin tool directory should be named ally. It should have a path as follows:
[yourmoodledir]/admin/tool/ally
The filter directory should be named ally. It should have a path as follows:
[yourmoodledir]/filter/ally
The report directory should be named allylti. It should have a path as follows:
[yourmoodledir]/report/allylti
- Make sure that each folder and its contents are readable by your web server.
- Log in as an admin user to your Moodle site and open the admin page. This should check for new plugins and present you with an option to Upgrade Moodle database now. Select this button to install the plugins.
- After installing the plugins, navigate to System Administration > Plugins > Admin tools > Ally.
Select Auto configure Ally web service'.
On the next screen there will be a web service token and a URL for testing the ally web service.
This URL needs to be directly accessible from the internet so that Ally can use it.
If successful, you will need to copy the Ally web service token, and web service link and provide it to your Ally technical consultant or to the support engineer. They will contact you once everything is set up at their end and provide you the 'key', 'secret', 'launch URL, 'file updates URL and 'client id'.
If your Moodle instance makes use of custom required fields for user accounts, “Log in as” the Ally Webservice user that gets created by the plugin auto-configure to ensure those custom fields are populated and saved.
Configure the Moodle plugin
The Ally technical consult will create the Ally client using the Moodle Webservice Token generated in the previous section and will provide you the details for configuring the Ally Plugin.
- Log in as a Moodle administrator.
- From Site administration select Plugins and Admin tools. Select Ally Configuration.
- Enter the following details
Content Authors: The user roles that are content authors. Must be: Manager, Course creator, Teacher (the defaults).
This normally shouldn't need to change, please don't change this without consulting with the Ally technical consultant.
- Key: The LTI Key that was provided by Ally technical consultant
- Secret: The LTI Secret that was provided by Ally technical consultant
- Launch URL: The LTI Launch URL that was provided by Ally technical consultant
- File Update URL: The File Update/Event URL that was provided by Ally technical consultant. https://[AllyEnvironment].ally.ac/api/v1/events
- Client ID: The Client ID that was provided by Ally technical consultant
- Log range: Light
- Save changes.
Ally Institution Report
Once the Ally plugin has been configured, you will be able to access the Ally Institution Report.
No data will be present in the report until Ally course syncing has occurred and the initial report is generated.
To access the Ally Institution Report, go to Site administration and select Reports. Select Accessibility.
Ally Filter
When you are ready to have the Ally accessibility score indicators and Alternative Accessible version download option made available within Moodle, you will need to activate the Ally filter.
Enable the Ally filter
- From Site administration select Plugins and Plugins overview.
- Go down to the Text filters section and enable the Ally filter.
- Move the Ally filter to the top of the Filter list.
Access Ally Configuration UI
We provide you with instructions on how to access Ally Configuration during set up. If you don't have access, submit a request on Behind the Blackboard.
Ally Configure Courses
Configure courses
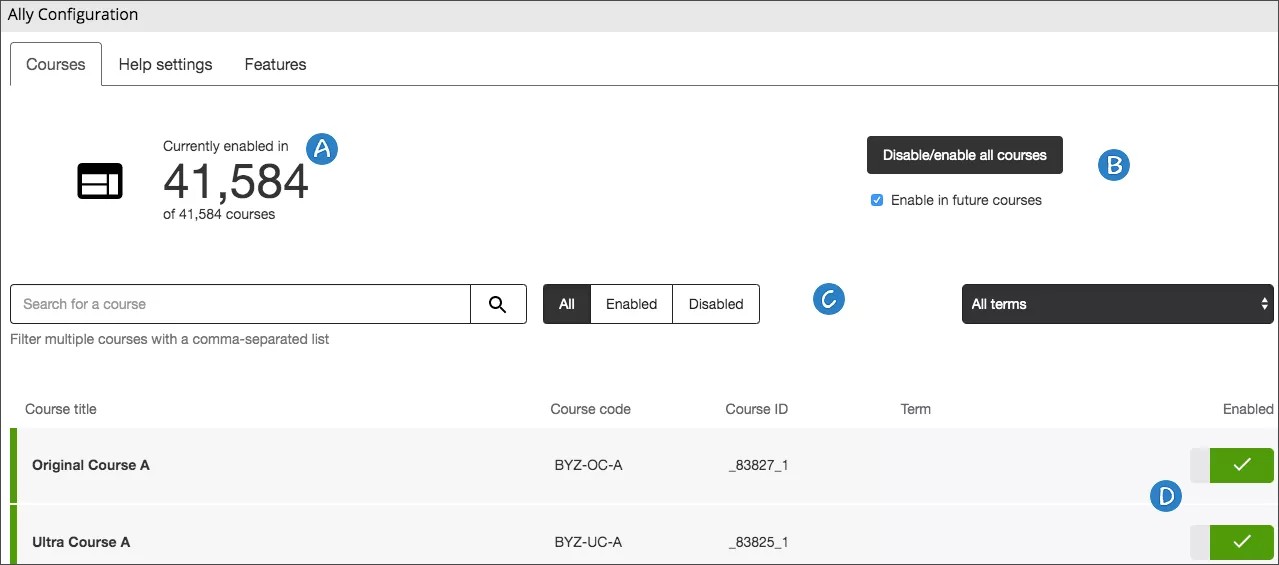
Go to your Ally Configuration page and turn Ally on for all courses or decide course-by-course. It's up to you.
- View how many of your courses use Ally.
- Turn Ally on or off for all existing courses. Decide ahead of time if you want it enabled for all future courses as well.
- Search for individual courses or filter all course by enabled, disabled, and term.
- Turn Ally on or off for individual courses.
Turn Ally on or off for a single course
When Ally is on, instructors and students benefit from the accessibility scores, instructor feedback and alternative formats that Ally provides.
The Institutional report is available for all courses. It doesn't matter if Ally is on or off in a course. The course appears in the Institutional report.
From Ally Configuration, find the course you want to update. Use the Search field and filters to search by course title, course ID and course code.
Select Enable or Disable under the Enabled column to turn Ally on or off.
- Ally is off: Select Enable course UI integration to turn on

- Ally is on: Select Disable course UI integration to turn off

Turn Ally on or off for all courses
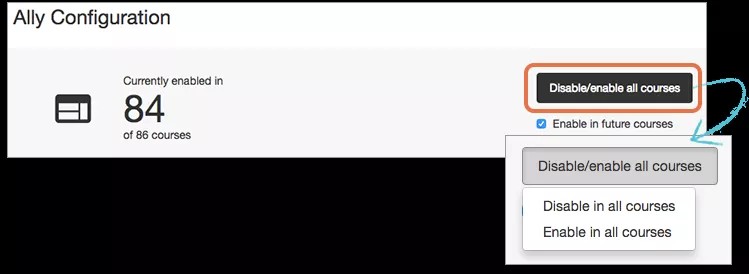
Not sure if all courses are using Ally or not? At the top of the Ally Configuration page, see how many of your courses are currently using Ally.
When Ally is on, instructors and students benefit from the accessibility scores, instructor feedback and alternative formats that Ally provides.
The Institutional report is available for all courses. It doesn't matter if Ally is on or off in a course. The course appears in the Institutional report.
You can turn Ally on or off in every existing course from the Ally Configuration page. Select Disable/enable all courses and select Disable or Enable.
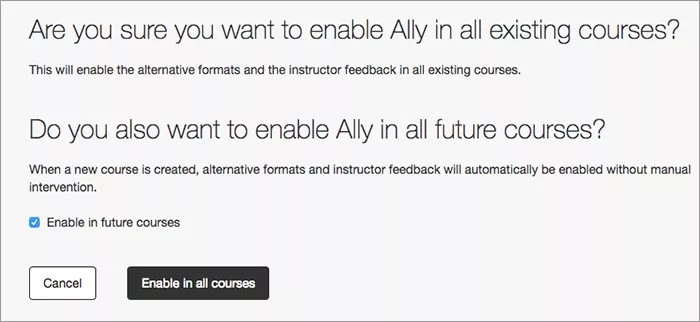
Select Enable in future courses if you want Ally automatically on in all new courses.
If you don't select this, new courses will not have Ally enabled. If you want Ally on at a later date, turn Ally on for single courses.
After you choose to disable or enable in all courses, you need to confirm your choice. Select Enable or Disable, depending on your choice. Select Cancel if you changed your mind and don't want to change anything.
Turn Ally on for all new courses only
When Ally is on, instructors and students benefit from the accessibility scores, instructor feedback and alternative formats that Ally provides.
The Institutional report is available for all courses. It doesn't matter if Ally is on or off in a course. The course appears in the Institutional report.
Select Enable in future courses if you want Ally automatically on in all new courses.
If you don't select this, new courses will not have Ally enabled. If you want Ally on at a later date, turn Ally on for single courses.
Ally Configure Help Settings
Configure Ally user help settings
Configure custom help messages that display in the Alternative formats and Instructor feedback modals. The custom help messages can be used to point students and instructors to existing institutional documentation, share contact information, and so on. When no custom message has been configured, the Help links point to these pages in Blackboard help:
- Alternative formats: This page explains how and when the different alternative formats can be used
- Instructor help: Everything instructors need to know about Ally in their courses
The custom help content can be configured in the Ally Configuration UI, and uses the Markdown format to help provide a structured and accessible message.
- Go to Ally Configuration and select Help settings.
- Choose the default or custom help option for both the Instructor feedback help and Alternative formats help.
- If you choose the custom option, edit the Custom message.
Use the Markdown format to help provide a structured (and accessible) message.
- Select Save changes.

Configure expert help
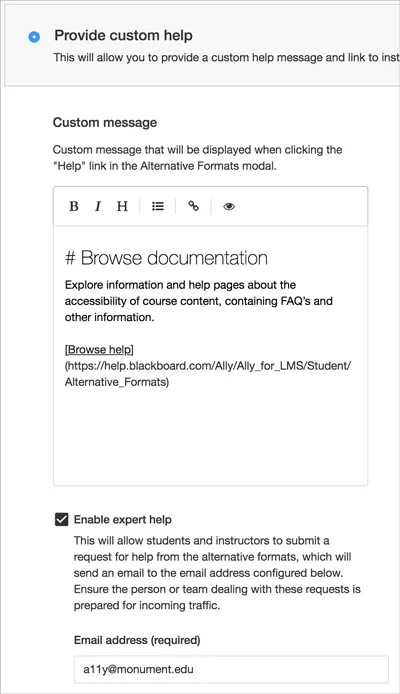
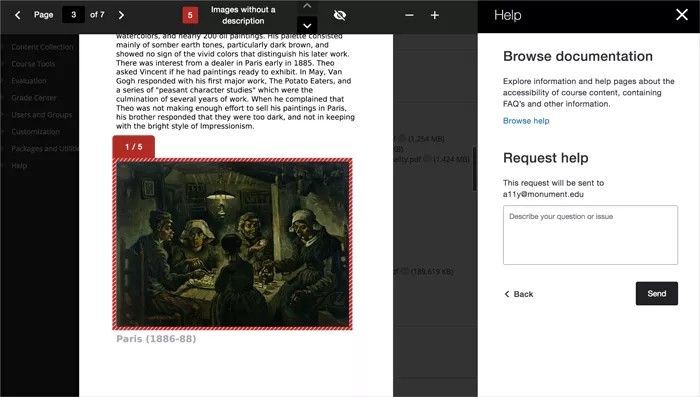
Give your instructors and students easy access to your team of accessibility experts. Enable expert help to add a way for your users to request more help directly from in the alternative formats and instructor feedback panels.
When a request is made, an email containing the help request and details about the current course, content item and user is sent to the email address you configure.
- Go to Ally Configuration and select Help settings.
- Choose Provide custom help for both the Instructor feedback help and Alternative formats help.
- Select Enable expert help.
- Type the email address for your team of accessibility experts.
- Select Save changes.
The Ally API user for the Blackboard Learn integration needs to be given the "Administrator Panel (Users) > Users" or "system.user.view" permission to allow Ally to include the student name and email address in the help request email. The Ally API user for the Moodle integration needs to be given the “moodle/user:viewalldetails” permission to allow Ally to include the student name and email address in the help request email.
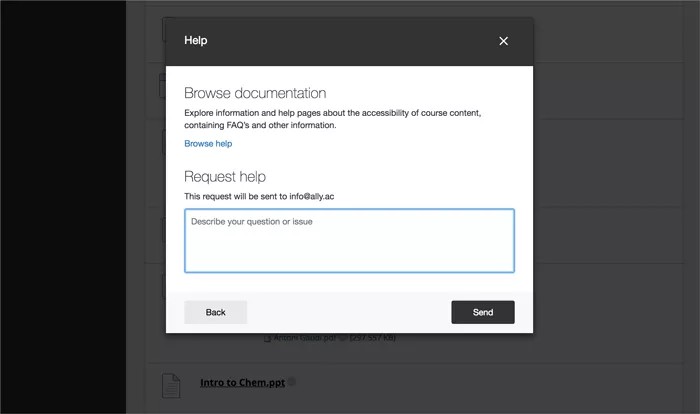
Request alternative formats help
Request instructor feedback help
Customize Ally Features
Customize Ally feature flags
You can turn some features on or off to customize Ally to suit your institutional preferences.
In Ally Configuration, decide what features you want to be enabled.
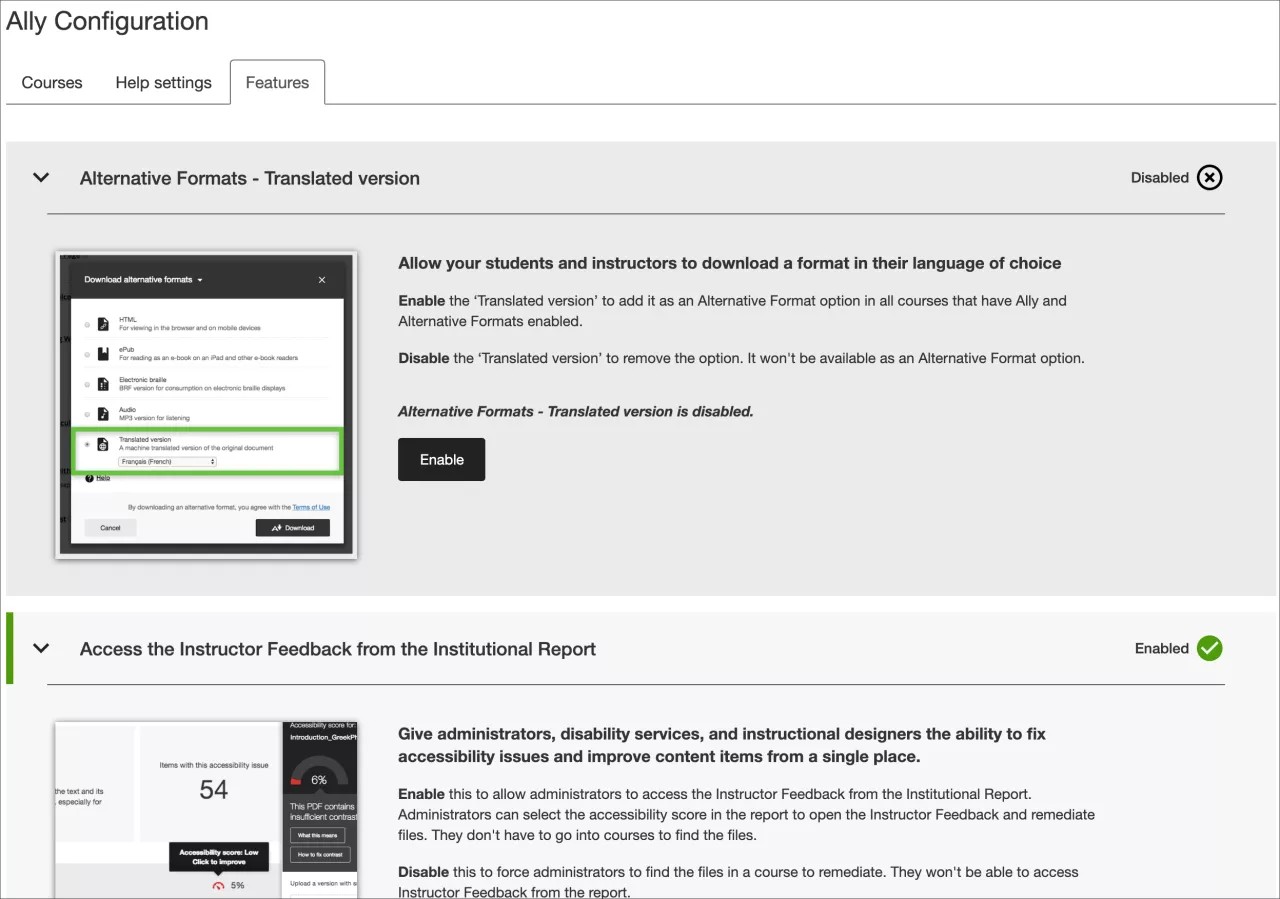
- Go to Ally Configuration and select Features.
- Find the feature you want to turn on or off and select it.
- Immersive Reader alternative format: Students can enhance the reading experience with this online feature.
- Translated version alternative format: Students can download a translated alternative format of an original file.
- BeeLine Reader alternative format: Students can download a BeeLine Reader alternative format.
- Score indicators in all courses for administrators: Administrators can see the Ally accessibility score gauges in all courses, including courses where Ally is not enabled in the Ally Configuration UI. This allows them to fix issues without having to enable Ally in the course.
This feature flag is available for D2L Brightspace, Instructure Canvas, Moodle, and Schoology.
- Access the Instructor Feedback from the Institutional Report: Give administrators, disability services, and instructional designers access to the Instructor Feedback.
- Instructor feedback for WYSIWYG content (Rich Text Editor content): Instructors and administrators can access feedback for content created in your LMS WYSIWYG editor. Tick on the "Also enable LMS built-in checker" checkbox to enable both accessibility checkers.
More on WYSIWYG Accessibility for instructors
This feature flag does not disable the Instructor Feedback or quick fixes on HTML files uploaded or created in D2L Brightspace.
Ally data integration into Impact by Instructure (formerly EesySoft): Institutions with an Impact by Instructure license can allow more detailed monitoring of interactions in the alternative formats modal, the instructor feedback, and the course accessibility report. Institutions can use this data for adoption reports and campaigns within Impact by Instructure. The Impact by Instructure integration is disabled by default.
This integration requires an Impact by Instructure license.
- Select Enable or Disable to turn the feature on or off.