This information applies only to the Ultra Course View.
This information applies only to the Ultra experience.
Explore the courses page
From the list where your name appears, you can view a list of your courses. You can return to previous courses to review content, reuse material, and prepare your future courses.
Your institution controls the page that appears after you log in.
On the Courses page, you can access all of your courses. Each course card lists the course ID, course title, and instructor. If your course has multiple instructors, select Multiple Instructors for a list. Select More info to see the description and schedule, if added.
Courses that are associated with a term will always be displayed under that term. Note, however, that a course associated with a term that is made available to students will display both in the current term and in term it is associated with.
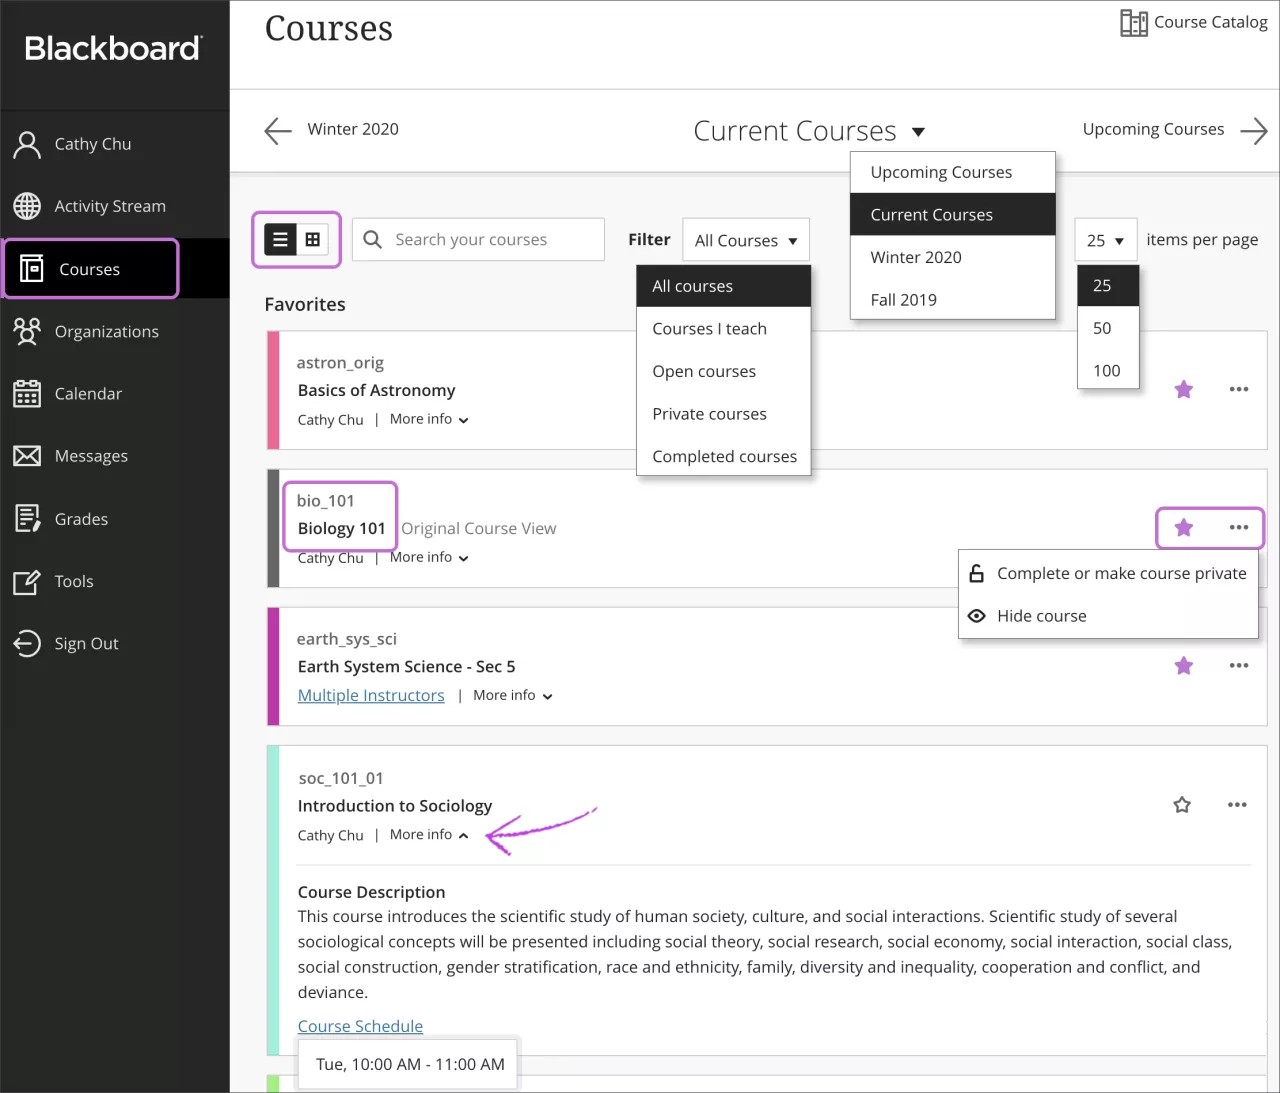
Filter or search your list. Use the Filter menu to modify your view of the page. Your filtered list stays as you access courses. If you navigate to another page, all courses show again. Use the search function to find courses on the current page.
Browse by term. Move to past, current, and upcoming courses. If you teach a lot of courses, you can choose how many appear on each page. At the bottom of the list, you'll find a page selector to navigate through long lists.
View your favorites quickly. If you access a course frequently, you can select the star button to add it to your favorites so it appears at the top of the list. You can select the star button again to remove a course from your favorites.
You can't reorder courses in the list. Courses are listed in alphabetical order and grouped by term with the newest courses first. Your favorites appear at the top of the page.
Manage your courses. You can set your courses to these states:
- Open. You can open a course when you're ready for students to participate.
Private. You can make a course private while you add or experiment with content, and then open it to students when you're ready. Students see private courses in their course lists, but they can't access them.
You can't make a course private during an active term. If a user needs access to a private course, contact your administrator about a course's settings.
Hide. You can choose to hide a course from your course list to organize your view. Activity for hidden courses no longer appears in the global pages about all your courses. Only instructors have the option to hide courses. To show a hidden course, filter the list by Hidden from me > open a course's menu > select Show course.
Hidden courses always appear in Grades unless the course is unavailable or occurs outside of the set start/end dates.
Complete. You can choose to set your course to Complete when the course has ended, but you can no longer make changes to it. Students can access the content, but they can't participate in the course any longer. For example, they can't reply to discussions or submit assignments. You can return the course to Open or Private as you want. However, if a course has an end date, and the end date passes, then students can't access the course any longer. So, if you complete a course and open it again after the end date, students can't access it.
Change your view. You can view the Courses page as a list or a grid. In grid view, you can customize the image on your course cards.
The minimum size for images is 1200 x 240 pixels with an aspect ratio of 4:1. Use this measurement to ensure the best quality. Open the menu in the top-right corner of a course card's image and select Edit course image to upload a new image.
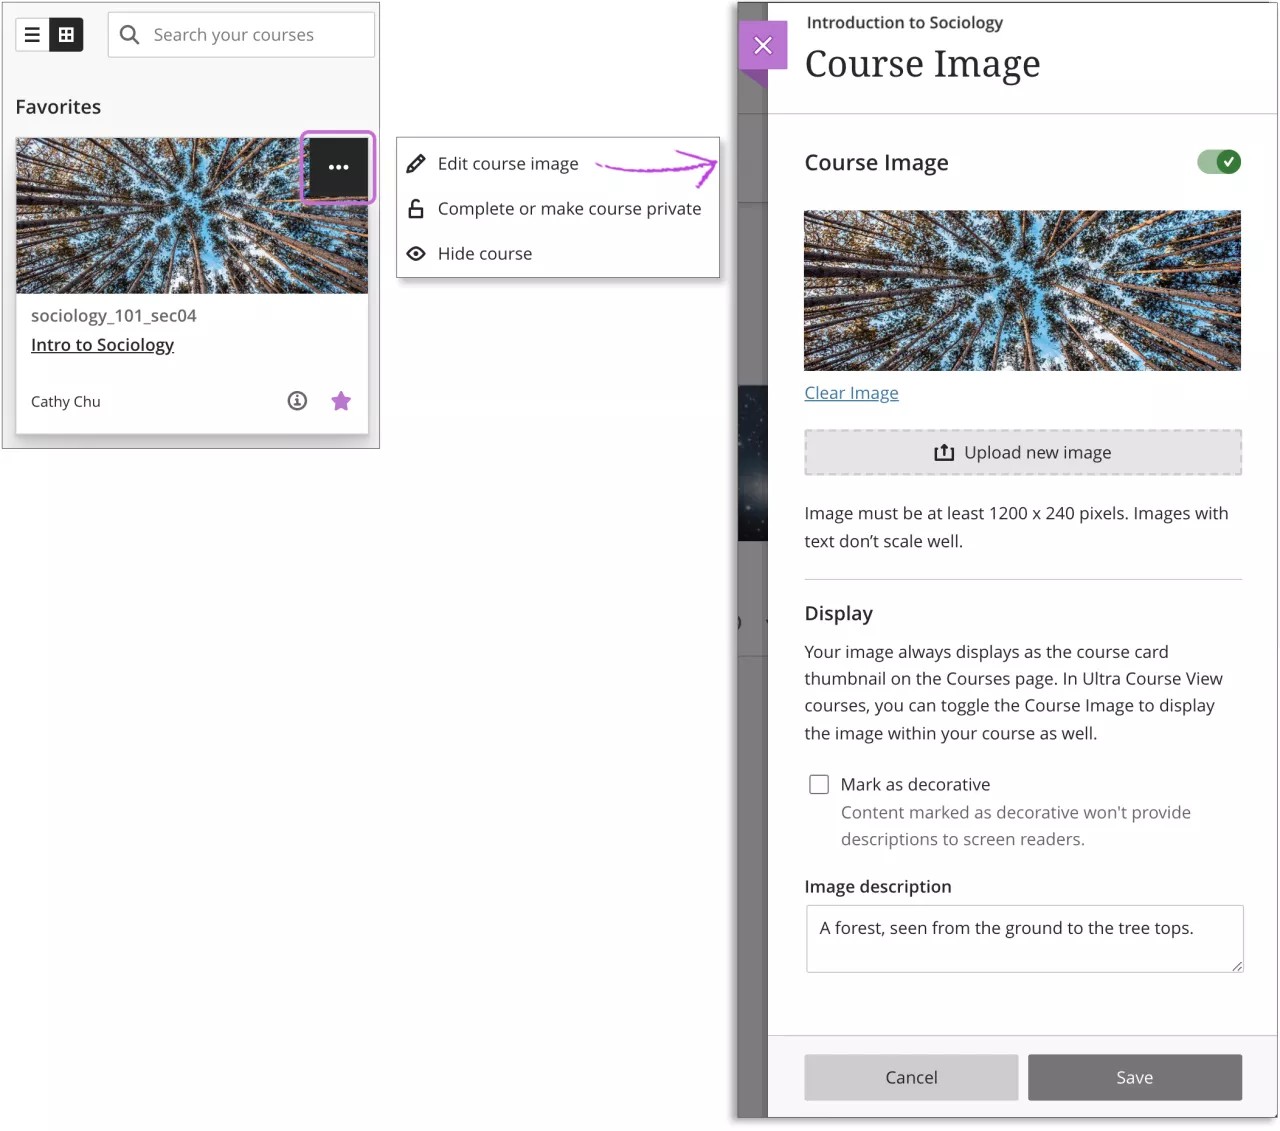
Text isn't recommended for the course card image. If you use text, center the text both vertically and horizontally in the image. Wrap longer text over multiple lines so the text isn't cut off in smaller breakpoints.
How do terms work?
Terms are defined time periods that help institutions organize courses according to the academic calendar. Your institution may use terms to group your courses and control availability in bulk.
The term's start and end dates control where associated courses appear on the Courses page:
| Course Duration | Term Alignment |
|---|---|
| Continuous | Current term |
Select dates: Current date is equal to or between start and end date Current date occurs before the start date Current date occurs after the end date |
Current term Future term Past term |
Days from the end of enrollment Student and guest users with remaining days Student and guest users with no remaining days Non-student, non-guest users |
Current term Past term Current term unless associated with a term in the past of future |
Course Duration - Use Term Duration Continuous Select Dates Current date is equal to or between the Term start and end date Current date occurs before the Term start date Current date occurs after the Term end date Days from end of enrollment Student and guest users with remaining days Student and guest users with no remaining days Non-student, non-guest users |
Current term Future term Past term
Current term Past term Current term |
- If the term duration has elapsed, the course appears in Past Courses with the term name as the page title. Your students won't have access to these courses.
- If the term duration is in the present, the course appears in Current Courses with the term name as a group.
- If the term start and end dates are both in the future, the course appears in Upcoming Courses with the term name as a group. Your students won't have access to these courses.
If your course isn't associated with a term or uses custom start and end dates and is currently active, it appears in the Assorted dates group on the Current Courses page. Non-term courses are labeled by year on the Past Courses page when they end or on the Upcoming Courses page if they start in the future.
You have the ability to manage course duration through Course Settings, at the top right corner of your course.
More on managing Course Duration
More on managing Course Availability
For administrators: Adjustments to course settings can be made from the Edit Course interface in the administrator panel as well as Course Settings in a course. Adjusting Course Duration and/or Term Duration will impact the term display logic.
Browse the Course Catalog
You can use the course catalog to browse the courses offered at your institution. You can find the Course Catalog link on the Courses page.
In the catalog, you can search for courses based on these fields:
- Course ID
- Course Name
- Course Description
- Course Instructor
- Course Term
After you select the field type, type a search term or phrase. By default, the search looks for any course that contains your search term. You can change this operation to search courses that equal or start with your search term instead. You can also select Not blank to see the full list of available courses.
Select Go to start your search. If your list of results is too long, you can refine the results with the Creation Date filter. Choose a date and whether the course was created before or after that date.
Select a course in the results to preview the content. If the course allows self-enrollment, you or your students can enroll in the course immediately. In the course catalog, open a course's menu and select Enroll.