When you deploy a test or survey in a content area, you set the options for feedback, due date, restrict by location, timer, multiple attempts, and presentation.
The options in this topic apply to both tests and surveys.
Test or Survey Options page
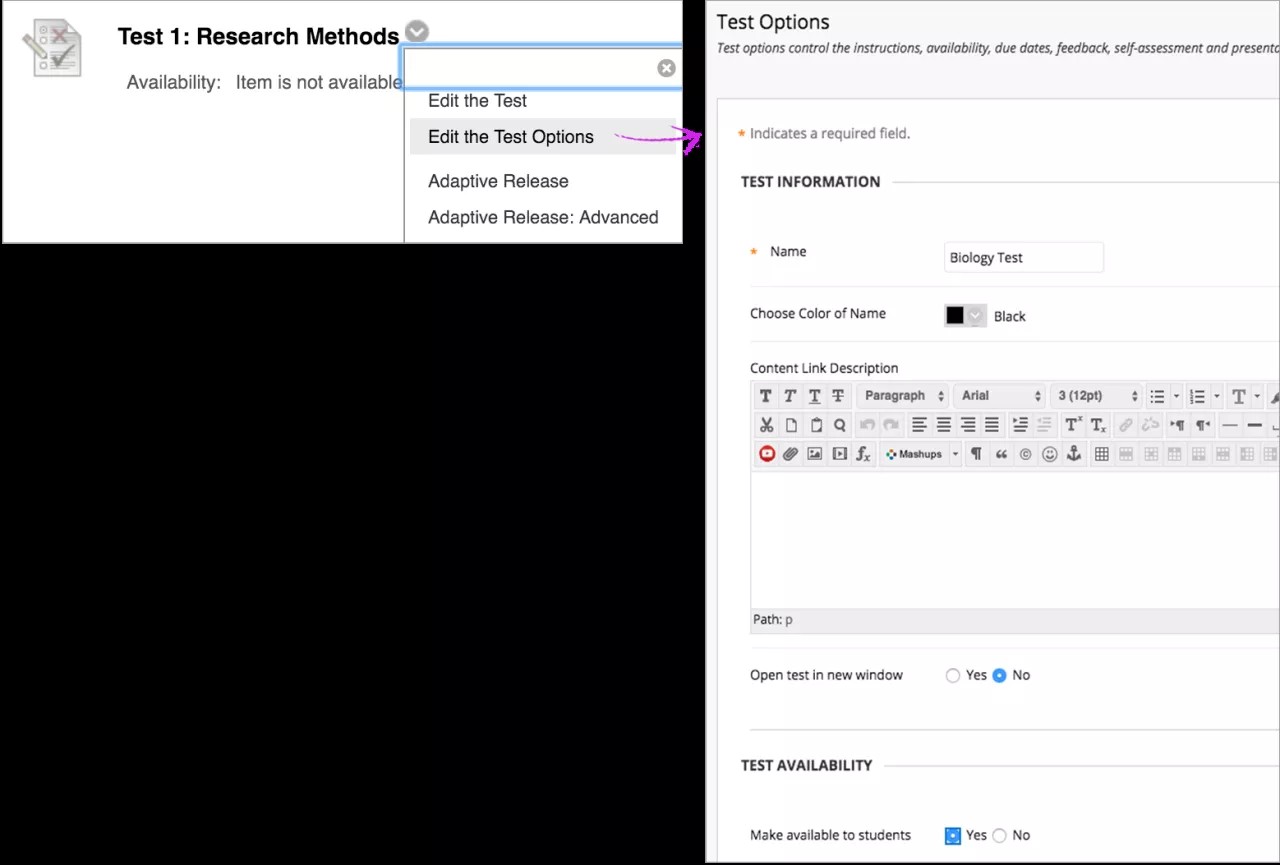
Open a test or survey's menu and select Edit the Test Options or Edit the Survey Options.
On the Test or Survey Options page, you can add instructions or a description that appears to students in the content area.
You also manage the test or survey's availability.
Unavailable and deleted tests and surveys differ in these ways:
- Unavailable tests and surveys deployed in a content area don't appear to students. When Edit Mode is ON, instructors and course builders can see unavailable tests.
- You can limit availability to a specific time period. Display dates don't affect a test or survey's availability, only when it appears.
- If you delete a test or survey from a content area, it's removed from that location. You can deploy the test or survey again as needed—in one location only.
- If you delete a test or survey from the Tests or Surveys page, it's permanently deleted from your course. The action is irreversible.
Multiple attempts
You can allow students to take a test or survey multiple times. The status of multiple attempts appears to students at the top of the test or survey.
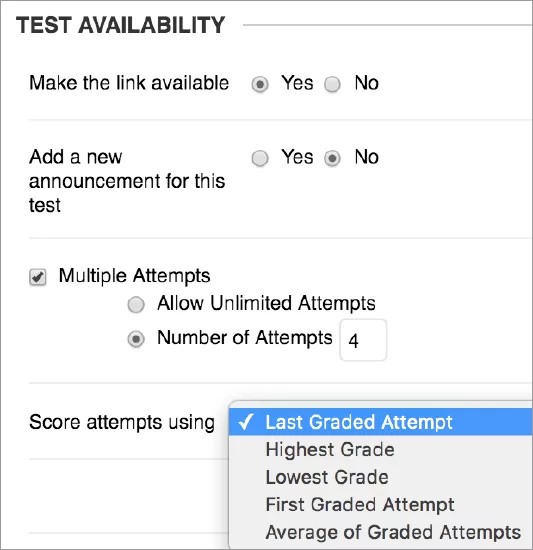
Select Allow Unlimited Attempts to allow students to take the test or survey as many times as they want. Or, select Number of Attempts and type a number.
With multiple attempts for a test, you can also select which attempt's score to use in the Grade Center from the Score attempts using menu.
Force completion, timer, and password
The options in this section apply to both tests and surveys.
Some test settings let you control the amount of time that students can access a test. You can also set a password for more secure online testing.
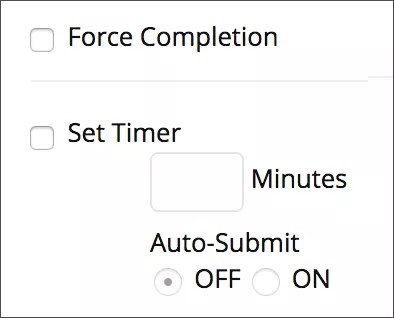
Force completion
If you turn on Force Completion, students must complete the test when they launch it. Students may only access the test ONE TIME. The Save function is available for students to save the questions as they work through them, but they may not exit and re-enter the test. In the instructions, Force Completion is noted and explained to students. If you don't turn on Force Completion, students may save their progress, navigate away, and return to complete the test.
If students accidentally close their browsers, leave the test page, or lose power or their internet connections, they can't continue. They must contact you and ask for a new attempt.
You may want to reserve the Force Completion option. Instead, you can require students to take a test on campus, connected to an Ethernet cable instead of Wi-Fi, and with a proctor. If issues occur, the proctor can reset the test.
Example: Force completion with timer
Students must finish the test after they begin. They can't exit the test and return, even though time is left. If students have connectivity issues, they must contact you to reset a test with Force Completion.
Example: No force completion with timer only
A student may lose internet connection for 10 minutes on a timed test. After the connection restores, the student can access the test and continue to work. With Auto-Submit, this student will miss out on some work time. Without Auto-Submit, the student can continue to work and you can check the student’s completion time after submission.
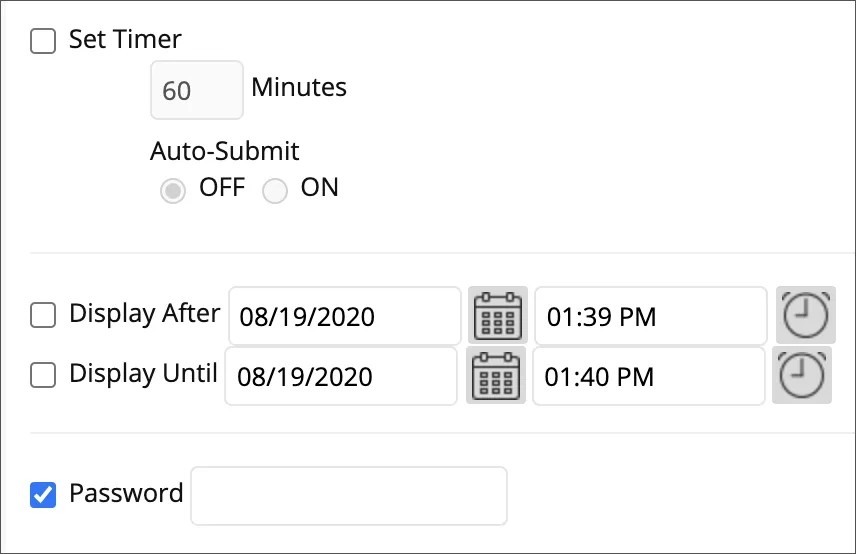
Set timer
You can set a timer to limit students’ completion time. You can set the timer to auto-submit the test when the timer ends or allow students to continue working and manually submit. You can view students’ completion times in their submissions.
Select the Set Timer option and type the amount of time in the Minutes box. The maximum time you can add is 1440 minutes.
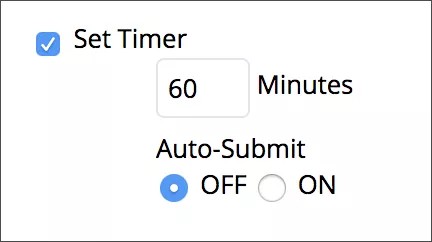
During a timed test, the time elapsed is displayed to students. Timer warnings appear at set increments when half the time remains down to 30 seconds.
If students save and exit the test, the timer continues. Students can return to work on the test until they submit or the timer auto-submits, whichever comes first.
Check out the student view of timed tests—use your browser's back button to return to this topic
Auto-Submit
If you set the timer, you can turn on Auto-Submit. Tests are automatically saved and submitted when the time expires.
If you don't turn on Auto-Submit, students have the option to continue when the time expires even beyond the 1440-minute maximum timer length. Those tests appear with the Needs Grading icon in the Grade Center to alert you students used more time. The tests also appear with an OVER TIME label in the Test Information area. The system doesn't apply an automatic penalty for completion times that are over the limit. On a student's submission page, you can adjust the grade based on the completion time.
Example:
On Tuesday, a student begins a test with a time limit of 60 minutes without Auto-Submit. The student exits the test with half of the questions left. The timer doesn't stop when the student exits. On Wednesday, the student returns to finish the test and submits it. The time elapsed is 16 hours and 19 minutes.
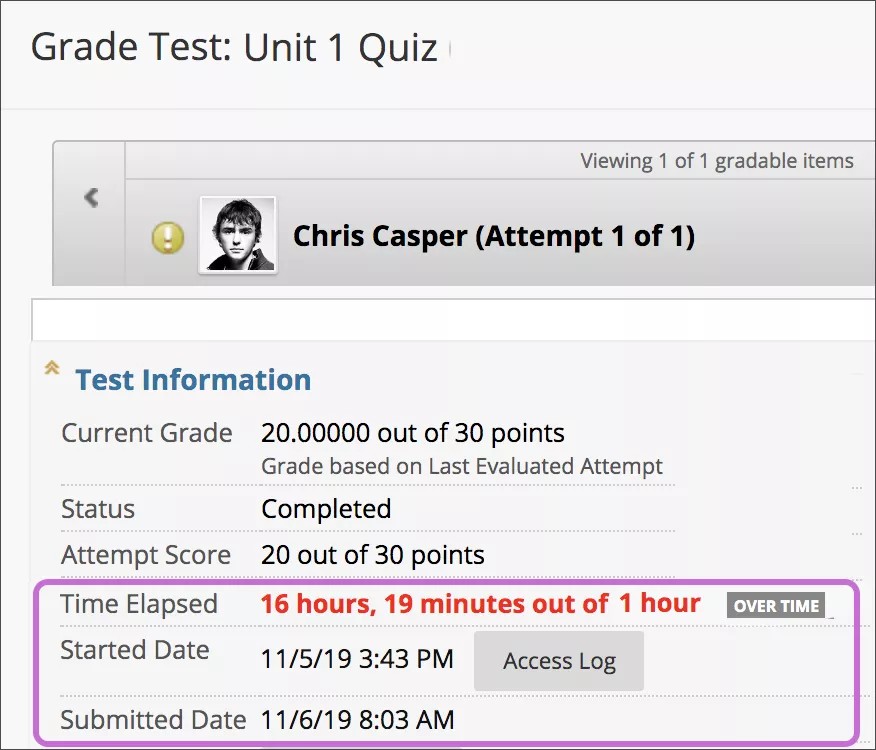
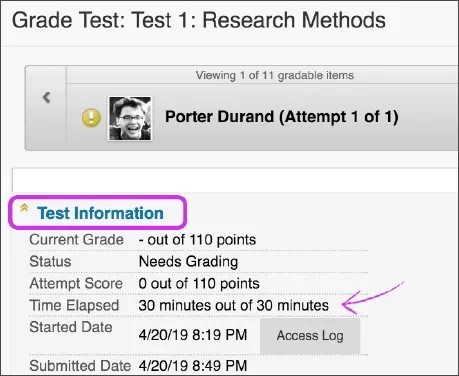
View completion time
To view the completion time, open a student's submission from the Grade Center and expand the Test Information section.
Video: Timed Tests
Watch a video about timed tests
The following narrated video provides a visual and auditory representation of some of the information included on this page. For a detailed description of what is portrayed in the video, open the video on YouTube, navigate to More actions, and select Open transcript.
Video: Timed tests shows how to add a timer to tests.
Password
You can set a password for students to use to open a test or survey. Passwords have a limit of 15 characters and are case sensitive.
Restrict location
You can require students to take a test or survey in a specific location. Students outside of this location aren't able to take the test or survey.
This option is based on a range of IP addresses created by your institution. If your institution hasn't created this range, this option doesn't appear.
IP addresses identify specific computers and are a good method to enforce location restriction requirements. On the Test Options page, select a location from the Restrict Location menu.
At times, you might need to allow a student or a group of students to take the test from somewhere outside of a specified location (IP range). In this case, you can use the Test Availability Exceptions to exclude specified students or groups of students from the location restriction.
More on test availability exceptions
Students with this exception enabled can take the test from any location, even if the test has the restriction for other students.
In a high-stakes testing situation, you or the proctor can override a restriction that has been enforced by the system. On the Test Begin page, you can see the individual instances when students were prevented access to a test. You will also see an option to override this restriction to allow a student to continue the test.
These restrictions are logged by the system in the event that later review is required.
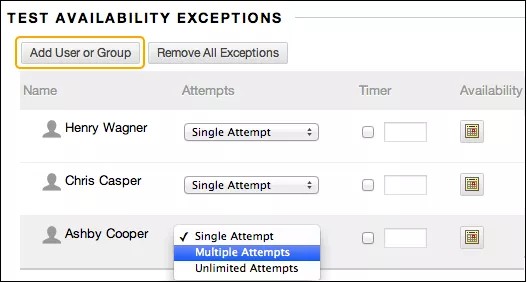
Test availability exceptions
For existing availability settings, you can make exceptions for individual students or groups. You might use exceptions to provide an accommodation to a student who is disabled or for technology and language differences.
If you've made an adaptive release membership rule that delivers the test to only certain students or groups, only those students can access the test. If you add different students or groups to the Test Availability Exceptions section, they won't be able to access the test. If adaptive release items are required, such as Display After/Until then adaptive release needs to be on.
Example:
For a test with one attempt, you can allow more attempts for a student who is blind and wants to use screen reader technology for the first time.
If the settings exist for a test or survey, you can create these exceptions:
- Number of attempts
- Timer
- Availability: Date and time the test is available to the student or group
If adaptive release items are required, such as Display After/Until then adaptive release needs to be on.
- Force completion
- Restrict location
You can set a date and time in only one of these areas: adaptive release or test exceptions. If you set a date and time in one area and then set a date and time in the other area, the first setting is overwritten.
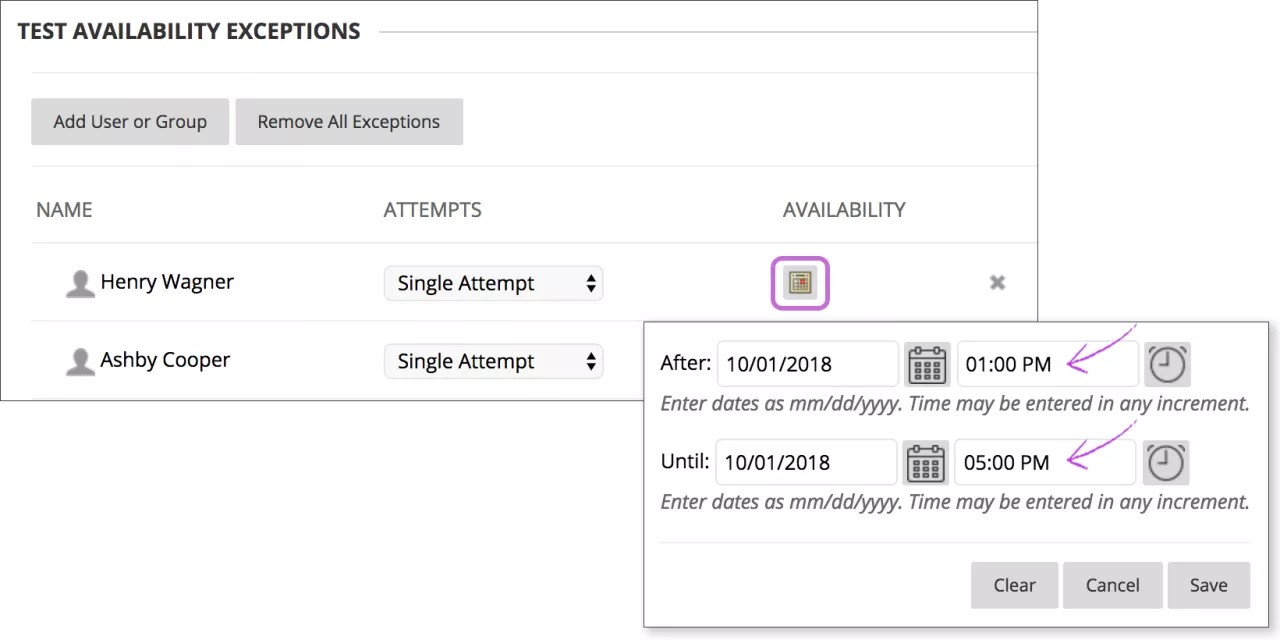
Extend availability
With test availability exceptions, you can offer certain students and groups longer access to a test.
Example:
In the Test Availability section, you choose to display a test on October 1 from 1:00 PM to 3:00 PM.
In the Test Availability Exceptions section, you can choose students and groups and give them longer access to the test. You must add a day and time for the After and Until fields.
Due date
If you use grading periods in the Grade Center, set a due date to easily include that test or survey in a grading period and on the calendar in the My Blackboard menu.
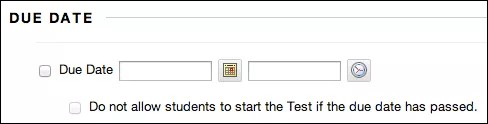
Due date and late submissions
To prevent late submissions, you can select the check box for Do not allow students to start the Test/Survey if the due date has passed. After the due date, students receive a message that notifies them that they can no longer complete the test or survey.
When you allow late submissions, they're clearly marked on these pages:
- Needs Grading—tests only
- View All Attempts
- Review Test Submission
- Grade Details
Late submissions for automatically graded tests also appear on these pages. You must manually review late test submissions to remove the Needs Grading status. When you access a late submission and select Save and Exit, the automatically graded test grade is released to the student and the grade appears in the Grade Center column. Because surveys are anonymously submitted, you won't be able to view students' actual submissions. But, if a student submits a survey late, you also need to access the submission and select Save and Exit. Then, the Completed icon appears in the Grade Center and for the student in My Grades.
Self-assessment options
By default, a deployed test is included in Grade Center calculations. However, you can allow students to take tests for review or practice without impacting Grade Center calculations.
You can turn a test into a self-assessment by hiding students' scores in the Grade Center. Students can take the test to reinforce learning without feeling pressure about a score affecting their total grades. Select the appropriate options in the Show Test Results and Feedback to Students section so they're able to see how they did. If you select all options, students will see the answers they selected and which ones are correct.
| Option | Description |
|---|---|
| Include this Test in Grade Center Score Calculations | You can include this test in Grade Center calculations. If the test isn't included, the score doesn't affect any Grade Center calculations. |
| Hide Results for this Test Completely from Instructor and the Grade Center | You can hide this test score from you and exclude it from Grade Center calculations. The display in the Grade Center will read Complete/Incomplete and N/A or zero appears on the Grade Details page. You can't see students' answers to questions. Students can view their own scores.
When you select this option and edit column information in the Grade Center, these will be unavailable:
|
Results and feedback options
You can set which results and feedback are available to students after they complete a test or survey. You can set one or two rules with the menus. You can't choose some rules in combination. After you select a rule in the first menu, some may not appear in the second menu.

If rules conflict, the system grants the student or group of students the more permissive settings. For example, students will receive the greatest number of attempts and longest availability time.
The image shows the two default options applied to tests: After Submission and Score per Question. If you make no changes, students see their overall test scores and the scores earned for each individual question after they submit their tests. Select more options to determine what else they see, such as the correct answers or your feedback.
Students can always see their overall test scores. You can't change that option from this page. If you don't want them to see their scores yet, access the Grade Center column's menu and hide the column from students. However, when you hide a test column from students, they see nothing about the test in My Grades. When they access the test in the content area, they receive a message that says when they submitted their tests. No scores appear.
This table explains the test and survey results and feedback options.
| Option | Description |
|---|---|
| When | Set when appropriate test results and feedback are shown to students:
|
| Score per Question | Show the score earned for each test question. This option is a default for tests only. Clear the check box if you don't want to show scores for individual questions. |
| Answers | You can allow students to see information about their answers:
Example 1: Show more feedback When students access their tests, they see their overall scores, each question's score, and all answer options. They see their submitted answers marked as correct or incorrect, and any feedback provided. 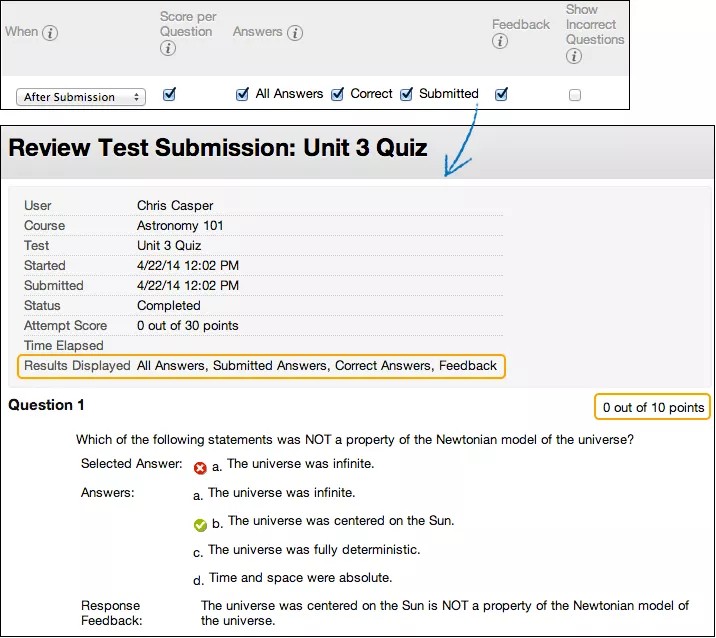
Example 2: Show less feedback to discourage cheating If students take a test at different times, you can make a limited amount of feedback available until all students submit the test. For the first rule, select After Submission in the first menu and clear the check box for Score per Question. Make no other selections. After they submit their tests, students can only see their overall test scores. 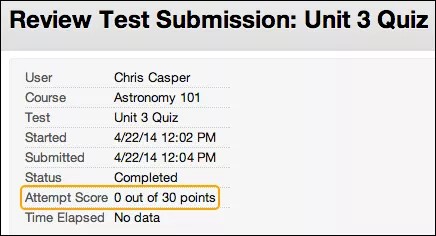
For the second rule, select After Due Date and select options to show more results and feedback. You can create an announcement to notify students that additional feedback is available to view. |
| Feedback |
Show instructor-generated feedback for each question. This option appears for tests only. Students won't see the feedback provided by the instructors unless the Feedback option has been turned on in the test settings page. A warning message will be shown in the Feedback panel when the instructor tries to save the feedback text, if the Feedback option has not been turned on. Example: A new test is created. Feedback is not turned on: 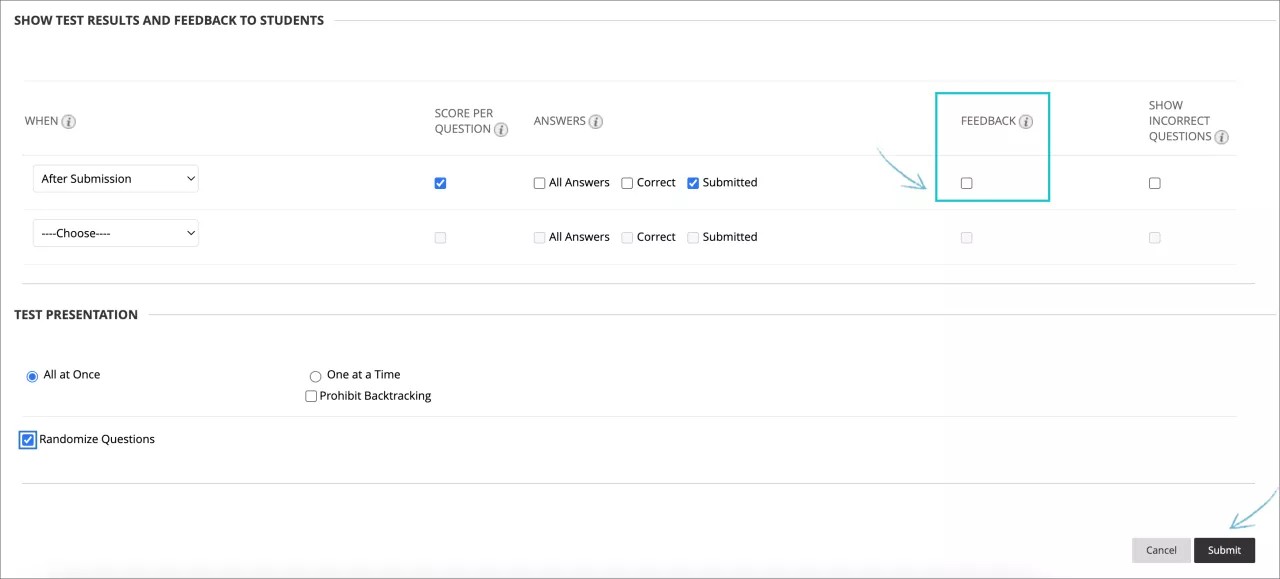

Students can see their grades, but not the feedback provided. There is no bubble icon visible for the test: 
The instructor can edit the test settings and make the feedback visible to students: 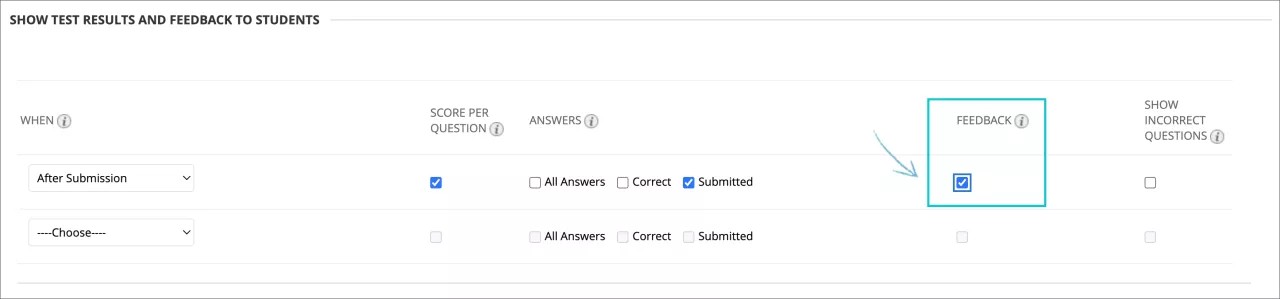
Students can now see the feedback provided by the instructor: 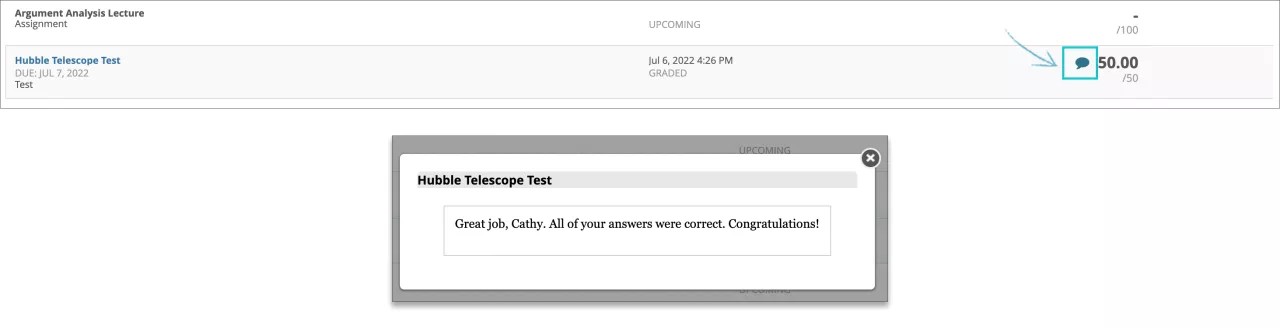
|
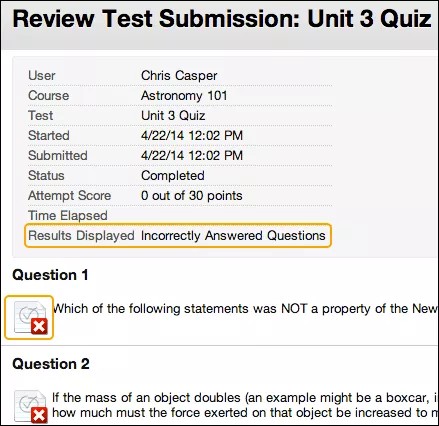
| Show Incorrect Questions | Show the questions a student answered incorrectly or partially incorrectly. This option appears for tests only. You might show incorrect questions and allow multiple attempts so that students can focus their studying on those areas.
|
One-time view for results and feedback
In the Show Test Results and Feedback to Students section, you can select One-time View. After students submit their tests, the results and feedback options you selected are in effect for students to view ONCE. However, students can always view the overall test scores they earned. Immediately after a student navigates away from the test, any other options you chose are restricted. You can apply a second rule to allow students to view newly selected options at a later time. The second rule isn't combined with the one-time view rule, but is applied separately.
The ability to select different options for each rule allows you to show some test results and feedback initially, and then show more later.
Examples:
Rule #1: Select One-time View and Show Incorrect Questions. Select no other options so that while other students are still allowed to take the test, no one can share the correct answers.
Rule #2: Select all of these options:
- After Due Date
- Score per Question
- All Answers
- Correct
- Submitted
- Feedback
After the due date, students see their scores along with all answer options. They also see their submitted answers marked as correct or incorrect and any instructor feedback.
Test or survey presentation
This table explains the options for presenting questions in tests and surveys.
| Option | Description |
|---|---|
| All at Once | Present all questions on one screen. Students scroll through all the questions and can move up and down from question to question. When selected, you may not choose Prohibit Backtracking. |
| One at a Time | Display one question at a time. The screen includes navigation tools to move between questions. The Submit function only appears on the last page of the test or survey. You may also select Prohibit Backtracking and Randomize Questions. |
| Prohibit Backtracking | Prevent students from going back to questions they have already answered. If you don't allow backtracking, questions are presented one at a time and the <<, <, and >> functions don't appear to students. |
| Randomize Questions | Display questions in a random order each time the test or survey is taken. If you include references to the question numbers as they appear on the Test Canvas, don't use this option because the random order changes the question numbering. |