Whether you're a student or an instructor, your Blackboard Learn app profile is populated with your Blackboard Learn profile information, including your name and picture.
If your institution enables it, you can easily change your profile picture within the app, and it will update across all instances of your profile picture in the Blackboard Learn app and platform.
You can't change your name or other personal information because that data is pulled from your institution's Blackboard Learn system.
Your name and profile picture are visible to others within the app, while he rest of your profile information isn't shared with others.
Add / change / remove your profile picture
Here are the steps to add or change your profile picture in the Blackboard Learn app:
- Go to the bottom menu and select More.
- Tap on the avatar or current profile picture next to your name to view the Change Profile Picture options.
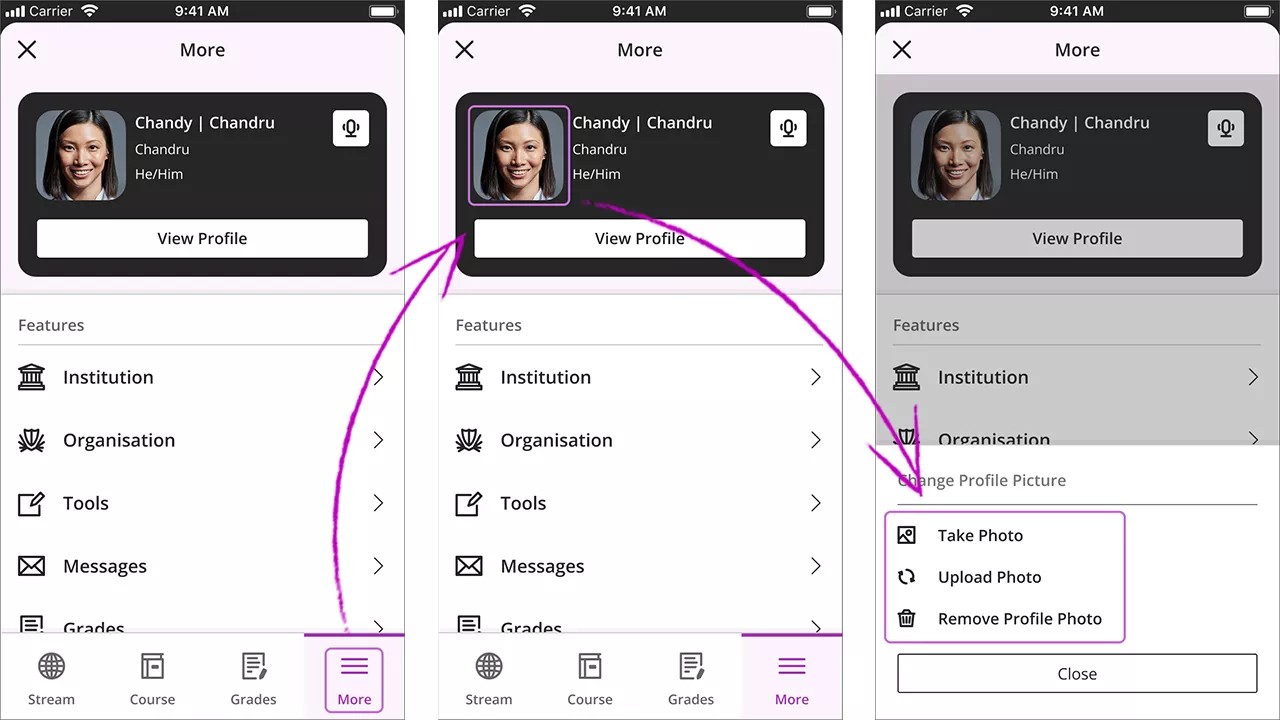
- You can either take a photo with your device's camera or upload a saved image. Make sure that the Blackboard Learn app has permission to access your camera and photo library.
- Adjust the image as needed and select Save.
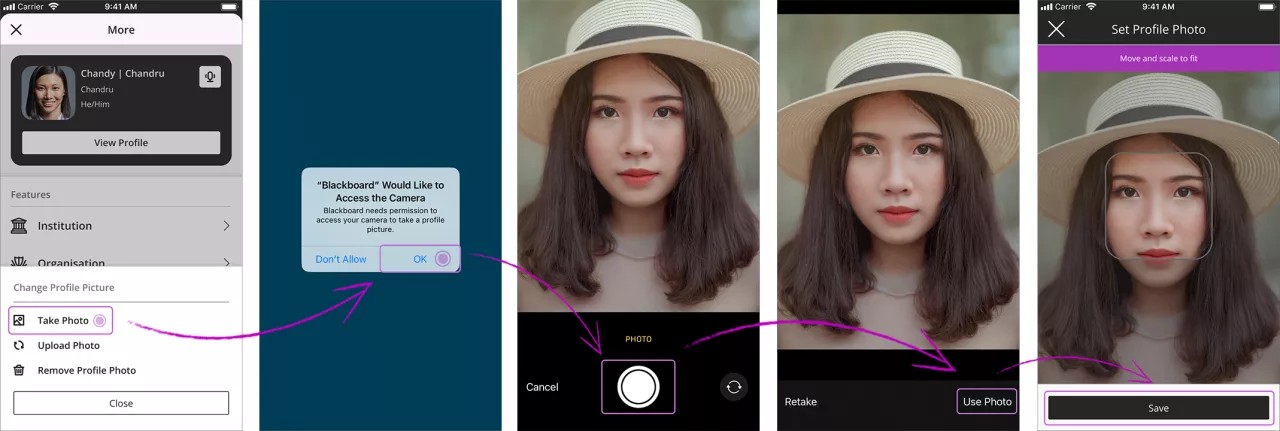
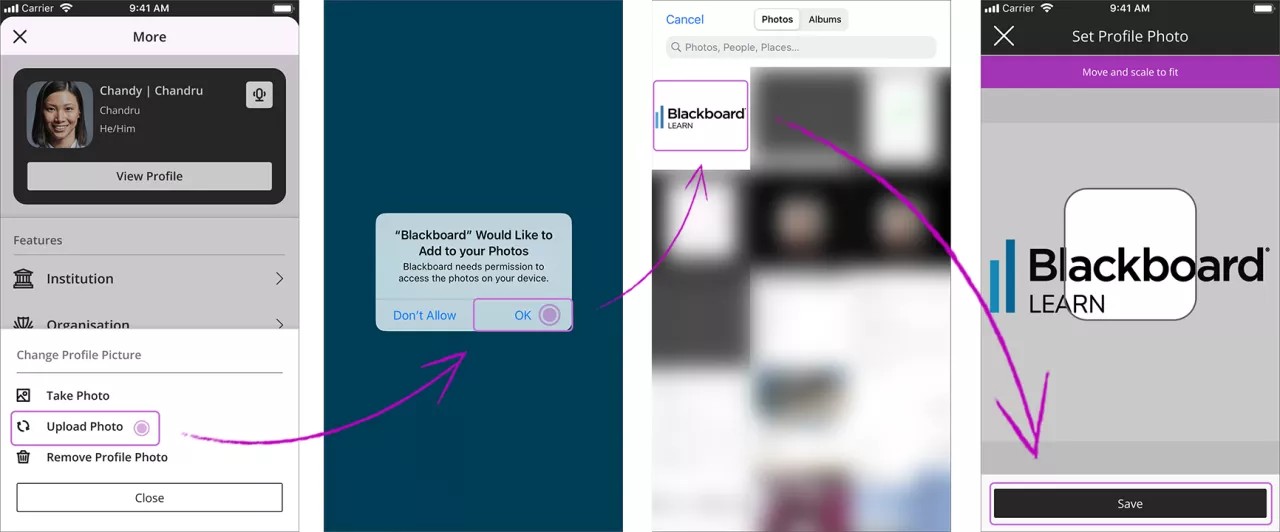
- A confirmation message will appear once the picture has been uploaded. Select Close to finish.
If you want to delete your profile picture, follow these steps:
- Go to the bottom menu and select More.
- Tap on your current profile picture next to your name to view the Change Profile Picture options.
- Select the Remove Profile Photo option and confirm your action by selecting Delete.
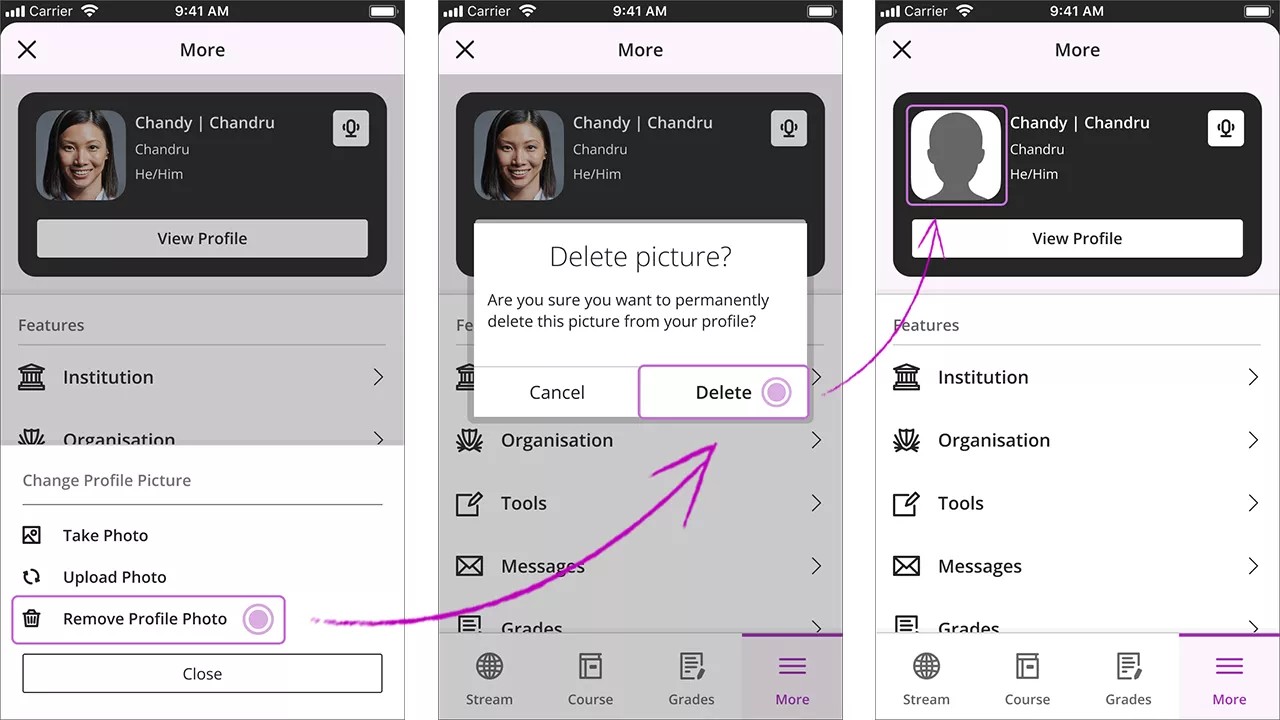
- A confirmation message will appear once the picture has been deleted. Select Close to finish.
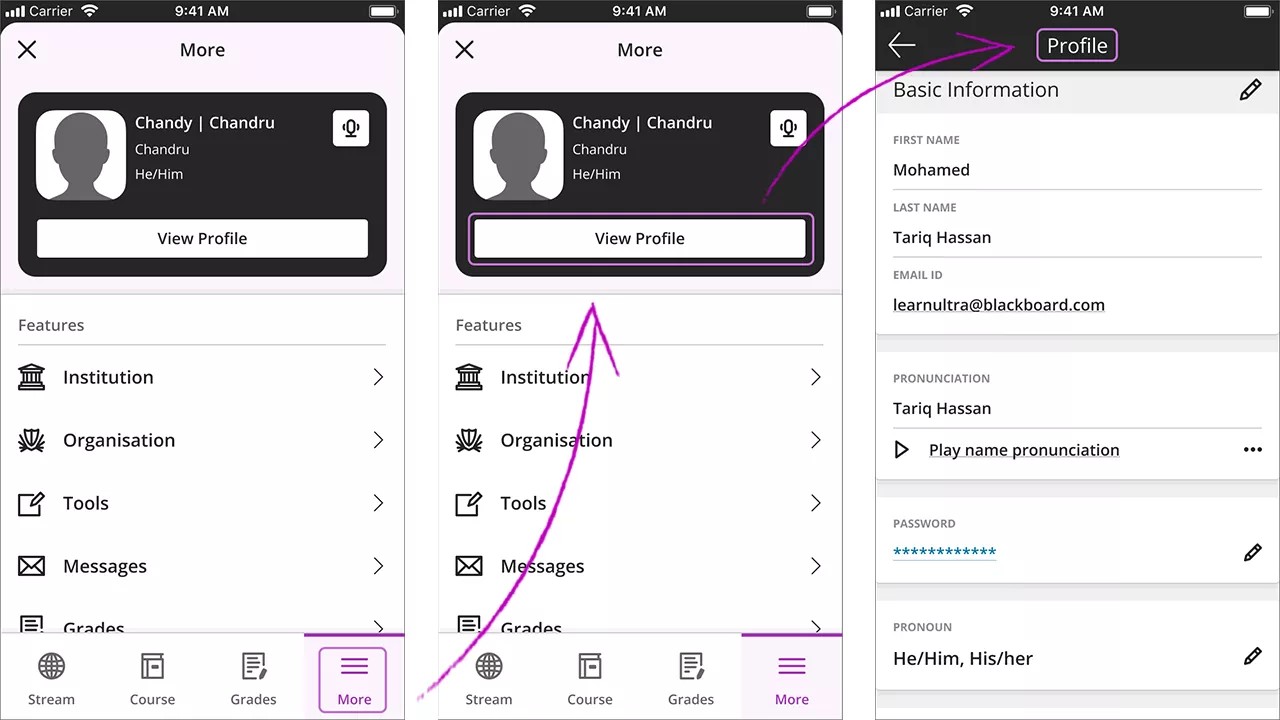
View your profile information
- Go to the bottom menu and select More.
- Select the View Profile option.
- In this Profile panel, scroll down to view your personal information, including:
- Basic information like your name, email, and pronouns.
- Additional information like your gender, birthday, and education level.
- Contact information like your mailing address and phone number.
- Job information like your job title and department.
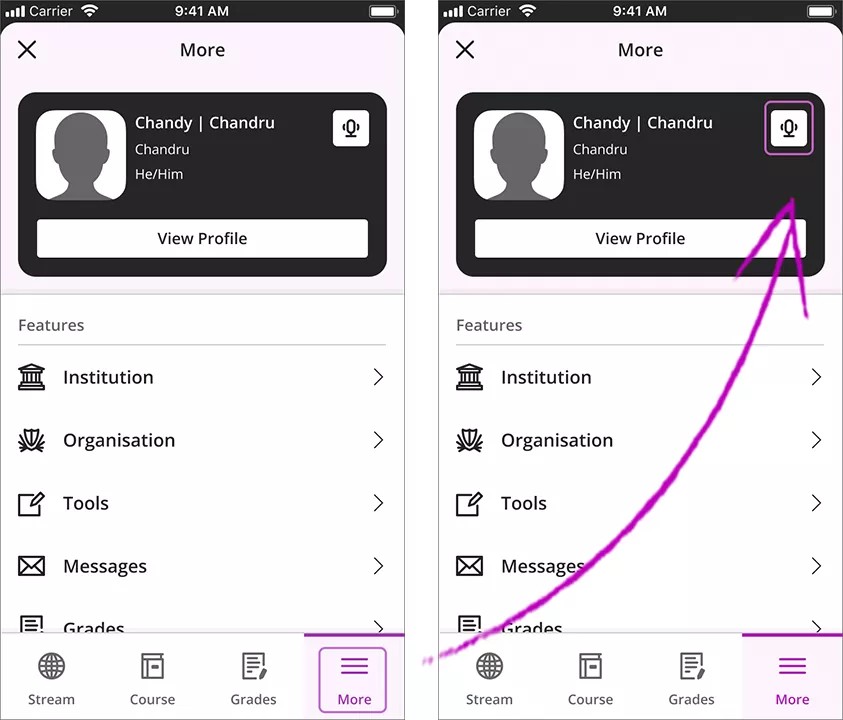
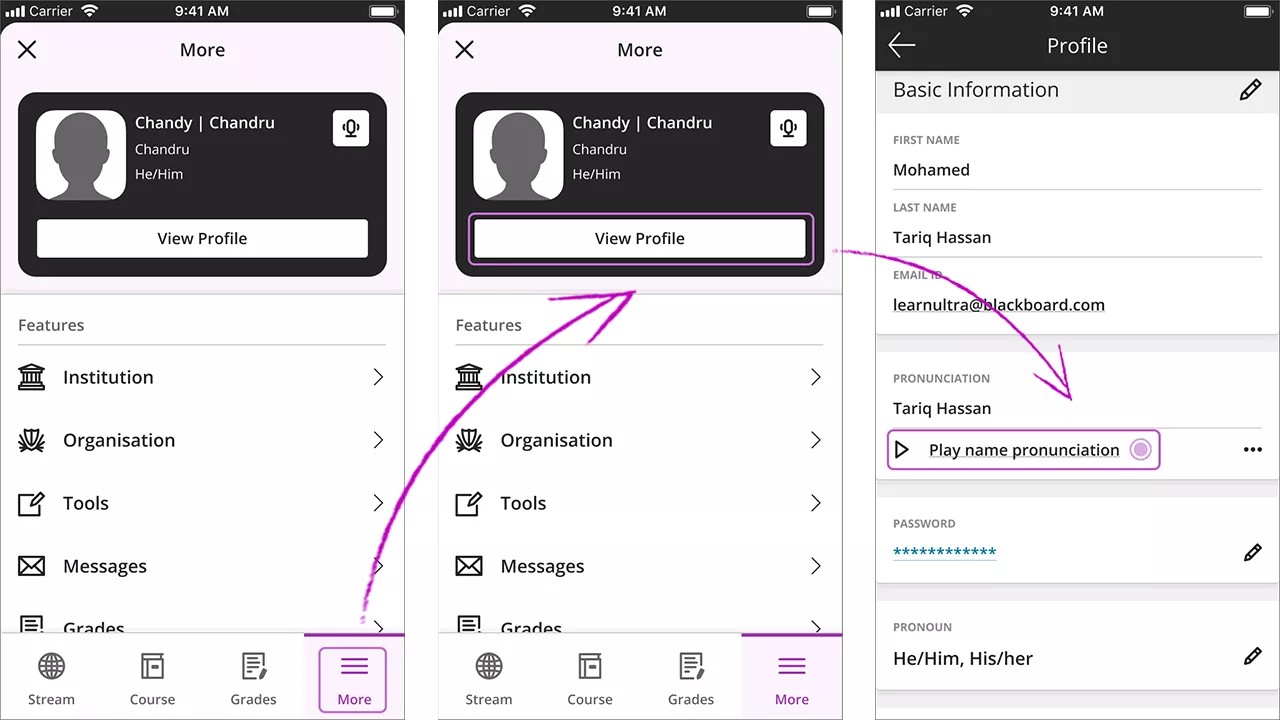
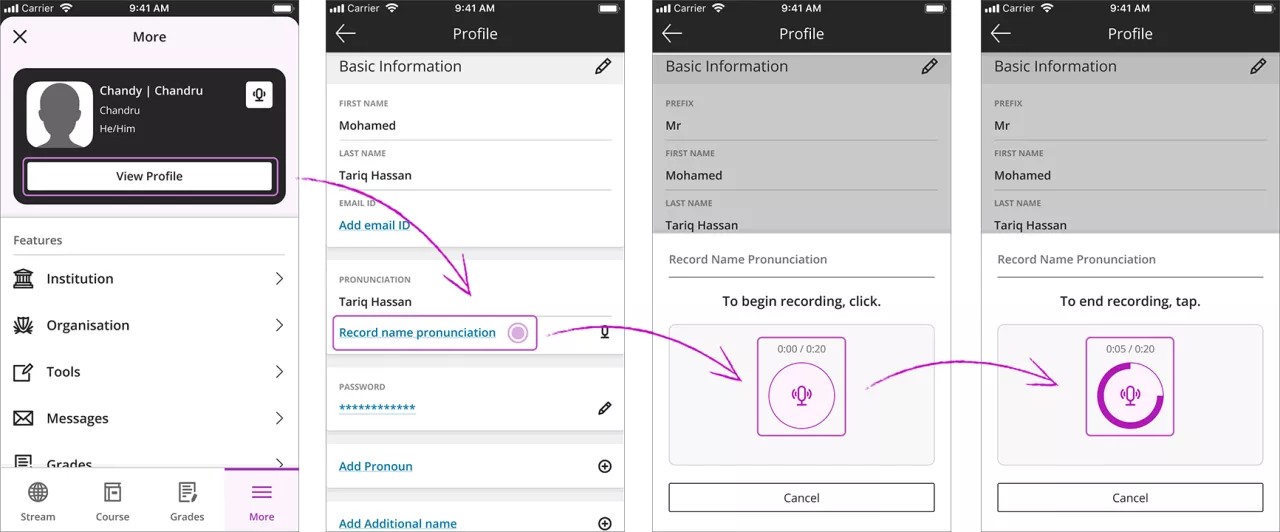
Play your name pronunciation
Follow these steps to hear your name pronunciation:
- Go to the bottom menu and select More
- You can either select the microphone icon next to your name or choose View Profile and then, in the Pronunciation field, select the Play name pronunciation option.
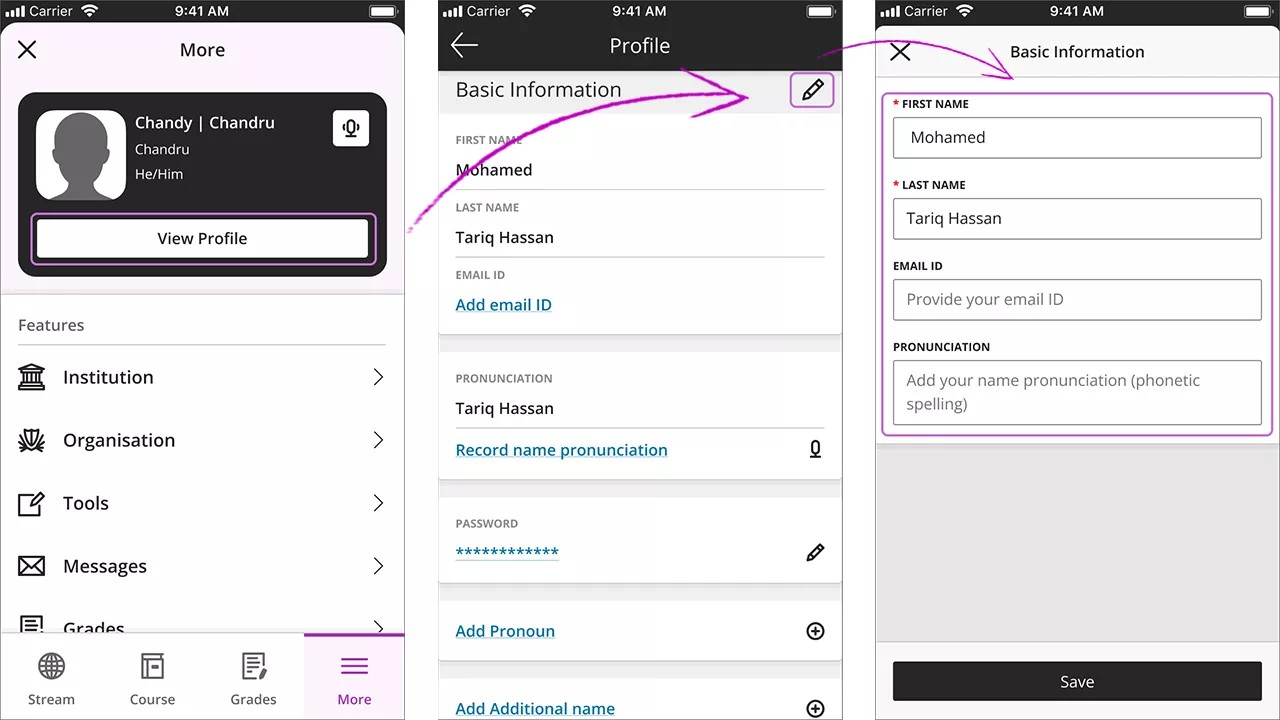
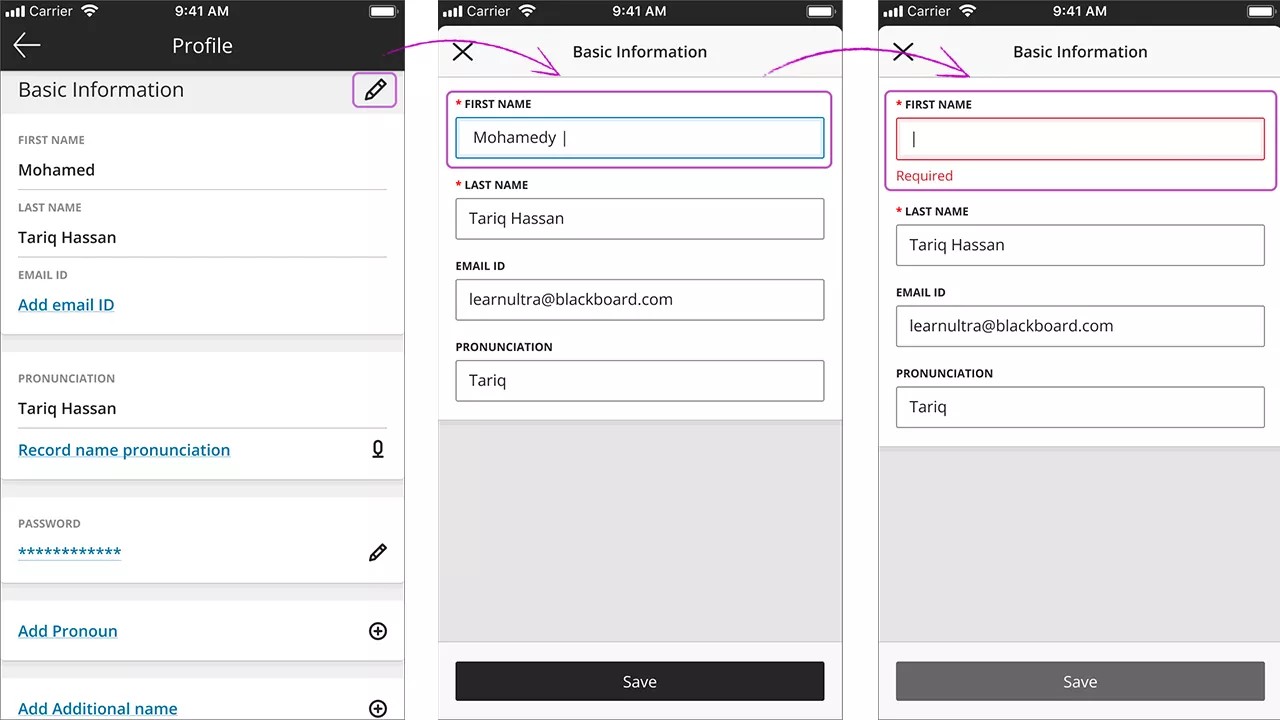
Add / edit / remove your profile information
You can add information in the empty fields on your profile as follows:
- Go to the bottom menu and select More.
- Select View Profile.
- To fill in the empty fields, you can either select the pencil icon in the section you want to complete (e.g. Basic Information, Additional Information, Contact Information), or select the blue text in the field you want to fill out (e.g. Add pronoun, Add gender, Add phone number).
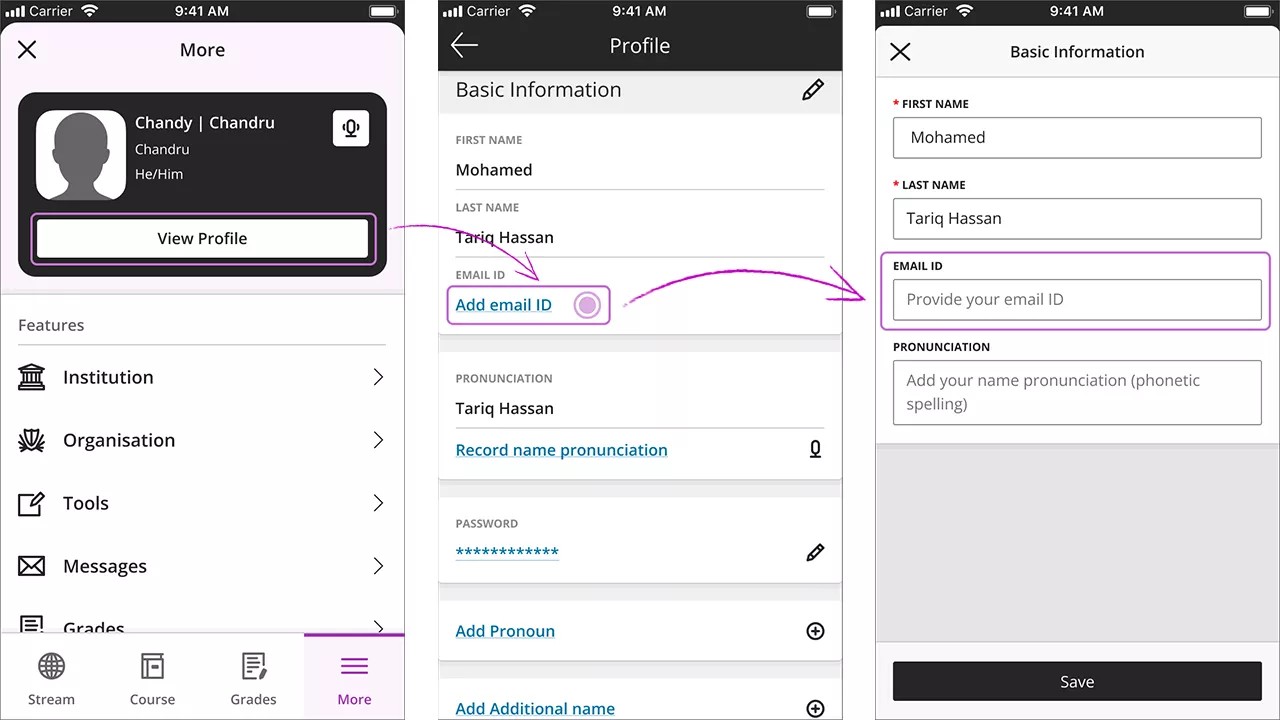
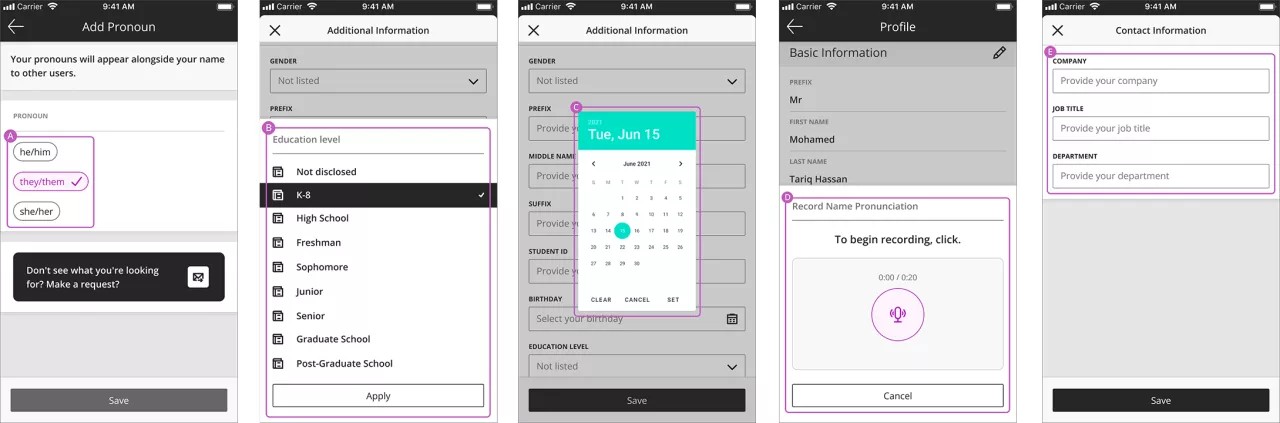
- Depending on the type of information required, you will need to either A) select an option, B) choose an item from a dropdown list, C) select a date on the calendar, D) record a voice note, or E) provide an open-ended response in a text field. Bellow you can find some examples:
- Confirm your actions by selecting Save.
You can edit your profile information by following these steps:
- Go to the bottom menu and select More.
- Select View Profile.
- Select the pencil icon on the section of your profile that you want to edit.
- Confirm your changes by selecting Save.
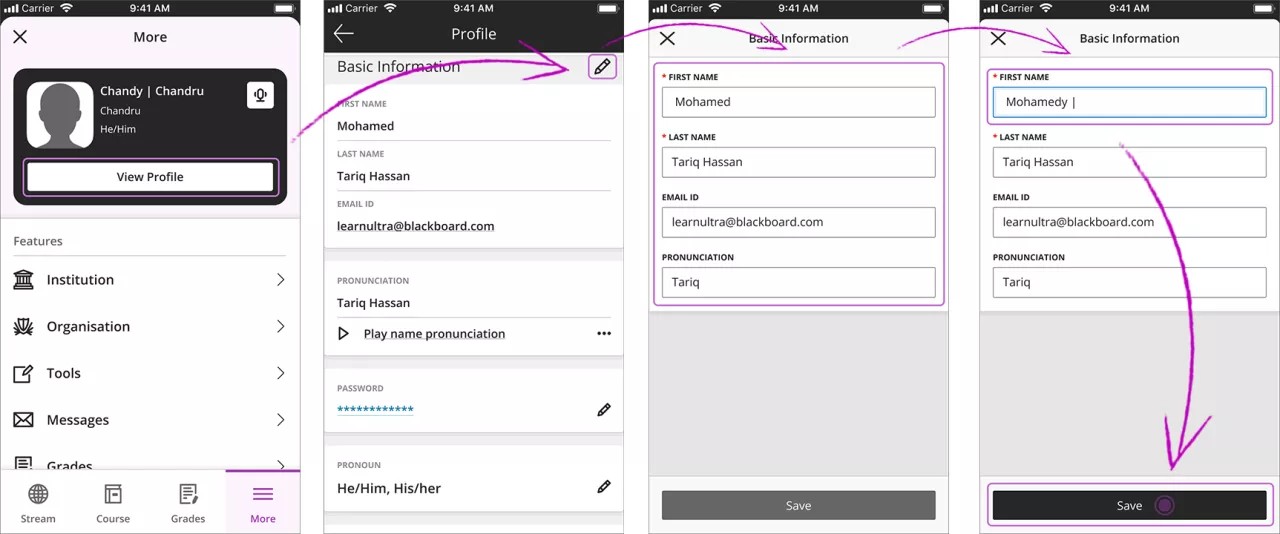
Please note that the Save button will only be activated once you have made at least one change to your profile.
By following these steps, you can easily remove information from some of the fields by leaving the space blank, as long as they are not mandatory. In such cases, the Save button will be deactivated until you fill the required information.
Record / replace / delete your name pronunciation
To add a recording of your name pronunciation to your profile, follow these steps:
- Go to the bottom menu and select More
- Select View Profile.
- In the Pronunciation field, choose the Record name pronunciation option.
- Tap on the microphone icon to start recording. When you're done, tap the icon again to stop recording.
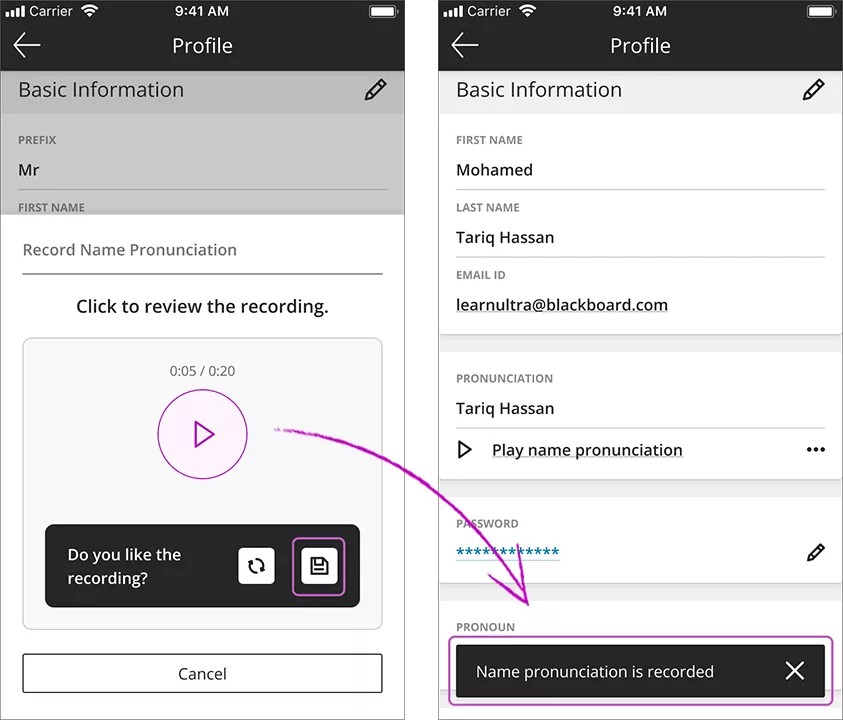
- If you're satisfied with the recording, select the Save icon.
- If you're not satisfied with the recording, tap on the Repeat icon, and then select the Replace option to redo your recording.
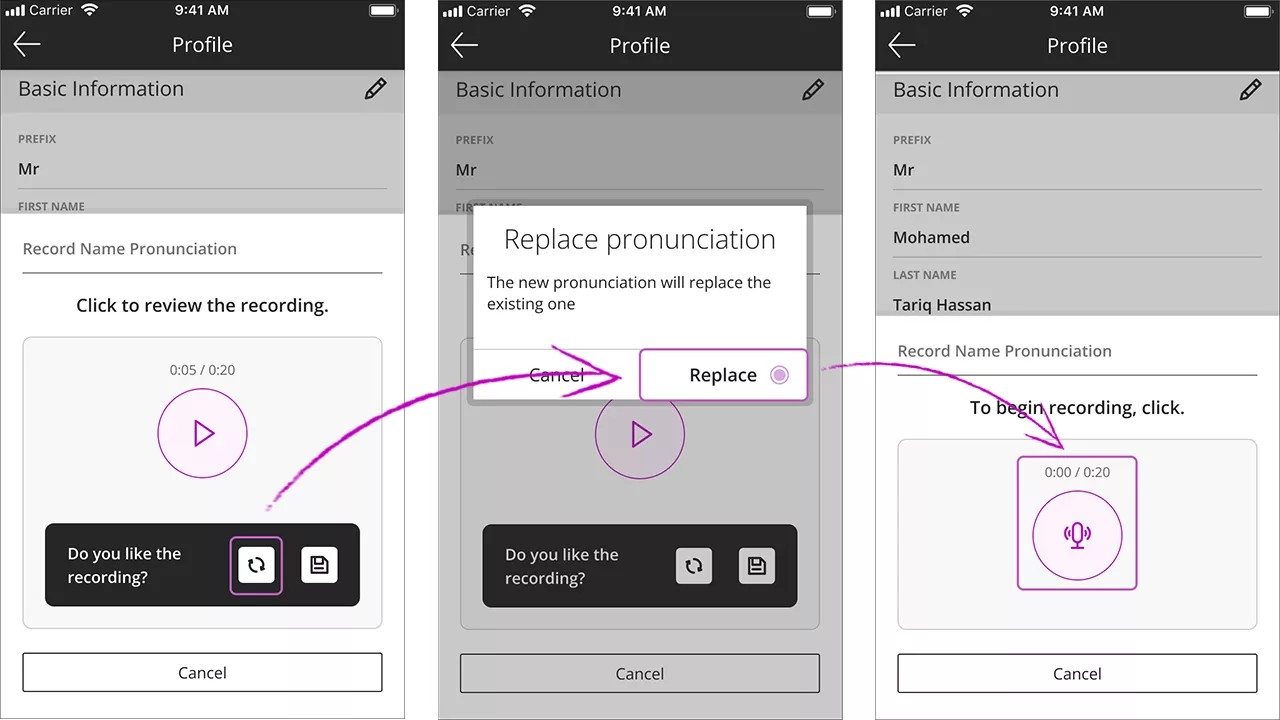
Here's how you can replace your current name pronunciation with a new recording:
- Go to the bottom menu and select More
- Select View Profile.
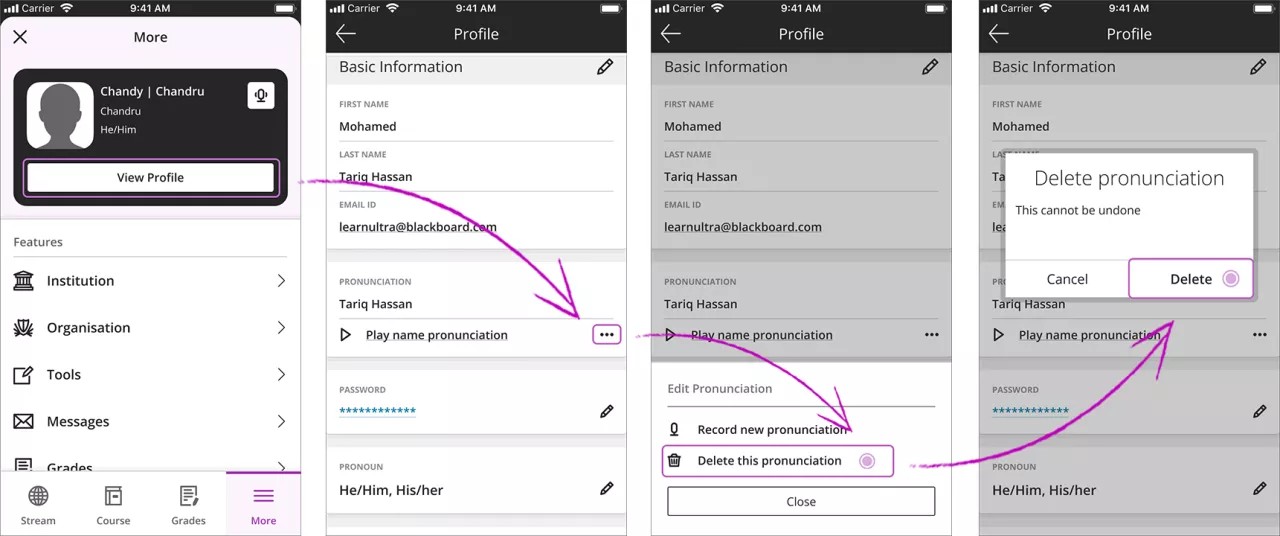
- In the Pronunciation field, select the three horizontal dots menu and select Record new pronunciation.
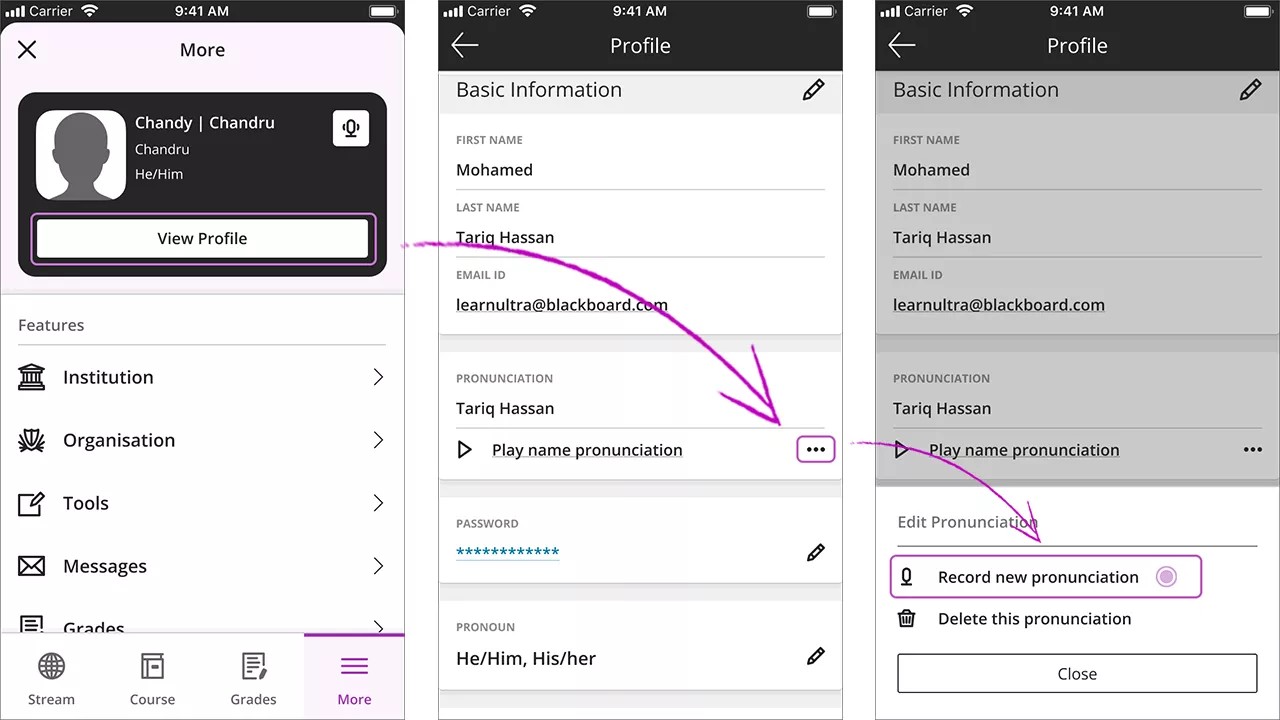
- Record and save your new recording by following the same process explained above.
If you want to delete your name pronunciation recording, follow these instructions:
- Go to the bottom menu and select More
- Select View Profile.
- In the Pronunciation field, select the three horizontal dots menu and select Delete this pronunciation.
- Confirm your action by selecting Delete.